Less is more. You’ve probably heard that before. But if you’re living in a studio apartment, “less” isn’t merely a design decision — it’s a survival tactic.
The mantra of a minimalist studio apartment isn’t to make your space look bare or dull. It is about preserving only what is important. It’s about clean lines, open space and a home that actually feels serene instead of chaotic.
The problem? The majority of people don’t know how to begin. They scroll through their cluttered studio and get overwhelmed. They buy more storage bins. They rearrange furniture five times. And still, nothing feels right.
But here is a brutal fact: minimalism isn’t about buying more stuff. It’s about accomplishing more with less.
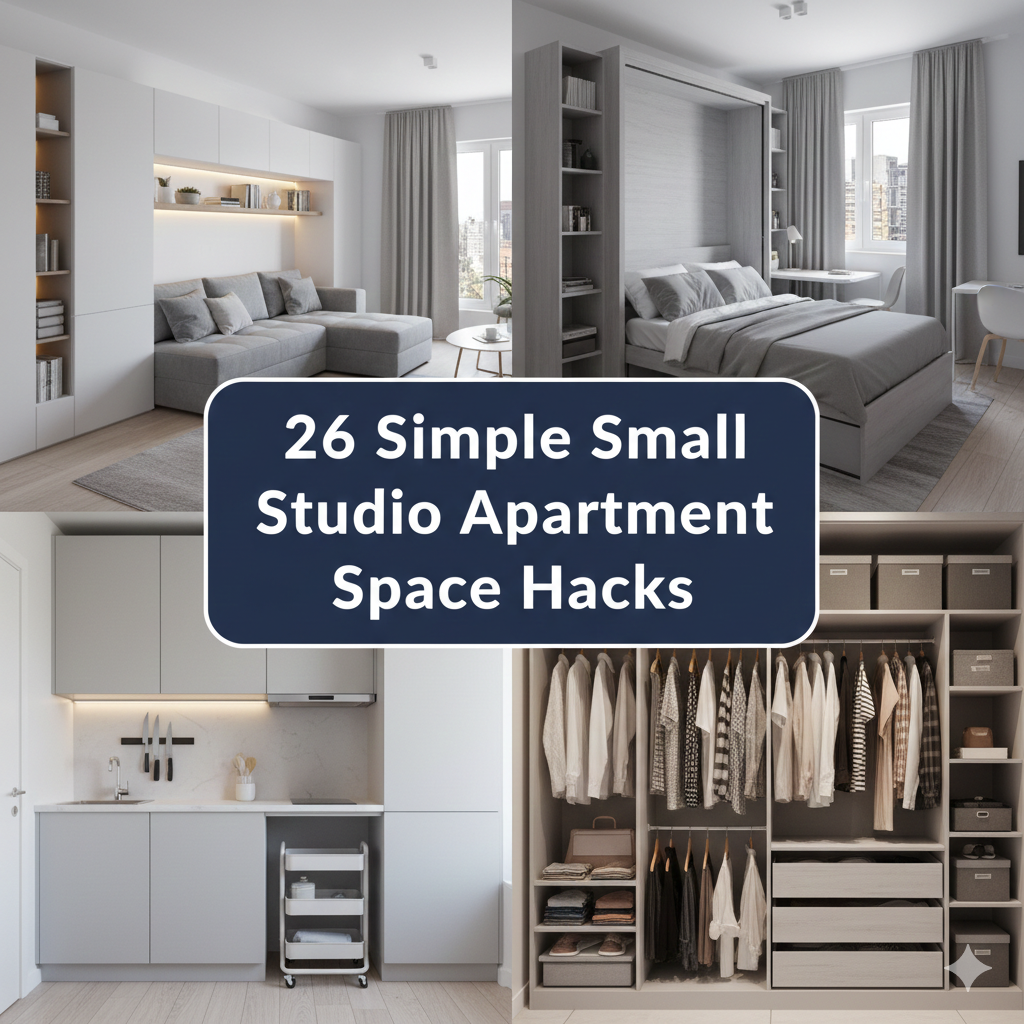
This article discusses 4 instant studio apartment space hacks for minimalist design that are efficient, economical and really work. No fluff. No complicated renovation projects. Just actual, practical ideas you can implement today.
Everything You Need to Know About Studio Apartments
Studio apartments and minimalism go together like peanut butter and jelly.
Think about it. A studio is already small. Every piece of furniture, everything you own, consumes valuable square footage. The more you own, the more congested it becomes. The more congested it becomes, the more frazzled you become.
Minimalism flips this around. Minimalism plays into the small nature of your studio rather than against it. You discard what you don’t need. You keep what you love. And suddenly — the same tiny room feels open, intentional and peaceful.
There’s also a psychology to this. According to research from Princeton University, physical clutter competes for your attention and raises your stress levels. A cleaner, simpler space actually helps your brain relax.
For a deeper dive into how to set up and style your studio from scratch, Studio Apartment Setup is packed with layout guides, décor ideas and practical tips built specifically for small-space living.
Here’s a fast look at how cluttered studios stack up against minimalist ones:
| Factor | Cluttered Studio | Minimalist Studio |
|---|---|---|
| Stress levels | High | Low |
| Perceived room size | Smaller | Larger |
| Cleaning time | Long | Short |
| Morning routine | Chaotic | Smooth |
| Guests’ first impression | Overwhelming | Calm and stylish |
| Focus and productivity | Scattered | Improved |
The numbers don’t lie. A minimalist approach makes daily studio life better in many different ways.
Without further ado, here are the four hacks.
Hack #1 — Only Keep the Bare Minimum in Your Furniture
The Furniture Trap Most Studio Dwellers Fall Into
Walk into most studio apartments and what do you see? Too much furniture.
A full sofa. A coffee table. A dining table and four chairs. A dresser. A bookshelf. A TV stand. A side table. And somehow, all of it is packed into 400 square feet.
Every piece of furniture seemed essential at the time it was acquired. But together, they transform a studio into an obstacle course.
This is where minimalist design begins — with a brutally honest self-assessment of your furniture.
One question should be asked about every single piece: Do I use this every single day?
If the answer is no, it has to go.
The Formula for Minimalist Furniture in Studios
Here’s a simple framework. A minimalist studio consists of just five types of furniture:
- Sleeping — where you sleep (the most essential)
- Seating — one couch or two cozy chairs, not both
- Eating — small table, maximum two chairs
- Working — a small desk or wall-mounted drop-down surface
- Storage — built-in or multifunctional only
That’s it. Everything else is optional.
The operative word in that last category is multifunctional. In a minimalist studio, every piece of furniture needs to pull double duty. A bed with built-in drawers takes the place of a dresser. A storage ottoman stands in for a coffee table. A wall desk folds down where a dedicated office setup would be.
Multifunctional Furniture That Actually Works
| Furniture Piece | Main Use | Secondary Use | Space Saved |
|---|---|---|---|
| Storage bed | Sleeping | Clothes/linen storage | Eliminates dresser |
| Storage ottoman | Seating/table | Blankets/books storage | Eliminates coffee table |
| Fold-down wall desk | Working | Décor when closed | Eliminates full desk |
| Sofa bed | Seating | Guest sleeping | Eliminates guest furniture |
| Dining bench with storage | Seating | Shoes/bag storage | Eliminates entryway unit |
| Nesting tables | Side tables | Compact when not in use | Saves 70% over regular tables |
Something magical happens when you replace regular furniture with multifunctional pieces. Your floor opens up. Light behaves differently around the room. The apartment starts to breathe.
The “One In, One Out” Rule
Once you’ve purged down to the essentials, defend that space with a simple rule: for every new thing that comes in, something old must go out.
Buy a new lamp? An old one leaves. New throw pillow? An old one goes. This rule seems strict but it develops into instinct very quickly. And it helps your minimalist studio feel more intentional — not like stuff just accumulated over time.
Hack #2 — Create a Neutral Color Base and Let Space Speak
Why Color Matters More in Small Spaces
Color is one of the most potent tools in interior design. In a tiny studio, it can either open up and air out your space — or make it feel like the walls are closing in.
Small rooms seem smaller in dark, busy or mismatched colors. Light, neutral and cohesive colors have the opposite effect. They reflect light. They visually expand a room. They create a sense of calm, ideal for a minimalist lifestyle.
This does not mean your studio has to look like a hospital. Neutral doesn’t mean boring. It means intentional.
The Minimalist Color Palette System
A minimalist studio color palette operates on three levels:
Base color (60%): This is your main color. It goes on walls, large furniture and flooring. Think white, soft grey, warm beige or light cream. These colors reflect light and make the area feel larger.
Secondary color (30%): This fills in the mid-range — your sofa, curtains, rugs or bedding. Pick a color that works with your base. Dusty blue, sage green, warm taupe or charcoal grey all work beautifully.
Accent color (10%): This is your personality. Small pops of color in cushions, a plant pot, one piece of artwork or a throw blanket. Keep it to one accent color. Two accent colors start to feel busy.
Here’s what this looks like in practice:
| Color Level | Percentage | Examples | Where It Goes |
|---|---|---|---|
| Base | 60% | White, soft grey, warm beige | Walls, flooring, large furniture |
| Secondary | 30% | Sage green, dusty blue, taupe | Sofa, curtains, rugs, bedding |
| Accent | 10% | Terracotta, mustard, navy | Cushions, plants, artwork, throws |
Stick to the Same Tone Family
One of the biggest mistakes many people make is choosing “neutral” colors and then mixing warm and cool tones together.
Warm whites contain yellow or pink undertones. Cool whites skew blue or grey. Mixing them causes a room to feel disjointed — even if you can’t quite put your finger on why.
Choose a tone family — warm or cool — and stick to it across everything. Your walls, your furniture, your fabrics. Everything being in the same tone family makes the room feel cohesive naturally, without having to try too hard.
Natural Light Is Your Best Design Tool
As you’re considering color, consider light as well.
Maximizing natural light is one of the easiest, cheapest minimalist upgrades you can implement. Replace thick drapes with sheer linen panels. Move furniture away from windows. Use mirrors — a big mirror on one wall can visually expand a room by reflecting light back into the space.
According to Architectural Digest’s guide on small space design, strategic mirror placement and light-toned walls are among the top professional tricks for making compact rooms feel significantly more spacious.
A light-filled studio with neutral walls feels twice the size of a darker one. Light is free. Use it.
Hack #3 — Excel at Concealed and Purposeful Storage

The Minimalist Storage Paradox
Here’s something that confuses a lot of people when they first try minimalist design: minimalism doesn’t mean storage-free. It means having invisible storage.
A messy studio has storage all over — and it’s all out in the open. Stacks of boxes. Clothes on chairs. Papers on every surface. Things lie wherever they happen to land.
A minimalist studio has just as much storage — but most of it is hidden. Everything has a dedicated home. Surfaces stay clear. The room looks simple because the storage is hidden.
This is one of the most significant shifts in thinking when it comes to 4 fast studio apartment space hacks for minimalist design.
The Three Types of Minimalist Storage
Type 1 — Built-in storage: This is storage as part of a piece of furniture. Beds with drawers. Ottomans with lids. Sofas with under-seat compartments. Dining benches with secret space inside. This type of storage adds zero visual clutter because it disappears into the furniture.
Type 2 — Behind closed doors: Wardrobes, kitchen cabinets, bathroom vanities. The crux here is what goes on inside these spaces. Minimalists keep the insides tidy too, because clothes strewn on a chair equals visual clutter in the room.
Type 3 — Vertical and wall storage: Floating shelves, wall-mounted hooks, pegboards, rail systems. This type is visible — but if done correctly it appears intentional and styled rather than messy. The trick is to be selective. Don’t fill every shelf. Only display items you love or use regularly.
A Room-by-Room Hidden Storage Guide
| Room Area | Hidden Storage Solution | What It Replaces |
|---|---|---|
| Bedroom | Bed with built-in drawers | Dresser (6–8 sq ft saved) |
| Living area | Storage ottoman | Coffee table + extra storage |
| Entryway | Floating shelf with hooks below | Shoe rack + coat stand |
| Kitchen | Magnetic knife strip + rail hooks | Drawer space + cabinet space |
| Bathroom | Mirrored medicine cabinet | Separate mirror + shelving |
| General | Baskets on shelves | Visible item clutter |
The “Clear Surfaces” Rule
In a minimalist studio, surfaces are there for one reason only: to be used, not stored on.
Your kitchen counter is for cooking — not for mail, keys, random tools and last week’s shopping bags.
Your coffee table is for your coffee — not for magazines, remotes, charger cables and half-finished snacks.
Select one item per surface that is allowed to live there permanently. Everything else is put away after every use. This one habit makes your studio look and feel better than any furniture purchase ever could.
Hack #4 — Create Order Without Walls Using Zones and Visual Anchors
The Open-Plan Problem
Studio apartments are open plan by definition. There are no walls between your bedroom, living room and kitchen. This is great for light and airflow — but it poses a design challenge.
Without any visual separation, everything starts to blur. Your bed feels like it’s in your kitchen. Your work desk feels like it’s in your bedroom. The entire apartment feels like one large, shapeless room with no function.
Minimalist design solves this brilliantly — without constructing anything.
How to Zone a Studio Without Walls
Zoning means creating visual boundaries between different areas of your studio. You’re not literally carving the space up — you’re simply assigning an identity to each area.
Here are four primary tools to zone a minimalist studio:
Rugs: A rug is the easiest and most effective zoning tool. Lay a rug under your sofa and coffee table — it instantly defines the living zone. Lay a smaller rug at your desk — now that’s the work zone. The bedroom area can have its own rug under the bed. Suddenly, one open room feels like three purposeful spaces.
Lighting: Unique illumination in different zones creates strong distinctions. A warm bedside lamp for the sleeping zone. A brighter overhead or desk lamp for the work zone. Ambient floor lighting for the living area. Lighting communicates to your brain — this area does something different.
Furniture arrangement: The placement of your furniture creates invisible walls. A sofa with its back facing the bed provides a natural separation between living and sleeping areas. A desk pressed against a side wall feels like a separate nook. Thoughtful arrangement does more than you might expect.
Color or texture variations: You don’t have to paint different walls different colors (though you can). A different color rug, different throw pillow fabric or a different texture in textiles can signal a zone change without paint.
The Visual Anchor Principle
Each zone needs one visual anchor — one dominant element the eye hits first.
The anchor in the sleeping zone is the bed. Make it beautiful. Use crisp, neutral bedding. Add two matching pillows. Keep the headboard clean and free of clutter.
In the living zone, the anchor could be a statement sofa or a piece of wall art above it.
The anchor in the work zone is the desk — kept open and intentional.
Visual anchors give each zone a center of gravity. They make the room feel designed rather than just furnished.
The Minimalist Studio Zone Layout
Here’s one example of how zones can be organized in a typical studio:
| Zone | Visual Anchor | Rug | Key Lighting |
|---|---|---|---|
| Sleeping zone | Bed + headboard | Soft textured rug | Warm bedside lamp |
| Living zone | Sofa or artwork | Medium pile area rug | Floor lamp + overhead |
| Work zone | Desk + chair | Small flat rug or none | Bright task lamp |
| Kitchen/dining | Small dining table | None (hard floor) | Pendant or under-cabinet |
When every zone is defined, your studio stops feeling like one cluttered space. It begins to feel like a well-conceived home — one that just happens to be all in one room.
Bringing It All Home — Your Minimalist Studio Action Plan
Here’s the full picture. All four hacks working together:
| Hack | Core Action | Biggest Win |
|---|---|---|
| Hack #1 — Furniture Edit | Remove excess, go multifunctional | More floor space, less chaos |
| Hack #2 — Neutral Color Base | Build a 60/30/10 color palette | Bigger, calmer, more cohesive look |
| Hack #3 — Hidden Storage | Clear surfaces, hide clutter | Cleaner look without owning less |
| Hack #4 — Zones + Anchors | Define areas without walls | More intentional, room-like feel |
Each hack builds on the last. Strip the furniture first. Then set your colors. Then sort your storage. Then zone your space. By the end, your studio looks and feels completely different — even if not a single wall has moved.
Minimalist Details That Make a Big Impact
In addition to the four main hacks, here are some quick additions that will take your minimalist studio up a notch:
Plants — but just a few. One or two strategically placed plants bring life without crowding. A snake plant in the corner. A tiny succulent on the window sill. Keep it simple.
Matching storage containers. If items are visible on shelves, make them look purposeful. Matching baskets, identical jars, same-color boxes. Cohesion reads as calm.
Cable management. Nothing ruins a minimalist aesthetic quicker than a tangle of cords. Use cable clips, velcro ties or a cable box to keep cords hidden and organized.
Quality over quantity in décor. One large piece of art looks more minimalist than five small ones. Select fewer objects but make each one remarkable.
Mirrors as design elements. A single large mirror does more for a small space than almost anything else. It reflects light, gives depth and makes the room feel so much bigger.
An FAQ Guide to Minimalist Design in Studio Apartments
Q: Does minimalist design mean I have to get rid of everything I own? Not at all. Minimalism is about holding on to what matters. It is not about living with nothing — it’s about intentional living. Hold onto anything that is useful or truly brings you joy.
Q: Can minimalism work in a home full of hobbies and collections? Yes, but it requires more advance planning. Set aside one zone or one shelf for your hobby or collection. Keep it curated and contained. A well-displayed collection looks intentional. Items scattered everywhere look cluttered.
Q: What’s one small, easy first step toward a more minimalist studio? Clear every flat surface in your apartment. Put everything away or in a box. Then reintroduce items one by one as you actually need them. After one week, donate or toss anything that remains in the box. It’s the quickest way to discover what you really need out in the open.
Q: Is minimalist design expensive? It’s often the opposite. Minimalism means buying less. You invest in fewer, higher-quality things rather than mass quantities of cheap stuff. A minimalist approach to shopping is almost always cheaper in the long run.
Q: Can a minimalist studio still feel warm and cozy? Absolutely. Warmth comes from texture — soft rugs, linen curtains, knitted throws, wooden furniture. A minimalist studio with warm textures and soft lighting feels incredibly inviting. Minimalism doesn’t mean cold.
Q: How do I keep a minimalist studio looking good after the initial setup? Two habits: the one in, one out rule and a weekly 10-minute tidy. Return everything after you use it. Clear surfaces before bedtime every night. Once you develop the habits, minimalism is easy to maintain.
Q: What if I share a studio with a roommate or partner who isn’t minimalist? Negotiate on shared spaces and allow each person to have their own zone. Agree on keeping surfaces clear in shared areas — the kitchen counter, the living space. How each person manages their own personal zone is up to them.
Conclusion
Living in a small studio apartment is not a sacrifice. It’s a choice.
It’s choosing calm over chaos. Intention over accumulation. Space over stuff.
These 4 fast studio apartment space hacks for minimalist design show you a true, actionable roadmap to get there — without gutting your apartment or breaking the bank.
Start with your furniture. Be merciless about what stays and what goes. Then build your color palette from the ground up, opening the space with light and neutral tones. Then prioritize your storage — hide what you can and style what you can’t. Finally, zone your studio so every corner has a use and a character.
You don’t have to do all four of these this weekend. Select the one that feels most pressing. Make that change. Notice how your apartment feels different. Then move to the next one.
Small steps. Real results. One minimalist studio at a time.