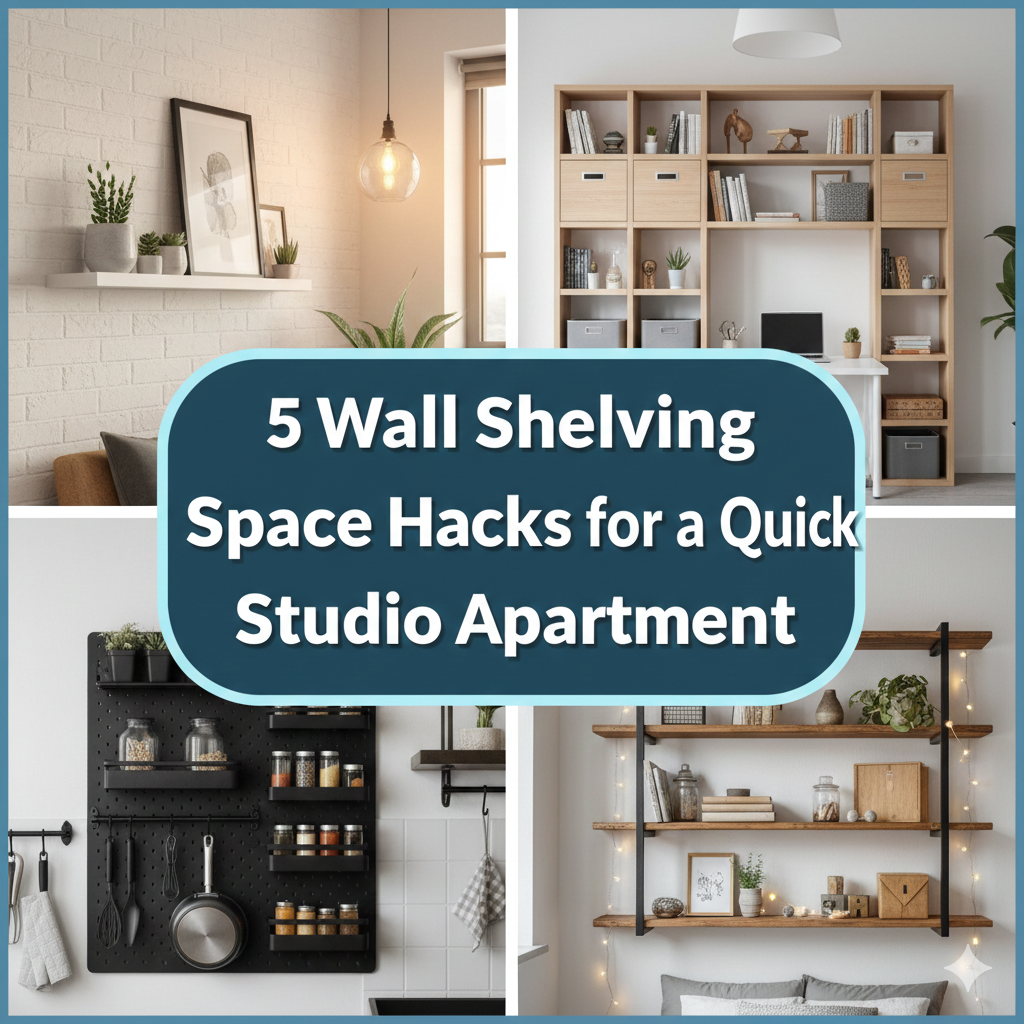
Studio apartment living can be like an everyday game of Tetris. Where do you put your books? Your plants? Your kitchen stuff? The answer is almost always the same — look up.
Your walls are open for business. Studio dwellers typically completely ignore them. That’s a huge mistake. Wall shelves can completely transform your small space. They create storage without consuming your floors. They make rooms look taller. They give every item a home.
This article will break down 4 practical studio apartment wall shelves space hacks that you can actually use, no contractor required and no big budget needed. Every tip is simple, straightforward and geared particularly for small living.
Let’s get into it.
The Case for Wall Shelves in a Studio
Before we dive into the hacks, it’s good to know why wall shelves are so effective in studio apartments.
A studio apartment usually is just one room. You sleep, cook, work and enjoy downtime all in the same space. That means clutter accumulates quickly. Each possession is fighting for the few usable square feet.
Wall shelves address this issue by taking it vertical. Instead of splaying, you pile. It clears your floor, opens up the area and provides your apartment with a cleaner, more streamlined look.
Here is a quick comparison of floor storage vs. wall shelves:
| Feature | Floor Storage | Wall Shelves |
|---|---|---|
| Floor space used | High | None |
| Visual clutter | Often high | Low (if organized) |
| Cost | Varies | Low to moderate |
| Installation difficulty | Easy | Easy to moderate |
| Makes room look bigger | Rarely | Yes |
| Customization options | Limited | Very high |
When it comes to a small space, wall shelves win out in just about every category.
Now, let’s get into the four hacks that can make your studio apartment a home in no time.
Hack #1 — Make Your Blank Wall an Entire Storage Wall From The Floor
Stop Wasting Your Biggest Surface
Nearly all studio apartments have at least one long, blank wall. Maybe it’s behind your couch. Perhaps it’s across from your bed. Whatever it is, that wall does you no good right now.
Here’s the hack: Consider that whole wall a built-in storage system.
You don’t have to invest thousands in custom cabinetry. A few floating shelves in a clever configuration can cover the same territory. The trick is to start at the floor (approx 12–18 inches up) right up to the ceiling.
How to Set It Up
Begin with three to five shelves at varying heights. Put heavier items — such as books, bins or baskets — on bottom shelves. Higher up, put light things and decorative pieces. It keeps the visual weight distributed and makes the whole wall feel intentional.
Use a combination of open shelves and small closed boxes or baskets. Open shelves display neat items. Baskets hide the mess. This pairing gives the wall a more styled than cluttered vibe.
Tip: Use a slightly darker paint color for the wall behind your shelves compared to the rest of your room. It creates a built-in look and makes the shelving unit feel less like an afterthought and more like a part of the apartment’s design.
What to Store Here
The full-storage wall works for nearly any type of items:
- Books and magazines
- Kitchen excess (spices, small appliances, pantry items)
- Plants (mix trailing and upright plants for texture)
- Work essentials (notebooks, chargers, small tech)
- Décor items (candles, frames, small sculptures)
Each shelf is like a mini scene. Put things that belong together, together. Leave some air space on all the shelves — don’t load them too tight.
Hack #2 — Create a Floating Bedroom Zone With Shelf Dividers
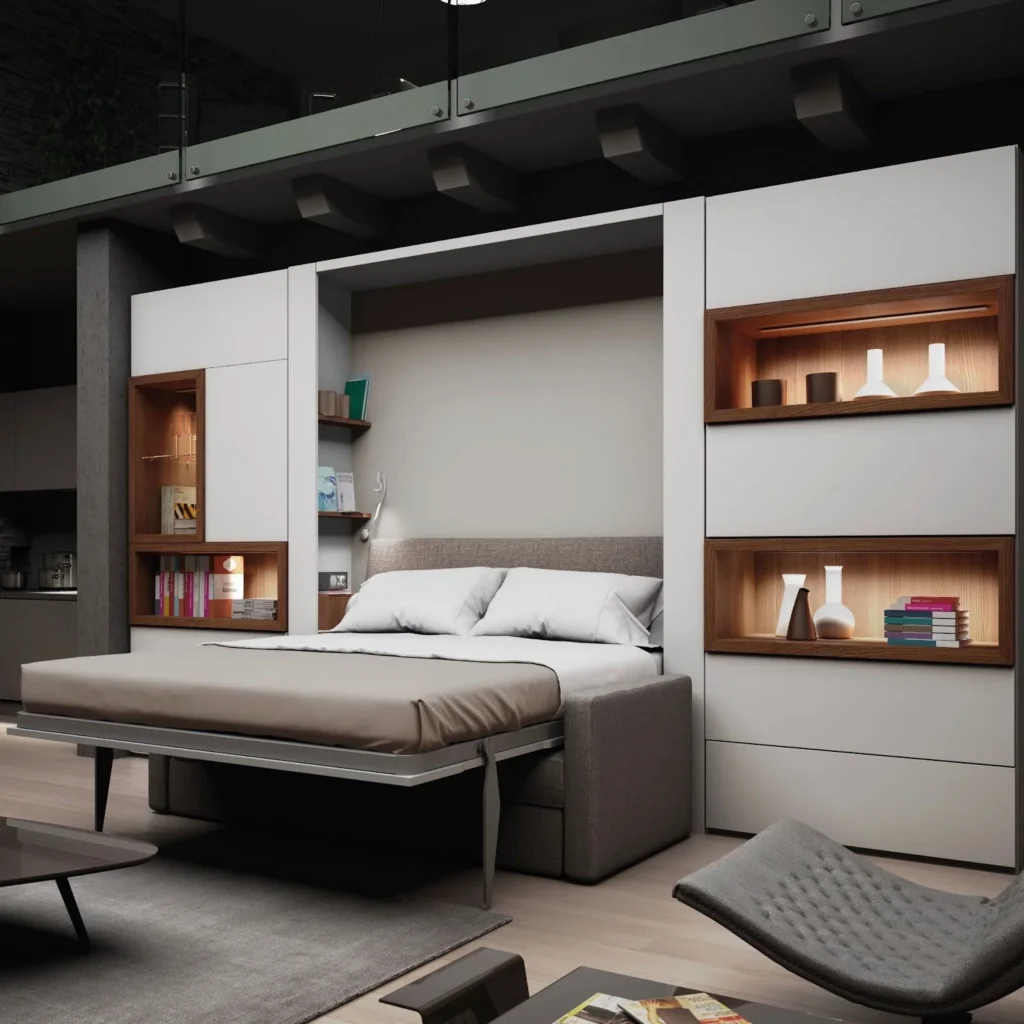
One Room, Multiple Zones
The most challenging part about living in a studio is that all your life happens in one room. Your sleeping space melds into your living space. Your workspace is two feet away from your bed. It feels chaotic.
Wall shelves can help divide your space without putting up a wall. Studio hacks don’t come much more clever — or underappreciated — than this one. If you’re looking for more inspiration on making a studio feel like a real home, Studio Apartment Setup is a great resource packed with practical layout and décor ideas.
How the Floating Divider Works
Here’s the idea: Place a tall, narrow set of floating shelves perpendicular to the wall. Angle them to stick out just a little into the room on one side. It establishes a visual division between two spaces — such as a bedroom area and a living room area — without shutting out light or making the space feel smaller.
If you cannot install shelves perpendicular to the wall, do this instead: place two tall shelving units on opposite walls at the “border” between your bedroom zone. Drape a fabric, string of lights or curtain between them. Now, you have a soft and beautiful divider that uses your shelves as anchor points.
Make It Work Visually
On the bedroom side of the shelves, there’s space for:
- Things which you keep at your bedside (water bottle, phone charger, lamp)
- A few books or a journal
- Small plants or a candle
From the living room side, it can show:
- A mini speaker or TV component
- Decorative objects
- Remote controls in a tiny tray
It is particularly useful here, as it gives the impression of separate rooms. Psychologically, this matters a lot. When the place where you sleep feels distinct from the spot where you work or relax, your brain begins to treat them as separate. You sleep better. You work better. You relax better.
Types of Shelves That Work Best Here
| Shelf Type | Best For | Notes |
|---|---|---|
| Floating cube shelf | Clean, modern look | Easy to install |
| Ladder shelves | Leaning without drilling | No wall damage |
| Box shelves with backing | Extra privacy/division | Blocks some light |
| Industrial pipe shelves | Bold, stylish look | Heavier, more permanent |
Hack #3 — Take Kitchen Wall Space to Use for Vertical Pantry Storage
The Tiny Kitchen Problem
Studio kitchen spaces are brutal. You get six to eight feet of counter space — if you’re lucky. The cabinets are shallow and odd dimensions. There’s never enough space for all the things.
Wall shelves are the quickest solution in a cramped kitchen.
The Vertical Pantry Setup
Choose one wall inside or just outside your kitchen area. Add three to four shelves, approximately 10–12 inches between each. This is your vertical pantry.
Here’s what goes on each level:
Top shelf (hardest to reach): Things that are rarely used — holiday dishes, extra packages of paper towels, bulk stuff you buy infrequently.
Middle shelves (eye level): Everyday items — spices, oils, canned foods, snacks, small appliances you use weekly.
Bottom shelf (most accessible): The items you reach for multiple times a day — your coffee setup, cutting boards, go-to pots or bowls.
This setup keeps your counters free. Uncluttered counters make a tiny kitchen’s perceived space feel much bigger. No magic — just good organization.
Attach a Pegboard or Rail System Underneath
Here’s a bonus mini-hack within this hack: attach a magnetic strip or small rail system beneath one of your shelves. Store your knives on the magnetic strip. Use S-hooks to hang small pots, ladles or mugs from the rail.
That empties a whole drawer and a cabinet. In a studio kitchen, that’s considerable.
According to The Spruce’s guide on small kitchen organization, using vertical wall space is one of the most effective strategies for maximizing a compact kitchen — and it doesn’t require a renovation.
Ideal items for vertical kitchen shelves:
- Spice jars (decant into matching bottles for a tidy feel)
- Small baskets for snacks or produce
- Coffee, tea, and mug station
- Cookbooks (shelve with covers out)
- A little houseplant, a succulent or herb (gives the kitchen life)
Safety First
Here are the rules to keep in mind when loading your kitchen shelves:
- Do not load shelves with heavy items that they are not rated to support
- Always anchor shelves into wall studs for heavier loads
- If you have children, store sharp items (knives, graters) on lower shelves
- Allow a few inches of breathing room on every shelf — full shelves are impossible to use
Hack #4 — Use Above-Door and Corner Shelves to Claim Dead Space
The Spaces Nobody Thinks About
Here’s the thing: most people can only think of the most obvious wall space — the big, flat surface between two windows. But there are two spaces in every studio apartment that almost no one uses:
- Above doors and windows
- Corners
Both are absolutely free real estate. And they can hold an impressive amount of stuff.
Above-Door Shelving
The area above a door frame is typically 12–18 inches tall and as wide as your door — about three feet. That’s enough space for a nice shelf.
What can you store up there?
- Books you don’t access daily
- Decorative baskets holding seasonal items
- Additional blankets or tightly rolled pillows
- Boxes of board games or hobby supplies
These things do not have to be grabbed every single day. They just need a home. Above the door is ideal for that.
Quick install tip: Use one set of floating shelf brackets and a piece of wood cut to size. Stain or paint it to match your other shelving. It takes less than an hour and usually costs under $30.
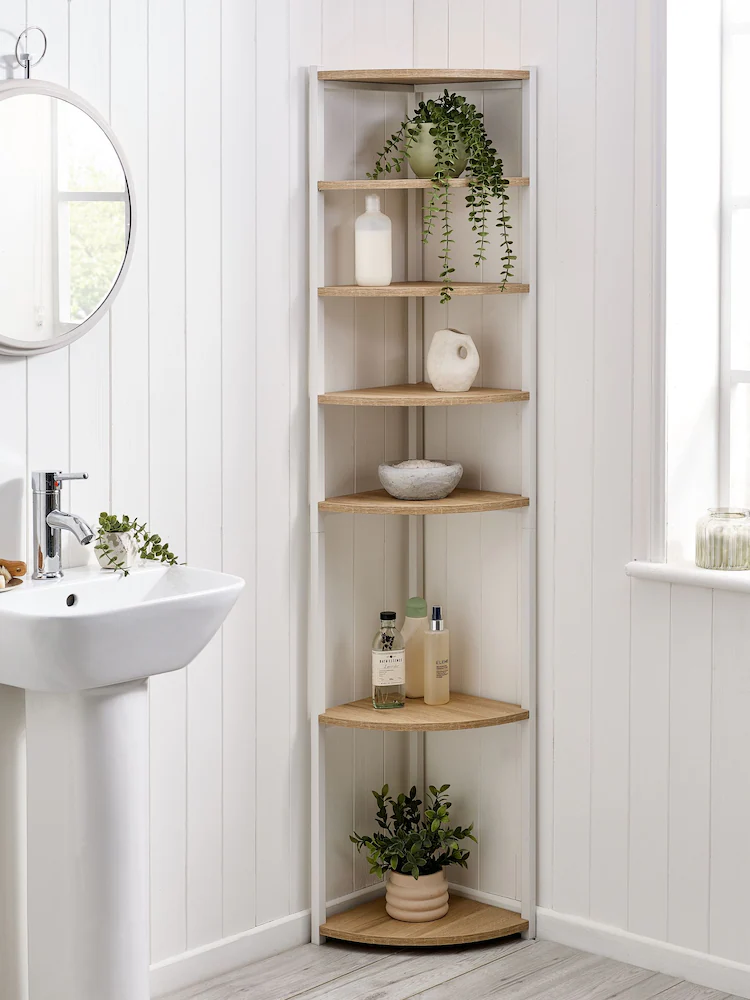
Corner Shelving — The Forgotten Goldmine
Corners are almost always ignored. They’re awkward. They feel like leftover space. But with the proper shelves, they can be one of the most functional places in your apartment.
There are a few styles of corner shelves:
Triangle shelves: Flat triangular shelves that sit in a corner. Good for plants, candles and small décor.
Wraparound corner shelves: L-shaped shelves that continue down both walls to meet at the corner. Perfect for books, storage bins or a mini home office setup.
Spiral corner shelving units: Freestanding units that you place in a corner. No drilling needed. Works great for displaying art or plants.
The Corner Home Office Hack
This one is clever. If you work from home — intermittently or full time — a corner shelf setup can serve as your complete home office.
Mount an L-shaped desk shelf in a corner at sitting height. Install a shelf above it for your monitor (or buy a monitor stand). Put a shelf above that for books, notebooks and supplies.
You now have an entire work zone in a corner that likely was two feet by two feet before. Nothing else in your apartment is disturbed. When you finish your work day, you close the laptop, and the “office” visually disappears.
This setup works beautifully because:
- It makes use of otherwise wasted corner space
- It separates your work zone from your sleep zone
- It requires minimal floor space
- It can be styled to appear deliberate and beautiful
Putting It All Together — The Full Studio Shelf Plan
Here’s how all four hacks can go to work in a single studio apartment:
| Wall/Zone | Hack Used | Purpose |
|---|---|---|
| Long blank wall | Hack #1 | Main storage + display |
| Bedroom/living border | Hack #2 | Zone divider + bedside storage |
| Kitchen wall | Hack #3 | Vertical pantry + cooking zone |
| Corners + above doors | Hack #4 | Overflow + home office |
Put all four together, and your studio is unrecognizable. Every area has a function. Every item has a home. The floor stays clear. The room is open and organized.
Shelf Styling Tips to Make Everything Look Good
Storage is only half the job. The other half is ensuring your shelves actually look nice. Here are some quick styling principles:
Rule of three: Group items in odd numbers. Three plants. Five books. Seven small objects. Uneven clusters appear more natural and curated.
Mix up the heights: Don’t place everything at the same level. Stack a few books, place a tall plant beside a short candle, lean a frame against the back of the shelf.
Add one living thing: A plant on almost every shelf (even a tiny succulent) helps make shelves feel warm and alive.
Leave space to breathe: Do not fill every inch. Empty space is not wasted space — it’s what makes shelves appear tidy rather than cluttered.
Limit yourself to a color palette: Use only two or three main colors across all of your shelves. This makes everything feel cohesive even if the items are all unique.
Budget Breakdown — How Much Will It Actually Cost?
Here’s a rough idea of what each hack could cost:
| Hack | DIY Budget Option | Mid-Range Option |
|---|---|---|
| Full storage wall | $40–$80 | $150–$300 |
| Bedroom zone divider | $30–$60 | $100–$200 |
| Vertical kitchen pantry | $25–$50 | $80–$150 |
| Corner + above-door shelves | $20–$40 | $60–$120 |
| Total | $115–$230 | $390–$770 |
These figures are estimates and differ by location and materials. But even at the most extreme end, a total shelf makeover costs far less than renting a larger apartment or buying big furniture.
FAQs About Studio Apartment Wall Shelves
Q: Will they damage my apartment walls? Most landlords will allow small nail or screw holes as long as you patch them when you leave. If you’re concerned, use damage-free adhesive strips for lighter shelves, or check with your landlord before drilling.
Q: How much weight can floating shelves support? It varies with the shelf and its installation. Most floating shelves can support 20–50 pounds if securely anchored into studs. Heavy-duty shelves can hold more. Always check the weight rating before loading up a shelf.
Q: What kind of shelf is best for a renter? Freestanding ladder shelves or leaning shelves are best suited for renters who don’t want to drill. They do not need to be installed and are easy to move.
Q: What height should shelves be off the floor? For things you use every day, make sure shelves fall between eye level and arm-reach height — about 48 to 72 inches from the floor. Store infrequently-used items on higher shelves.
Q: Do wall shelves actually make a small room appear bigger? Yes. Vertical shelves pull the eye upward, giving ceilings a greater sense of height. Not overpacking shelves also makes the general room feel more airy and spacious.
Q: How can I prevent my shelves from looking cluttered? Edit ruthlessly. Only display items that you love or actually use regularly. Group small items together in matching containers or baskets. Leave an open space on each shelf.
Q: Any non-drill solutions for shelves in corners? Yes — no drilling is required with freestanding corner shelves or ladder-style corner units. They’re just propped up against the walls, holding themselves with their own weight.
Conclusion
Your studio apartment doesn’t need to feel confining. It needn’t be a storage nightmare. The answer isn’t a larger apartment — it’s using the space you already have more wisely.
A clear action plan is laid out with these 4 fast studio apartment space hacks using wall shelves. Claim that long blank wall. Create a divider for your bedroom zone with shelves. Try to create a vertical pantry in your kitchen. And quit overlooking the corners and spaces above your doors.
Each hack is fast. Each one is affordable. And both can dramatically transform the appearance and ambiance of your studio.
Pick one hack to try this weekend. Choose the wall that most annoys you. Buy one set of shelves. Install them. Notice how different your apartment appears with that one change.
Then do the next one.
Before long, your studio will feel less like a small box — and more like a well-designed, orderly, inviting home.