
You Do Not Need More Space — You Need Smarter Space
Living in a studio apartment is like doing a puzzle every day.
What do you do with your clothing? Your books? Your kitchen stuff? Your gym bag? It adds up quickly — and the next thing you know, your tiny home is a cluttered mess.
But here’s the reality: You don’t need a bigger apartment. You simply have to utilize the space you already own in smarter ways.
Many thousands of people live comfortably in studio apartments under 500 square feet. They don’t have some magical extra rooms. They just know a few savvy tips that most renters never consider.
In this article, you’ll discover 5 super simple studio apartment space hacks that will literally make double the storage — without breaking your budget or gutting the place. These ideas work for you whether you’re a student or young professional — or genuinely anyone trying to make small-space living happen.
Let’s dive in.
Why Overcoming Studio Apartment Storage Is So Difficult (And Why It Doesn’t Have to Be)
Before jumping into the hacks, let’s discuss why studio apartments feel so small.
But the square footage isn’t really the biggest problem. It’s wasted vertical space, bad choices of furniture, and the failure to capitalize on invisible storage areas.
Most people only care about square footage. They place a couch here, a bed there, a dresser over there — and then have no idea why the room feels full. The walls, meanwhile, go bare up to the ceiling. Dust is gathering under the bed. Every door back is completely naked.
That’s free storage space available for use.
Thinking in three dimensions — not just about floor space, but walls and ceilings and the insides of your furniture — the moment you do, suddenly your studio feels twice as big.
Hack No. 1: Make Your Walls a Storage Powerhouse
Stop Leaving Your Walls Empty
Walls are the most underused storage surface of any studio apartment. Most renters will put up a picture or two and leave it at that. That’s a huge missed opportunity.
Consider this: if your apartment is 400 square feet and your ceilings are 8 feet high, that gives you more than 3,200 square feet of available wall surface. You’re just living on the floor — but you could be storing things on every wall.
Here’s how to make your walls work a little harder:
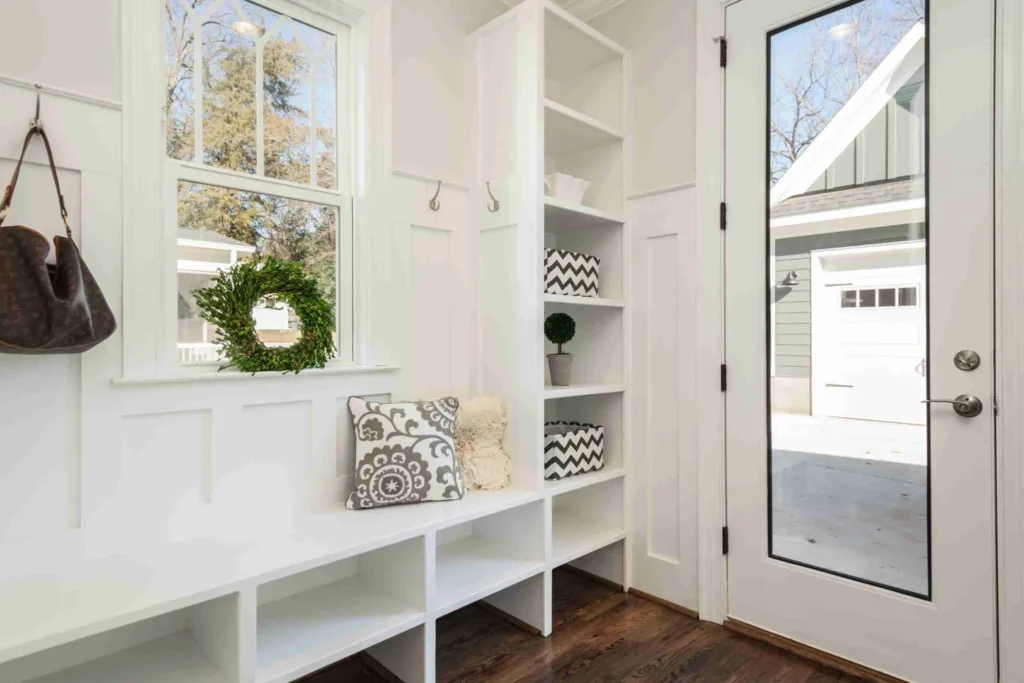
Floating shelves are your best friend here. They’re inexpensive, easy to install, and immediately create storage without consuming any floor space. Use them in the kitchen to hold spices and small appliances. Stash them in the bathroom for toiletries. Create a floor-to-ceiling wall in your central space for books, decor, and daily items.
Pegboards are another game-changer. Pegboards, once found only in garages and workshops, now look so cool you might want one in your apartment. Hang one in your kitchen and use it to hang pots, pans, utensils, and even little baskets. Hang one by the front door to catch keys, bags, and accessories.
Wall-mounted cabinets provide even more enclosed storage. These help hide everything — which is essential in a studio that doesn’t let clutter disappear from view.
The Gallery Wall Storage Trick
Here’s a creative tip that hardly anybody considers when decorating: mix wall art with storage.
You can also get floating shelves meant to hold picture frames and little things. You get decoration and utility in the same wall square footage. It comes off as intentional and stylized — not that you’re just trying to fit in more shelves.
What to Put on Your Walls
| Wall Zone | Best Storage Solution | Items to Store |
|---|---|---|
| Kitchen wall | Pegboard or floating shelves | Pots, spices, utensils, cutting boards |
| Bathroom wall | Small floating shelves | Toiletries, towels, first aid supplies |
| Living/sleep area | Full-length shelving unit | Books, clothes, baskets, decor |
| Entryway wall | Hooks + small shelf | Keys, bags, shoes, mail |
| Behind doors | Over-door organizers | Shoes, cleaning supplies, accessories |
Hack No. 2: Your Bed Is a Closet in Disguise
The Largest Piece of Furniture in Your Studio Should Serve More Than One Role
In a studio apartment, your bed occupies a significant part of the floor. Alone it’s 50–70 square feet. That’s a lot of real estate — and if it’s only being used for sleep, you’re squandering it.
The area beneath your bed is one of the most prized storage real estate in your whole apartment.
Under-bed storage bins are inexpensive and widely available. Buy flat, rolling, lidded bins and slide them under your bed frame. Store seasonal clothing, extra bedding, shoes, sports equipment, or anything you don’t need day-to-day access to in them.
For those whose beds sit low to the ground, bed risers are an easy solution. For less than $20, you can elevate your bed frame 6–8 inches and instantly create a whole new zone for stashing stuff.
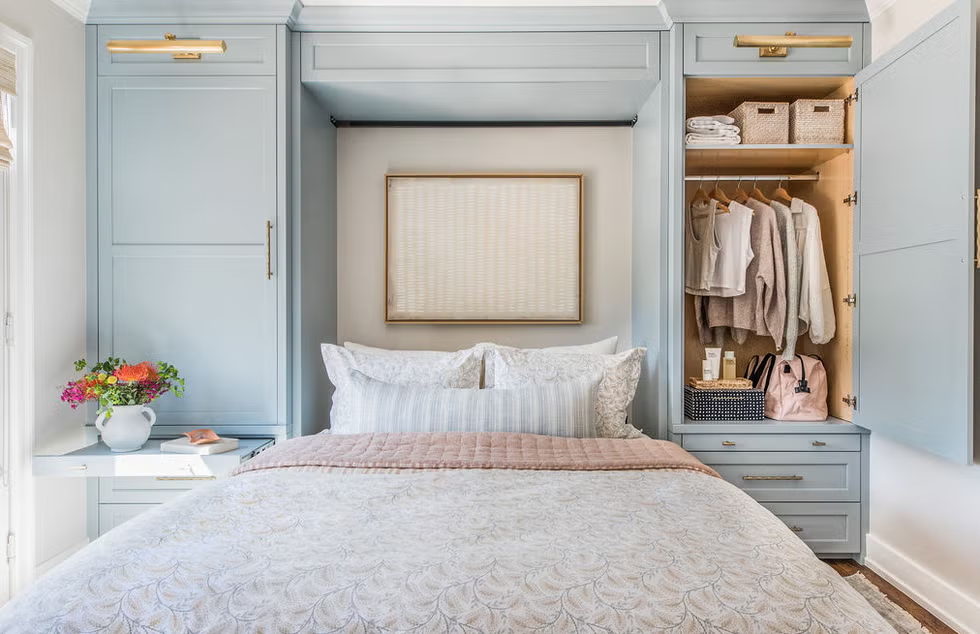
Upgrade to a Storage Bed Frame
If you’re in the market for a new bed, a storage bed frame is one of the best investments a studio dweller can make. These frames have built-in drawers on the sides or a hydraulic lift top that opens to reveal a huge storage compartment beneath.
One storage bed can take the place of an entire dresser. That frees up a significant section of floor space — which you can then devote to other activities, or leave empty to allow the room to breathe.
The Headboard Storage Hack
Don’t stop at under the bed. Your headboard can work too.
Bookcase headboards merge your headboard and a small bookshelf as one fixture. Ideal for storing books you’re currently reading, a lamp, your phone charger, glasses, and other bedside essentials — without requiring a separate nightstand at all.
Certain headboard designs also feature built-in outlets and USB ports. Functional and space-saving.
Hack #3: Purchase Furniture That Works Two (or Three) Jobs
One Piece, Multiple Functions — That’s the Studio Apartment Rule
In a normal house or even a spacious apartment, you can afford furniture that does only one thing. A coffee table is a coffee table, pure and simple. A bench is just a bench.
In a studio, that kind of single-use thinking will devour your real estate.
The single most effective tip for studio living is using multi-functional furniture. Every large piece of furniture you acquire must have at least two functions.
Here are the best examples:
Ottoman with storage: Use it as a coffee table, extra seat for guests, footrest, and storage bin for blankets, remotes, or magazines. One piece replaces three with this one!
Sofa bed or daybed: A sofa bed instantly converts your living area into a guest room. A daybed allows your sleeping space to double as a lounge in the daytime — giving your studio the feel of having separate “rooms.”
Fold-down wall desk (Murphy desk): This one is a total game-changer for anyone who works from home. The desk folds flat against the wall and disappears when you’re not working. It exists when you need it, and not a moment longer.
Drop-leaf table: When folded, a wall-mounted drop-leaf table occupies nearly zero space. It flips out into a full table when you need to eat — or have guests. Some unfold to accommodate 4–6 people from a form factor of only about 6 inches wide when closed.
Nesting tables: Use two or three small nesting tables rather than a single permanent coffee table. Tuck them in together as a matter of course, then open them out when you’re entertaining.
For more ideas on how to furnish and style your small space smartly, check out Studio Apartment Setup — a great resource packed with practical tips for studio living.
Multi-Function Furniture Comparison
| Furniture Piece | Single-Use Version | Multi-Function Version | Space Saved |
|---|---|---|---|
| Coffee table | Just a table | Ottoman with storage | Eliminates need for extra storage bin |
| Bed | Just for sleeping | Storage bed with drawers | Replaces full dresser |
| Sofa | Just for sitting | Sofa bed | Replaces guest bed |
| Desk | Fixed floor desk | Wall-mounted fold-down | Frees floor space when not in use |
| Dining table | Fixed 4-seat table | Drop-leaf wall table | Saves 20–30 sq ft of floor space |
Hack #4: Utilize All of Your Vertical Space (So Many People Quit at Eye Level)
You Only Store Things Where You Can Easily Reach — Huge Mistake
Here’s something that most people never do: look up.
You have at least a foot or two of empty space between the top of your tallest furniture and the ceiling a lot of the time. That area is being utterly squandered.
In a studio apartment, vertical storage is not only smart — it’s essential.
Reach for the Stars With Shelving
When you install shelves, don’t only do it at eye level. Go all the way up to the ceiling.
Yes, the upper shelves will be more difficult to reach. That’s fine! Put things you don’t often need up there — holiday decorations, extra bedding, storage backups, memorabilia, out-of-season items. When you need to reach them, use a small step stool.
The result? You’ve just created storage in an area that was 100% empty before.
Floor-to-ceiling bookshelves are one of the best investments for a studio. They’re dramatic, practical, and make the room feel taller and bigger — not smaller. That’s due to the fact that the eye follows the line of the shelves vertically, giving a sense of height.
According to The Spruce, using vertical space with floor-to-ceiling shelving is one of the most effective ways to dramatically increase storage in a small home without sacrificing style.
Make the Most of Space Above Cabinets and Appliances
Look at your kitchen. There’s likely 12–18 inches of space between the tops of your upper cabinets and the ceiling. That gap is free storage.
Place baskets or decorative bins up there. Store rarely used appliances, extra pantry items in labeled containers, or even things that don’t belong in the kitchen but need somewhere to live.
The same concept applies to the area above your fridge, the top shelf of your closet, and above door frames.
High Hooks for Vertical Wall Storage
Hooks don’t only go at shoulder height. If you have ceiling space in your entryway or closet, install a row of hooks for coats, bags, and other seasonal gear that doesn’t need to be accessed daily.
This helps clear both eye-level and floor-level clutter, while still leaving items easy to access.
Hack #5: Take Advantage of the “Dead Zones” — Unused Storage Areas You’re Overlooking
Every Studio Has These Overlooked Areas. Here’s How to Use Them.
No matter the size, every apartment has what designers refer to as dead zones. These are places where nothing occurs. Unused corners. The backs of doors. The space under the sink. The space between the refrigerator and the wall.
Most people pass through these zones daily without a second thought. Yet collectively, these dead zones can really add up to quite a bit of usable storage.
The Back of Every Door
The most neglected storage space in any home.
Over-the-door organizers can be hung on the back of your front door, bedroom closet door, bathroom door, and pantry door. These are affordable racks, hooks, and pockets that simply hang over the top of a door without drilling.
Use them to store:
- Shoes (over the closet door)
- Cleaning supplies (hang over the bathroom or kitchen door)
- Accessories such as scarves, belts, and hats
- Pantry items such as spice containers or snack bags
- Office supplies or crafting tools
A solid over-the-door shoe organizer holds 24–36 pairs of shoes. That might entirely eliminate your need for a separate shoe rack that takes up floor space.
Under the Sink
Most people jam some cleaning stuff under the sink and waste a ton of space.
Add a two-tier under-sink organizer (they’re shaped to wrap around the plumbing pipe) and suddenly you have a cabinet that is fully organized and maximized. Attach small hooks on the inside of your cabinet door for extra storage.
Awkward Corners
Corners can be difficult to navigate, but there are pieces of furniture specifically built for them.
Corner shelving units occupy that empty L-shaped area. Corner floating shelves are vertical stacks that fit in corners and utilize space beyond what standard shelves can reach.
The Gap Between Fridge and Wall
That 3–6 inch space between your fridge and the wall? It accommodates a slim rolling pantry cart. These slim carts glide in and out of tight spots and store canned goods, bottles, spices, and more. They slide back and vanish when not in use.
Dead Zone Storage Cheat Sheet
| Dead Zone | Storage Solution | What It Holds |
|---|---|---|
| Back of front door | Over-door hooks/rack | Bags, coats, umbrellas, keys |
| Back of closet door | Shoe organizer | 24+ pairs of shoes or accessories |
| Back of bathroom door | Over-door pocket organizer | Toiletries, hair tools, medicines |
| Under bathroom sink | Two-tier organizer + door hooks | Cleaning products, toiletries |
| Fridge-wall gap | Slim rolling cart | Canned goods, bottles, spices |
| Above fridge | Baskets or bins | Rarely used items, pantry overflow |
| Unused corner | Corner shelving unit | Books, plants, decor, storage bins |
| Space above cabinets | Labeled storage bins | Off-season items, rarely used appliances |
Putting It All Together: A Simple Studio Storage Action Plan
The five hacks here are a lot to take in all at once. So here is a simple, step-by-step plan of how to put it all into action without getting overwhelmed.
Week 1 — Evaluate and declutter. Take a walk through your studio with fresh eyes. Make a list of all the dead zones and underused spaces that you see. Conversely, spend some time going through your stuff and remove things you don’t actually use. Storage hacks are most effective in conjunction with regular decluttering.
Week 2 — Tackle the low-hanging fruit. Install over-door organizers. Add under-bed bins. Put hooks near the entryway. They require very little money and can be done in an afternoon. You’ll see immediate results.
Week 3 — Update your furniture. If your budget permits, replace single-use furniture with multi-use items. Even one or two smart substitutions — such as swapping in a storage ottoman in place of a regular coffee table — will make an obvious difference.
Week 4 — Go vertical. Mount floating shelves from mid-wall to ceiling. Add corner shelves. For the zones above cabinets and over fridges, fill them with labeled storage bins. This is where your storage space truly doubles.
Frequently Asked Questions
How can I make my studio apartment feel bigger on a budget?
Take the stuff that costs nothing first. Be ruthless about decluttering — removing items you no longer use is the quickest way to make room. Use vertical wall space with floating shelves, use the back of your doors, and add storage under your bed. All these changes cost very little but have a big impact visually and functionally.
What furniture is best for a studio apartment?
Search for multipurpose furniture. A storage ottoman, a sofa bed, a fold-down wall desk, and a storage bed frame are some of the best investments. A studio’s furniture must earn its floor space and be as useful as possible.
Can I do these storage hacks if I’m renting and not allowed to drill holes into walls?
Yes! Most of these hacks don’t even need any drilling. Over-door organizers, under-bed bins, and freestanding shelving units don’t cause any damage to walls. If you want floating shelves, consider adhesive mounting strips designed for heavier weights — many contemporary products can hold 20 to 50 pounds with not a single hole in the wall.
How do I store clothes in a studio apartment with a small closet?
Try a closet organizer system that hangs off the existing rod and adds extra shelves, drawers, and hanging zones to use every inch of your closet. Place an over-door shoe organizer on the closet door. Make use of under-bed bins for out-of-season clothes. If you still require more storage, a narrow wardrobe or armoire can add to your closet space.
What is the number one mistake people make with studio apartment storage?
Thinking only horizontally. People typically plan storage at floor and eye level, totally ignoring walls, vertical space, and hidden areas like the backs of doors and under the bed. The minute you begin thinking vertically and utilizing every available surface is when your storage choices rapidly expand.
Are storage beds worth the investment?
For studio apartments, absolutely. A good storage bed with built-in drawers can store as much as a full six-drawer dresser. That means you can do away with the dresser altogether — reclaiming a decent expanse of floor. Over time, that investment ends up paying for itself in higher function and by the peace of mind that comes with less cluttered living.
Small Space, Big Life — Your Studio Can Do More Than You Realize
Here’s the big takeaway from all of this:
Having a studio is not a limitation. It’s a design problem — and problems have solutions.
The five hacks described in this article — using your walls as storage workhorses, making your bed do double time, selecting multi-function furniture, going vertical, and claiming every dead zone — are successful strategies that real people use every day to live comfortably in small spaces.
No need to spend thousands of dollars. You don’t have to demolish walls. You just need to reconsider your space and make some smart adjustments.
Start small. Just take one hack from this list and execute it this week. When you see the results, you’ll want to continue.
Soon enough, your studio won’t feel like a squished-up compromise. It’ll feel like a smart, efficient, intentional home — just the way you intended.
Ready to start? Select your first hack, snag a few supplies, and start returning some space to your life today.