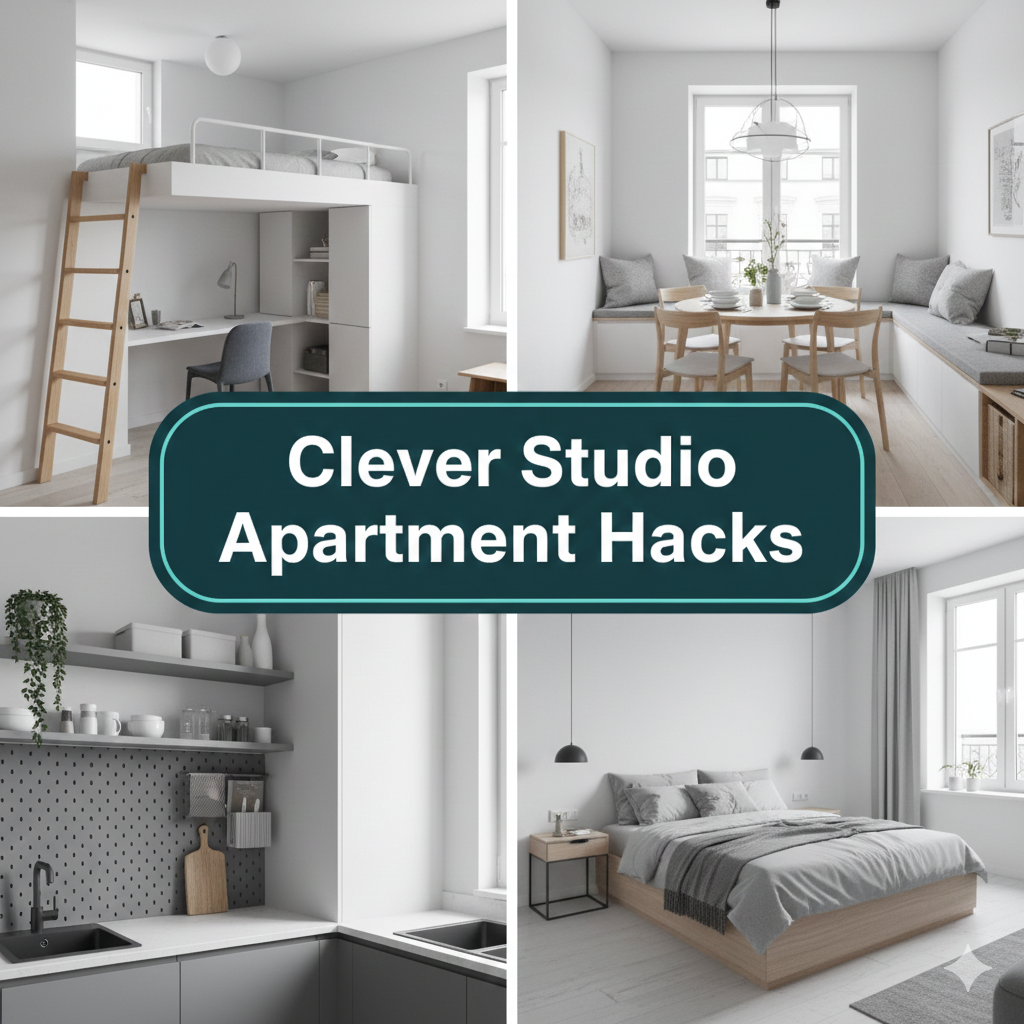
One room. That’s all you’ve got.
No bedroom door to close. No passageway between your kitchen and your couch. No wall between where you sleep and where you eat breakfast.
In a studio apartment, everything happens in the same room. And while that can feel homey and simple, it can also sometimes feel chaotic — as when your bed is situated directly facing your work desk, or the smells of what you’re cooking waft straight into where you’re sleeping.
The fix? You don’t have to knock down walls or hire a contractor. All you need are the right studio apartment space hacks to divide your room into areas that feel separated, stylish, and intentional.
Here are five truly creative ways to divide your studio into distinct areas — without sacrificing any square footage, bankrupting yourself, or making permanent changes. It doesn’t matter if you rent or own, there’s a hack for your space here.
Let’s break it all down.
Why Partitioning Your Studio Changes How It Feels to Live There
Before we dive into the hacks, it’s worth discussing why this is so important.
Your brain is never fully off when everything in your apartment is visible all at once. You sit down on the couch and notice your unmade bed. You go to sleep and look upon your messy work desk. There is no hard line of separation between “work mode” and “rest mode.”
Psychologists refer to this as the environment-behavior connection — the notion that your surroundings shape how you feel and behave. When your space has no defined zones, it’s harder to focus, harder to unwind, and harder to feel at home.
Room dividers solve this problem. They give the sensation of separate rooms at a fraction of the cost — and none of the permanence of actual walls.
Here’s a quick comparison of divided spaces versus open studios:
| Factor | Open Studio | Divided Studio |
|---|---|---|
| Visual clutter | Higher | Lower |
| Focus & productivity | Harder | Easier |
| Sleep quality | Often disrupted | More protected |
| Feels like a home | Less | More |
| Guest-friendly | No | Yes |
| Privacy level | Low | Noticeably better |
The gap is real — and it doesn’t take much effort to cross that divide.
What to Consider Before Choosing a Divider
Not every dividing hack translates to every studio. Here are four quick questions to answer before you go all in:
1. How much floor space do you have to spare? Some dividers — such as bookshelves — occupy floor space. Others — like curtains — occupy virtually none. Know your limits before you start shopping.
2. Do you rent or do you own? Renters need non-permanent solutions. Curtain tracks, freestanding shelves, and furniture layouts all work without damaging anything.
3. Does the divide need to be physical or just visual? A curtain provides a visual barrier but stops nothing physically. A bookshelf provides storage and a physical separation. Think about what problem you’re actually trying to solve.
4. What’s your style? Your divider will be one of the first things people see when they walk in. Make sure it suits your aesthetic — whether that’s minimalist, bohemian, industrial, or cozy.
Once you’ve answered these, you’re ready to choose the right hack.
Hack #1 — Curtains: The Cheapest and Easiest Room Divider
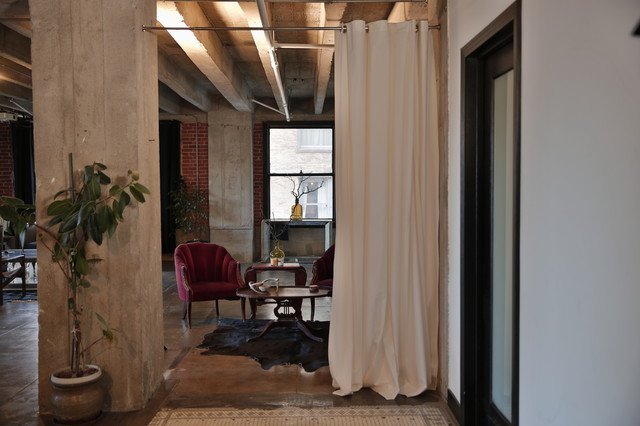
Here’s the easiest of all studio apartment space hacks — the humble curtain.
Curtains aren’t just for windows. Hung from a ceiling-mounted track or tension rod, they become full-length room dividers capable of radically changing the layout of your studio.
How to Set It Up
The setup is simple:
- Install a ceiling-mounted curtain track (available from most home stores)
- Thread your curtain panels onto the track
- Slide them open or closed whenever you need to
Tension rods are also a good option if your ceiling makes drilling tricky. Some tension rods can stretch up to 16 feet — more than enough for most studio apartments.
Renter tip: Command strips and pressure-fit curtain rods require zero drilling and leave no damage on walls or ceilings.
What It Does for Your Space
A floor-to-ceiling curtain instantly creates the feeling of a separate bedroom. Close it at night for privacy and a more sleep-friendly environment. Open it during the day to let the space breathe and feel bigger.
Curtains can also be used to conceal:
- A cluttered wardrobe area
- A home office corner
- Kitchen shelving
- Storage zones
Choosing the Right Curtain for Your Studio
The curtain you choose is just as important as the setup itself.
| Curtain Type | Best For | Effect on Light |
|---|---|---|
| Sheer linen | Visual divide, airy feel | Lets light through |
| Blackout fabric | Bedroom zone, sleep privacy | Blocks light completely |
| Velvet or heavy cotton | Sound dampening, cozy feel | Reduces light significantly |
| Patterned fabric | Style statement, bohemian look | Varies |
| Neutral solid colour | Minimalist and modern spaces | Varies |
Opt for floor-to-ceiling length to make as big an impact as possible. Curtains that end within an inch or so of the floor look purposeful and polished — a detail that makes all the difference in small spaces.
Hack #2 — Bookshelves as Walls: Storage Becomes Structure
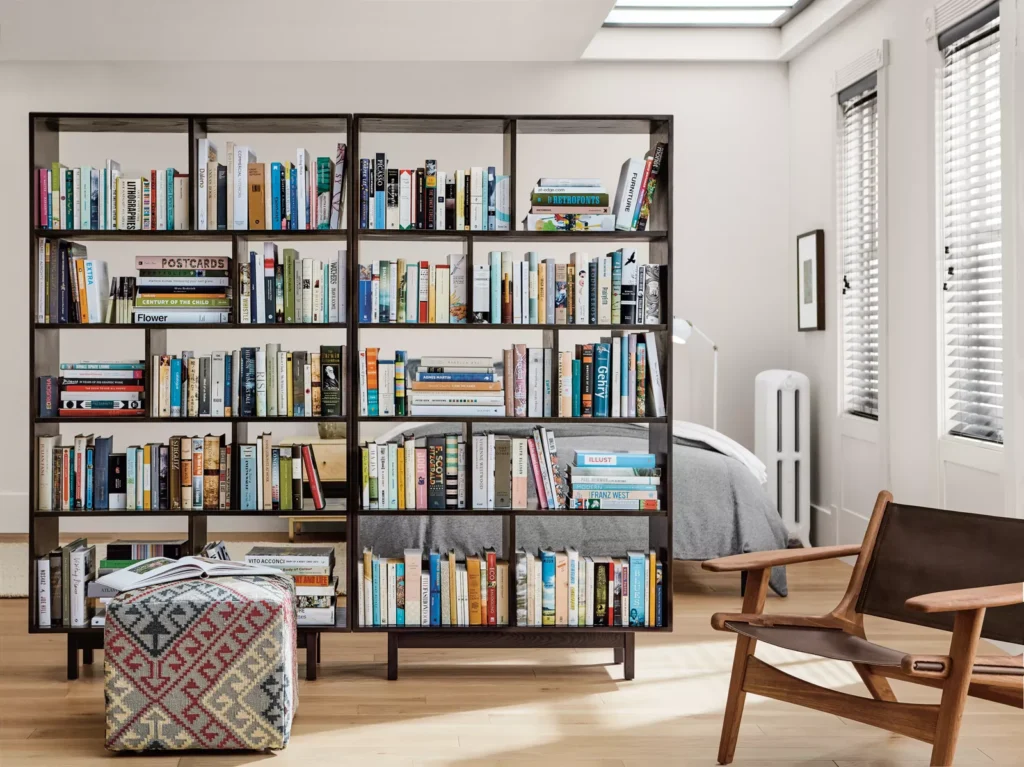
If curtains are the most subtle divider, bookshelves are the strongest. They give you a physical barrier and additional storage — two problems solved with one piece of furniture.
This is one of the most popular studio apartment space hacks for good reason. A tall, open bookshelf positioned in the middle of your studio does something remarkable: it makes your apartment feel like it has two rooms.
The Best Bookshelf Configurations
Not all bookshelves work equally well as dividers. Here’s what to look for:
Height: Aim for shelves at least 5.5 to 6 feet tall. Shorter shelves don’t provide enough of a visual break. Taller shelves near ceiling height start to feel like actual walls.
Open vs. closed back: Open-back shelves let light pass through to both sides, keeping the space feeling open and bright. Closed-back shelves provide a more substantial barrier but may darken the room.
Double-sided styling: Style both sides of the shelf. Books, plants, and decorative objects go on the living room side. Baskets, bins, and practical storage go on the bedroom side. Each side serves its zone.
Anchoring Your Bookshelf Safely
A tall freestanding bookshelf should be anchored to prevent tipping — particularly in homes with children or pets.
Most anchoring kits cost less than $20 and attach the shelf to the wall with a small bracket and strap. For renters, these kits are removable and leave minimal marks.
Never skip this step. A tipped-over bookshelf is a serious safety hazard.
Bookshelf Divider Ideas That Actually Look Great
- IKEA KALLAX + curtain combo: Set up a KALLAX shelf unit as your base divider, then hang a curtain above it to stretch the divide all the way to the ceiling. Maximum privacy, maximum storage.
- Cluster of ladder shelves: Group two or three ladder shelves next to each other for a lighter, more decorative divider.
- Plant shelf divider: Use a tall plant shelf and fill it with trailing plants. It’s a living wall that adds warmth and nature to your studio.
Hack #3 — Furniture Layout as a Silent Room Divider
Here’s a studio apartment space hack that costs you absolutely nothing: use the furniture you already own to create zones.
Most people push all their furniture against the walls. It seems logical — keep the centre open, make the room look bigger. But in a studio apartment, this approach actually makes the space feel more like a waiting room than a home.
The Power of Floating Furniture
“Floating” your furniture means pulling pieces away from the walls and arranging them to define separate areas. Professional interior designers use this technique to create rooms within rooms — no dividers required.
Here’s how it works in a studio:
The sofa as a partition: Position your sofa so its back faces the sleeping area. The back of the sofa provides a soft visual divide between the living zone and the bedroom zone. It’s subtle but effective.
The rug as a floor map: Place a large area rug under your sofa, coffee table, and armchair. This defines the living room zone clearly. The bedroom area gets a different rug — or no rug at all. Suddenly, each zone has its own floor identity.
The desk as a barrier: Place your work desk perpendicular to a wall, with the side facing out toward the room. It forms a mini office peninsula that feels tucked away without being completely closed off.
Use This Simple Layout Formula to Zone Your Studio
| Zone | Anchor Piece | Supporting Pieces |
|---|---|---|
| Living area | Sofa (floating, back to bedroom) | Coffee table, rug, armchair |
| Sleeping area | Bed (against far wall or corner) | Nightstand, floor lamp, small rug |
| Work area | Desk (perpendicular to wall) | Chair, shelf above desk, task lamp |
| Kitchen/dining | Dining table or bar cart | Stools, pendant light above |
When each zone has its own anchor piece and supporting items, the apartment reads like a multi-room home — even though it’s technically one single space.
The Rule of Rugs
One mistake studios often make is buying rugs that are too small. A tiny rug floating in the middle of a zone doesn’t define anything — it just looks lost.
For a living zone rug, at least the front two legs of your sofa should sit on the rug. Ideally, all furniture legs rest on it. Go bigger than you think you need. In small spaces, large rugs make rooms feel larger, not smaller.
Hack #4 — Plants as Living, Breathing Room Dividers
Plants are wildly underrated as studio apartment space hacks. Most people think of them as decoration. But a well-placed grouping of tall plants can serve as a beautiful, natural room divider that adds life, colour, and even cleaner air to your home.
Which Plants Work Best as Dividers
Not every plant is right for this purpose. You need plants that are tall, full, and relatively easy to care for.
| Plant Name | Height | Light Needed | Maintenance Level |
|---|---|---|---|
| Fiddle Leaf Fig | Up to 6 ft | Bright indirect | Moderate |
| Bird of Paradise | Up to 8 ft | Bright indirect | Low-moderate |
| Bamboo Palm | Up to 7 ft | Low to medium | Low |
| Snake Plant | Up to 4 ft | Any light | Very low |
| Monstera Deliciosa | Up to 5 ft | Medium indirect | Low |
| Rubber Plant | Up to 6 ft | Bright indirect | Low |
For a divider effect, group three to five plants of varying heights together. A tall bird of paradise flanked by two shorter snake plants and a monstera creates a lush, layered boundary that feels completely natural.
Plant Shelf Dividers: The Best of Both Worlds
A tall plant shelf — essentially a narrow ladder shelf designed for plants — is one of the most stylish divider options available. Fill it with plants at different heights, hang a few trailing varieties from the top shelf, and you have a living wall that’s impossible not to love.
This approach also works brilliantly for people who can’t commit to a large bookshelf or don’t want to drill anything into the ceiling.
A Note on Artificial Plants
Not everyone has the time, light, or patience for real plants. High-quality artificial plants — particularly in larger sizes — can achieve a very similar look. Look for silk or latex varieties with natural-looking leaves and realistic pot arrangements.
Avoid cheap plastic plants. They detract from the overall look and give the space a less considered feel.
Hack #5 — Lighting Zones: The Invisible Room Divider Nobody Talks About
Of all the studio apartment space hacks in this article, this one is the most underestimated. Lighting doesn’t physically separate spaces — but it mentally separates them in a way that’s surprisingly powerful.
Think about it. When you walk into a restaurant, the dimly lit corner booth feels completely different from the bright open bar area — even if they’re in the same room. The lighting creates two different moods, two different experiences, two different spaces.
You can do the exact same thing in your studio apartment.
One Room, Three Lighting Zones
The goal is to give each area of your studio its own distinct lighting personality.
The living zone: Warm, ambient lighting. A floor lamp beside the sofa, a table lamp on a side table. Dimmer switches let you control the mood. This area should feel relaxed and welcoming.
The work zone: Bright, focused task lighting. A good desk lamp with cool-white or daylight bulbs keeps you alert and on task. Keep this lighting separate from the rest of the room so work feels like work.
The sleep zone: Soft, very warm lighting. A small bedside lamp with a low-wattage warm bulb. No overhead lighting in this zone at night — bright overhead lights signal “daytime” to your brain and can disrupt your sleep cycle.
Light Colour Temperature: What It Means and Why It Matters
According to the Lighting Research Center, matching light colour temperature to the activity in each zone can meaningfully improve both focus and sleep quality.
| Zone | Colour Temperature | Effect |
|---|---|---|
| Bedroom | 2,700K–3,000K (warm white) | Calming, sleep-friendly |
| Living area | 2,700K–3,500K (soft white) | Relaxed, welcoming |
| Work/office | 4,000K–5,000K (cool white) | Alert, focused |
| Kitchen | 3,500K–4,500K (neutral white) | Clear, functional |
Matching your bulb colour temperature to each zone is one of the easiest and least expensive upgrades you can make. A pack of warm bulbs for the bedroom and cool bulbs for the desk costs almost nothing — but the difference in how each zone feels is immediately noticeable.
String Lights as Zone Markers
String lights (also called fairy lights or Edison bulb strands) are brilliant for marking zones in a studio. Draped along a shelf above the bed, they signal “this is the sleep area” without any physical barrier. Hung above a dining nook, they define the eating zone with warmth and character.
They’re inexpensive, renter-friendly, and endlessly adaptable.
Hacks That Get Better Together
Here’s the thing: the best studio apartment setups seldom depend on just one dividing trick. The magic comes when you layer two or three of these hacks together.
Some powerful combinations:
Curtain + Lighting: Use a blackout curtain to close off your sleeping zone at night, and pair it with warm bedside lighting inside the curtained area. It becomes a genuinely cosy, separate bedroom experience.
Bookshelf + Plants: Place a bookshelf as your main divider, then line the top with trailing plants that cascade over the edge. The plants soften the hard lines of the shelf and make the whole thing feel intentional and designed.
Furniture Layout + Rugs + Lighting: Float your sofa to define the living zone, anchor it with a large rug, and add a floor lamp in the corner. Give the sleeping zone its own rug and warm bedside lamps. Suddenly, your studio feels like a two-room apartment.
Budget Breakdown: What Do These Hacks Cost?
One of the best things about these dividing hacks is that they work at almost every price point.
| Hack | Budget Option | Mid-Range Option | Premium Option |
|---|---|---|---|
| Curtains | $20–$40 (tension rod + panels) | $80–$150 (ceiling track + linen) | $200–$400 (motorized track) |
| Bookshelf | $50–$100 (IKEA KALLAX) | $150–$300 (solid wood unit) | $400–$800 (custom built-in) |
| Furniture layout | Free (rearrange what you have) | $100–$300 (new rug or anchor piece) | $500+ (new furniture set) |
| Plants | $15–$40 (small cluster) | $80–$200 (larger statement plants) | $300+ (plant shelf + full collection) |
| Lighting | $15–$30 (new bulbs + one lamp) | $60–$150 (multiple lamps, dimmers) | $200–$500 (smart lighting system) |
If you know how to strategize, $50–$100 can go a long way in your studio apartment. Tackle the hack that solves your biggest problem first, then build from there.
Quick-Start Guide: Which Hack Should You Try First?
Not sure where to begin? Use this simple guide:
If your biggest problem is sleep privacy → Start with Hack #1 (Curtains). A blackout curtain surrounding your sleeping area will make an immediate difference.
If your main problem is clutter and no storage → Start with Hack #2 (Bookshelves). You’ll get both a divider and serious storage in one move.
If your apartment feels like a furniture showroom → Start with Hack #3 (Furniture Layout). Rearranging what you already have is free, and often delivers the biggest visual transformation.
If your space feels cold and lifeless → Start with Hack #4 (Plants). A few tall plants add warmth, colour, and character almost immediately.
If the apartment looks the same no matter where you are → Start with Hack #5 (Lighting). Swapping your bulbs and adding zone-specific lamps is quick, affordable, and surprisingly dramatic.
FAQs: Studio Apartment Space Hacks to Divide Rooms
Q: Can I divide a studio apartment without drilling anything into the walls or ceiling? A: Absolutely. Tension rods, freestanding bookshelves, furniture rearrangement, plants, and floor lamps all require zero drilling. These are perfect for renters or anyone who doesn’t want to make permanent changes.
Q: Will dividing my studio make it feel smaller? A: Not if done right. The key is to use dividers that allow light to pass through — sheer curtains, open bookshelves, or clusters of plants. Heavy, solid dividers in small spaces can feel claustrophobic. Light, open ones actually make the space feel more considered and spacious.
Q: What’s the most stylish way to divide a studio apartment? A: The most designed look tends to come from pairing a tall open bookshelf with plants on top and warm lighting on each side. It’s practical, beautiful, and works in almost any style of apartment.
Q: How do I divide a studio apartment with very low ceilings? A: Low ceilings make floor-to-ceiling curtains tricky. Instead, use furniture layout and rugs to define zones. Plants and lighting changes also work brilliantly in low-ceiling studios.
Q: I share my studio with a partner — how do we create personal space? A: A curtain or bookshelf divider that creates a small “corner” for each person works well. Even a dedicated chair with a floor lamp and a small side table creates a personal nook that feels separate from the shared space.
Q: Are these studio apartment space hacks suitable for very small studios (under 400 sq ft)? A: Yes — and some of them work better in smaller spaces. Lighting zones and furniture layout changes have no footprint at all. Sheer curtains on a tension rod are another zero-footprint option. In very small studios, avoid heavy bookshelves unless you really need the storage they provide.
Bringing It All Together
A studio apartment shouldn’t feel like one big, undivided room where everything blurs together.
With the right studio apartment space hacks, you can carve out a genuine sleeping area, a proper living space, a focused work corner, and even a cosy dining nook — all within the same four walls.
The five hacks in this article — curtains, bookshelves, furniture layout, plants, and lighting — are all achievable, affordable, and renter-friendly. None of them require a contractor, a big budget, or weeks of work. Most can be done in a single afternoon.
Start with the one that fixes your most frustrating problem first. Then layer in the others as you go. Before long, your studio won’t just be a place you live — it’ll be a home you actually love coming back to.
For even more tips on maximizing your studio layout, visit Studio Apartment Setup — a dedicated resource for smart small-space living.