
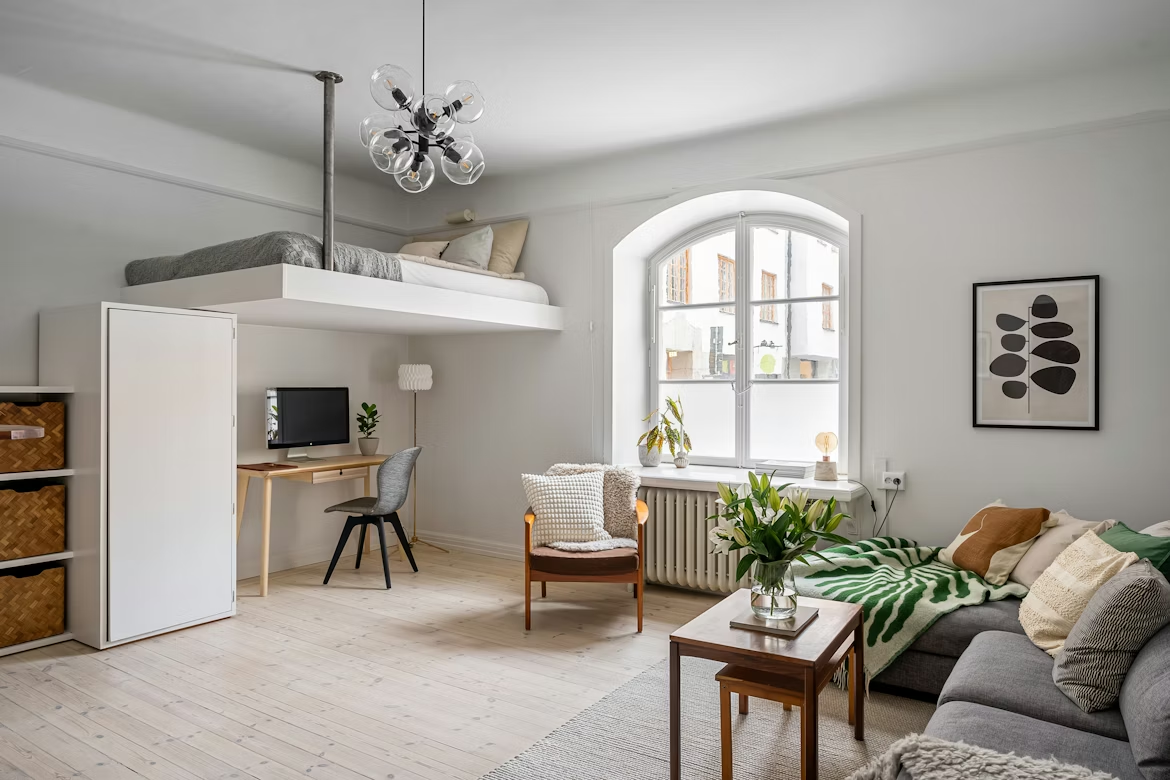
When I first moved into my studio, I made a rookie mistake that I’m slightly embarrassed to admit. I went to IKEA on day two — before I’d even lived in the space for a full weekend — and bought a massive storage unit that I was convinced would solve everything. It arrived in four flat-pack boxes, took three hours to assemble, and then sat in the middle of my apartment looking absolutely enormous and completely wrong for the space.
I returned it a week later.
The problem wasn’t that I didn’t need storage. I desperately did. The problem was that I bought storage before I understood my space — before I knew where things actually accumulated, what I reached for every day, and what could genuinely be tucked away out of sight.
After that expensive lesson, I slowed down, paid attention to how I actually lived in my studio for a few weeks, and then started solving storage problems one by one. What I ended up with wasn’t a perfectly matching, catalog-worthy setup. It was something better: storage that actually worked.
Here are the seven solutions that made the biggest difference.
1. Under-Bed Storage — The Most Underused Real Estate in Any Studio
I’d always vaguely known that under-bed storage was a thing. I just never took it seriously until I measured the space under my bed frame and realized I had roughly 10 inches of clearance running the entire length and width of a queen-sized bed. That’s a significant amount of hidden volume just sitting there doing nothing.
The key is being deliberate about what goes under there, because it’s easy for under-bed storage to become a black hole where things disappear forever.
What actually works:
Flat, rolling bins with lids are the gold standard. I use the SKUBB boxes from IKEA — they’re fabric, they zip closed, they slide easily on hardwood or carpet, and they come in sizes that fit neatly side by side. I have two under my bed: one for off-season clothing (winter sweaters in summer, light layers in winter) and one for extra bedding and spare towels.
The rolling part matters more than it sounds. If you have to get on your hands and knees and reach into a static bin every time you need something, you’ll stop using it within a month. Easy access is the difference between storage that works and storage you abandon.
One thing I got wrong: I initially used cardboard boxes under my bed. They looked fine for about two weeks, then one got damp from a slightly humid week, and everything inside smelled musty. Invest in proper fabric or plastic bins with lids. It’s worth the extra few dollars.
For anyone who wants to go deeper on this particular solution, this guide on the 6 best studio apartment space hacks for under-your-bed storage is one of the most thorough breakdowns I’ve seen — particularly for people with low-clearance bed frames.
2. Vertical Shelving That Goes All the Way Up
Most people hang shelves at eye level and call it done. I did this too. I had two floating shelves on my main wall, both at roughly 5 feet, and I thought I was being clever about wall space. What I wasn’t using was the four feet of wall above those shelves — all the way up to the ceiling.
Vertical storage is the most impactful change you can make in a studio. Floor space is limited and fixed. Wall height is almost always underused.
After I repositioned my thinking, I replaced my two mid-height shelves with a floor-to-ceiling shelving system. I built it out using the ALGOT system from IKEA (cheaper and more flexible than BILLY bookcases for this purpose), running brackets up the wall and adding shelves at varying heights.
Here’s how I divided the vertical zones:
| Height Range | What Goes There | Why |
|---|---|---|
| Floor to 2 feet | Baskets, bins, larger items | Easy grab-and-go access |
| 2 to 5 feet | Books, daily-use items, decor | Primary visual zone, most accessible |
| 5 to 6.5 feet | Less-used items, files, extras | Reachable but not front of mind |
| 6.5 feet to ceiling | Seasonal items, rarely used things | Out of sight, out of the way |
The difference in storage capacity between two mid-height shelves and a full floor-to-ceiling system is not incremental — it’s transformational. I tripled my shelf storage without adding a single piece of furniture to my floor plan.
The aesthetic concern: A lot of people worry that floor-to-ceiling shelving will make a small room feel cave-like or closed in. The trick is keeping the upper shelves lighter and less dense — a few objects with breathing room between them, rather than packed tightly. The lower shelves can be busier. This creates a visual lightness toward the ceiling that actually makes the room feel taller, not smaller.
3. A Storage Ottoman That Does Three Jobs at Once
I used to have a standard coffee table. Solid wood, nice looking, completely wasted opportunity in a studio apartment. It held a remote and a coaster. That was it. A flat surface doing exactly one thing.
Replacing it with a large storage ottoman was one of the better furniture decisions I’ve made. Mine is from Wayfair — a tufted, hinged-lid ottoman that’s large enough to use as a coffee table, sturdy enough to sit on when I have guests, and hollow inside with enough room for extra blankets, my yoga mat, spare cables, and a small toolkit.
That’s four functions in the footprint of one coffee table: surface, seating, storage, and blanket organizer.
What to look for when buying one:
A hinged lid is better than a removable lid — you can open it with one hand while holding something with the other. A flat, firm top means it actually functions as a table, not just a soft seat. Ottoman trays (usually $10–20 on Amazon) turn the top into a proper surface for drinks and books when you need it.
Size matters: go as large as your floor plan allows. A small storage ottoman gives you very little storage. A large one becomes genuinely useful. Measure your space and err toward bigger rather than smaller.
4. The Kitchen Wall — Pegboards, Magnetic Strips, and Hooks
Studio kitchens are often an afterthought — a few cabinets, a small counter, and not much else. Mine had four upper cabinet shelves and about 18 inches of counter space. That’s not a lot to work with.
The solution that freed up the most cabinet and counter space was going vertical on the wall itself.
I installed a magnetic knife strip on the wall above my counter — the kind with strong neodymium magnets that can hold a full set of knives, a pair of scissors, and a metal grater. That cleared out an entire drawer that had previously been a dangerous jumble of sharp things.
Then I mounted a wooden pegboard on the wall beside the stove. Using S-hooks and pegboard accessories from Amazon, I hang: my two most-used pots, a colander, measuring cups, a ladle, tongs, and a spatula. The pegboard cost me about $25 to make from scratch (a sheet of plywood, drilled and painted) and it freed up two full shelves of cabinet space.
What I wish I’d known: Not all walls can support heavy pots. If your walls are drywall, make sure you’re hitting studs for the pegboard mount, or use proper drywall anchors rated for the weight. I learned this the slightly terrifying way when a poorly anchored hook pulled out at 2am and sent a pot clattering to the floor.
If kitchen organization specifically is your main challenge, this breakdown of 12 studio apartment space hacks for tiny kitchens covers a lot of scenarios I didn’t have room for here — including corner solutions and over-the-sink storage.
5. The Entryway Catch-All System (That Actually Catches Everything)
The entryway of a studio apartment is where chaos either starts or stops. In my first few months, it started there. Shoes scattered across the floor, bags dropped in a heap, jackets piled on one chair that was never meant to be a jacket chair. Every time I walked in, I felt vaguely stressed before I’d even taken my shoes off.
The fix wasn’t expensive or complicated. It was just intentional.
I now have a three-tier shoe rack that sits flush against the wall inside the door. It holds six pairs of shoes and keeps the floor completely clear. Cost: $18 from Amazon.
Above the shoe rack, I mounted a row of five hooks at varying heights. Bottom hooks: everyday bags and the one jacket I reach for most. Top hooks: reusable shopping bags, my gym bag, and a spare umbrella.
On the narrow wall beside the door, I added a small floating shelf with a ceramic dish for keys and a small mirror below it. The mirror serves double duty — I use it before heading out, and it visually expands the narrow entryway.
The total cost of this entire entryway setup: Under $60, including hardware.
The impact: Walking into my apartment now feels completely different. There’s a system, everything has a place, and the visual calm of a clear entryway genuinely sets a different tone for the whole space. It sounds disproportionate, but the entryway is often the emotional entry point of an apartment — fixing it first has an outsized effect on how the rest of the space feels.
6. Hidden Storage Furniture — Beds, Benches, and Sofas With Compartments
This is the category where I’d spend the most money if I were setting up a studio from scratch today, knowing what I know now. Furniture that doubles as storage isn’t a novelty — in a small space, it’s a necessity.
The three pieces worth investing in:
A bed frame with built-in drawers. I upgraded to one about a year into my studio life and it eliminated my need for a separate dresser entirely. The drawers (two on each side) hold all my folded clothing — t-shirts, jeans, workout gear, underwear. The dresser that used to occupy a third of my bedroom wall is gone, and that wall space became my dedicated workspace.
A storage bench at the foot of the bed. Mine is a simple hinged bench from a local secondhand shop — I paid $35 for it and reupholstered the seat with fabric from a craft store. Inside: extra pillows, a spare duvet, and the random things that don’t have another home. It also acts as a seating spot when I’m putting on shoes or folding laundry.
A sofa with chaise storage. If you’re buying a new sofa for a studio, seriously consider a chaise sectional with a storage compartment under the chaise. This is where I store my board games, extra cables and tech accessories, and a couple of books I’m rotating through. It sounds niche but the storage volume is substantial.
A note on buying secondhand: Most of my storage furniture came from Facebook Marketplace or local thrift shops. A storage bench for $35. A side table with a drawer for $20. A small cabinet for $15 that I painted and turned into a bathroom organizer. If you’re patient and check listings regularly, you can find quality pieces for a fraction of retail. The key is knowing your measurements before you shop so you’re not tempted by pieces that won’t actually fit.
7. Closet Maximizers — Because Factory Closets Are Almost Always Inefficient
Studio apartment closets are generally designed with the bare minimum: one hanging rod, maybe a single shelf above it. That’s it. And it leaves an enormous amount of closet space unused — particularly the vertical space below hanging clothes and the shelf space above eye level.
The single most impactful closet addition I made was a double hang rod — a second rod that hangs from the existing one via adjustable chains. This effectively doubles the hanging space in a standard closet, which is enough for short items like shirts, folded pants, and jackets.
Below the double hang rod, I added a small rolling drawer unit (three drawers, fits neatly under short-hanging clothes). This is where my shoes now live, along with accessories and items I need quick access to.
On the shelf above the rod, I use lidded fabric bins to store seasonal items, extra linens, and things I access only a few times a year. Labeling the bins on the front face means I never have to pull them all down to find what I’m looking for.
The cost breakdown for my full closet upgrade:
| Item | Cost |
|---|---|
| Double hang rod | $12 (Amazon) |
| Rolling 3-drawer unit | $29 (IKEA ALEX, small) |
| 4x fabric storage bins with lids | $32 (IKEA SKUBB set) |
| Adhesive hooks on closet door | $8 |
| Total | ~$81 |
For under $85, my closet went from a chaotic pile of things to an actually functional storage system. The rolling drawer unit alone was a game-changer.
If you want to go further with closet-specific solutions, this guide on how to maximize small closets: 7 space hacks for studio apartments covers some approaches — like door organizers and tension rod tricks — that I didn’t get into here.
Storage Mistakes That Are Easy to Avoid
Since I made most of these firsthand, they’re worth naming:
Buying storage before auditing what you actually own. More storage doesn’t help if you’re storing things you don’t need. Before buying bins or shelves, spend 30 minutes identifying what you have too much of and what could simply be donated or tossed.
Prioritizing aesthetics over accessibility. Beautiful storage that’s hard to use gets abandoned. Function first, then make it look nice.
Ignoring the backs of doors. The back of every door in your studio — closet, bathroom, front door — is free real estate. Over-door organizers, hooks, and racks can add meaningful storage without touching your floor plan or walls.
Using too many different systems. I went through a phase of trying every organizing product I saw recommended online. The variety created chaos — different sizes, shapes, and styles that didn’t work together. Picking one or two systems and sticking to them makes maintenance easier and the space look more cohesive.
Forgetting about dead corners. Corner shelves, rotating corner organizers, and L-shaped storage units can activate space that’s otherwise completely unused. My bathroom corner alone gained three usable shelves once I added a standing corner unit.
The Bigger Picture
Every one of these solutions came from the same realization: a studio isn’t a smaller version of a bigger apartment. It’s its own kind of space with its own logic, and the storage approach has to match that.
The studios that feel cramped and chaotic aren’t usually under-stored — they’re just storing things in the wrong places, with the wrong systems, or without any system at all.
Start with one solution from this list. The one that matches your biggest current frustration. Do it properly, live with it for a week, and see how it changes how the rest of the space feels. Then add the next one.
Small spaces reward deliberate choices more than any other kind of living environment. Each good decision compounds.