A studio kitchen without a pantry is not a storage problem. It’s a logic problem.
I’ve walked into enough small-space kitchens, both in my design practice and through years of working on real-world setups for clients who thought they needed more square footage, to know that the issue is almost never the size of the space. It’s that people are trying to apply pantry thinking to a kitchen that was never designed for it. They’re cramming flour next to light bulbs next to three half-used bags of pasta and wondering why nothing feels organized.
The moment you stop trying to replicate what a pantry does and start working with what you actually have, the kitchen starts to make sense. Not just functionally, but visually. And a kitchen that looks edited and intentional changes how the whole studio feels to live in.
1. The Real Problem Isn’t the Missing Pantry
Pantries work because they operate on depth, dedicated zones, and a clear taxonomy of what lives where. Dry goods here, canned goods there, backup stock on the lower shelf. That logic works beautifully when you have three feet of depth and six feet of shelving.
A studio kitchen cabinet is none of those things. It’s shallow, often awkwardly proportioned, and usually shared between things that have no business being together. Cooking oil next to the dishwasher tablets next to a takeout menu no one has looked at since 2022. That combination doesn’t fail because of space. It fails because there’s no system.
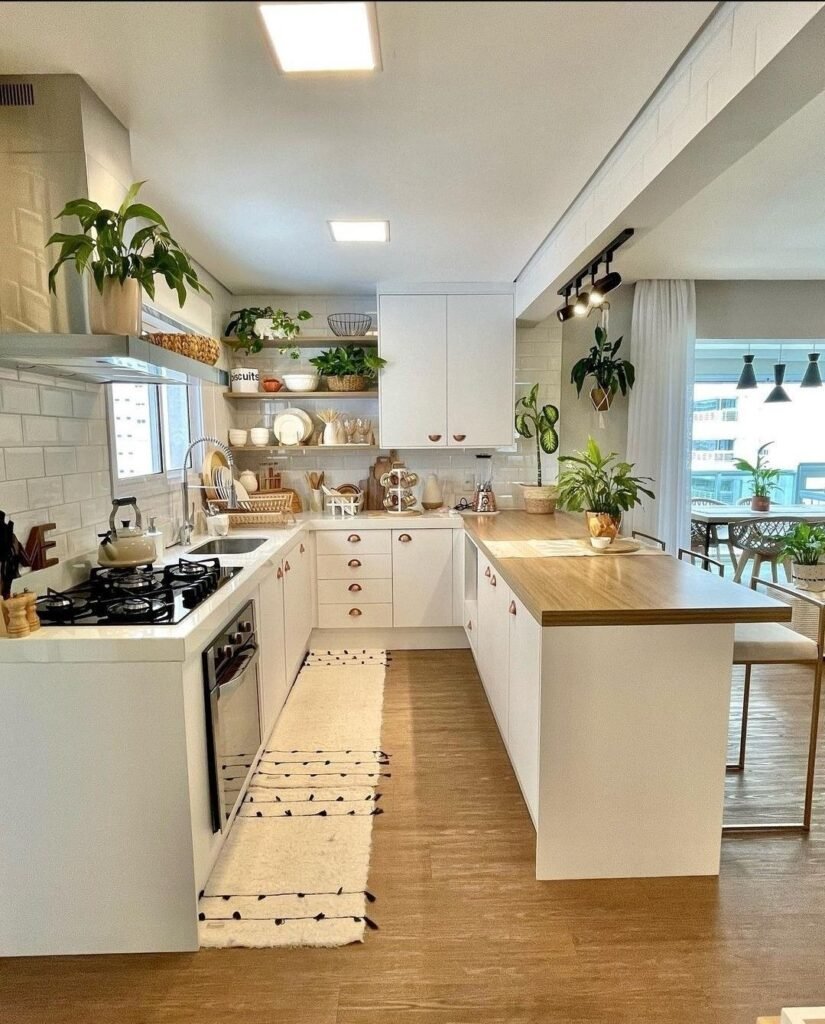
What actually replaces pantry logic in a small kitchen is something I call zone thinking. Your studio kitchen probably has more distinct storage zones than you’ve bothered to count: the cabinets above the counter, the cabinets below, the walls between and above those cabinets, the counter itself, and any adjacent space in the open-plan area. Each of those zones has a function. The mistake is treating them all as one big undifferentiated dumping ground.
Assign each zone a category and stick to it. Daily-use dry goods in one cabinet. Canned goods and backup stock in another. Oils, vinegars, and condiments near the stove. Spices on a rail or a dedicated shelf close to where you cook. The kitchen doesn’t need to be larger. It needs to be more specific.
I can’t tell you how many times I’ve reorganized a client’s studio kitchen and not moved a single cabinet, not added a single piece of furniture, just reassigned what lives where, and the whole thing transformed. Life is so much better when everything is in its place.
2. Go Vertical Before You Spend a Dollar
This one principle alone can solve most of a studio kitchen’s storage problem. And yet it’s the most consistently ignored approach I see, even among people who have already spent money on bins and organizers that aren’t really working.
The walls in your kitchen are prime real estate. Not just the backsplash, but the full wall above the counter, the wall beside the fridge, the strip of wall between the top of your upper cabinets and the ceiling. All of it. A mounted rail system along the back of the counter gets spices, utensils, small jars, and oil bottles completely off the counter and off the cabinet shelves, which frees up more usable storage than you’d expect.
Floating shelves going all the way up to the ceiling work beautifully for things you don’t need every day: the spare bag of coffee, extra canned goods, the oversized pot you use three times a year. You don’t need those things at arm’s reach. They just need a home that isn’t your main cabinet space.
There’s a detailed breakdown of how to apply this kind of vertical thinking across your whole studio, not just the kitchen, in the Studio Apartment Setup guide to vertical storage hacks. The kitchen and the rest of the apartment follow the same logic, and once you get comfortable with it, you start seeing storage opportunity everywhere.
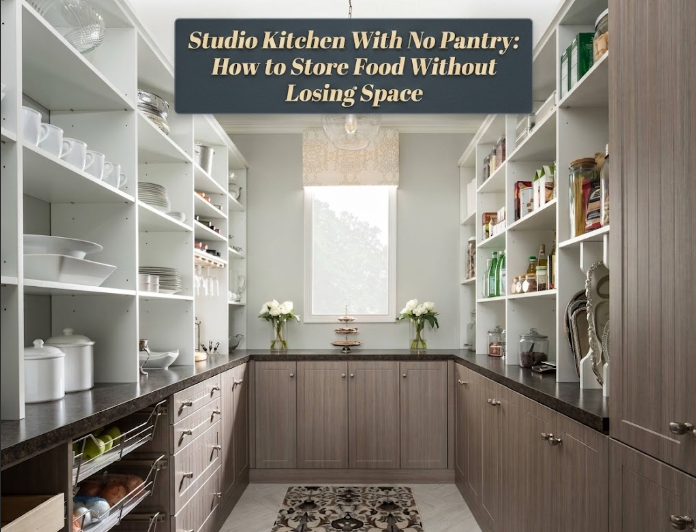
And here’s the design perspective that I always want clients to consider: open kitchen shelving, done well, doesn’t look utilitarian. A row of matching glass canisters, a few ceramic containers in a consistent palette, a wooden cutting board leaning casually against the wall. That becomes a design moment, not a storage compromise. The kitchen becomes part of the visual story of the space instead of a corner you’d rather ignore.
3. The Container Problem (This Is Where Most People Go Wrong)
You cannot organize food properly in its original packaging. Full stop.
Cereal boxes are enormous and awkward. Bags of flour and sugar are floppy and take up probably double the space the actual flour requires. Spice jars in their original bottles are all different heights and widths, which means no shelf system ever holds them neatly. Pasta bags that have been opened and clipped shut are a small-scale disaster waiting to happen every time you open the cabinet.
Transfer your dry goods into uniform containers. I know it sounds fussy. It is not fussy. It is the single most transformative thing you can do in a small kitchen, short of a renovation, and it costs significantly less than most people assume.
The key rules: square containers over round ones, because round containers create dead corners where nothing else can fit. Airtight where it matters, meaning flour, sugar, grains, cereals, crackers, anything that can go stale. Clear or semi-clear so you can see fill levels at a glance. And consistent, meaning the same brand or at least the same general style, because a cabinet full of mismatched containers looks chaotic even when it is technically organized.
Where people go wrong is buying containers before measuring their cabinets. A beautiful set of tall glass canisters is completely useless if your cabinet shelf clearance is nine inches. Measure first. Buy second.
Here’s a quick reference for matching container types to what you’re storing:
| Food Category | Container Type | Why It Works |
|---|---|---|
| Flour, sugar, oats, rice | Square airtight canister | Stacks cleanly, visible fill level |
| Pasta, dried lentils, beans | Tall narrow clip-top jar | Easy pour, see-through |
| Spices | Small uniform jars, identical height | Fits on rails, easy to scan |
| Snacks and crackers | Flat-lidded bin with a clip | Stays fresh, stackable |
| Canned goods | Original cans, tiered riser | No transfer needed, just stack |
| Oils, vinegars, sauces | Original bottles on a mounted tray | Prevents spills, keeps zone together |
Once you do this properly, the word I always reach for with design clients applies here too: edited. Not minimal in the cold, sparse sense, just deliberate. A cabinet that looks like someone made choices about it.
4. The Rolling Cart Is the Underrated Hero of Studio Kitchens
A lot of people resist the rolling kitchen cart because it feels like a concession. An admission that the kitchen isn’t enough. But that thinking is backwards, and I say it fairly bluntly to clients who come in with this assumption.
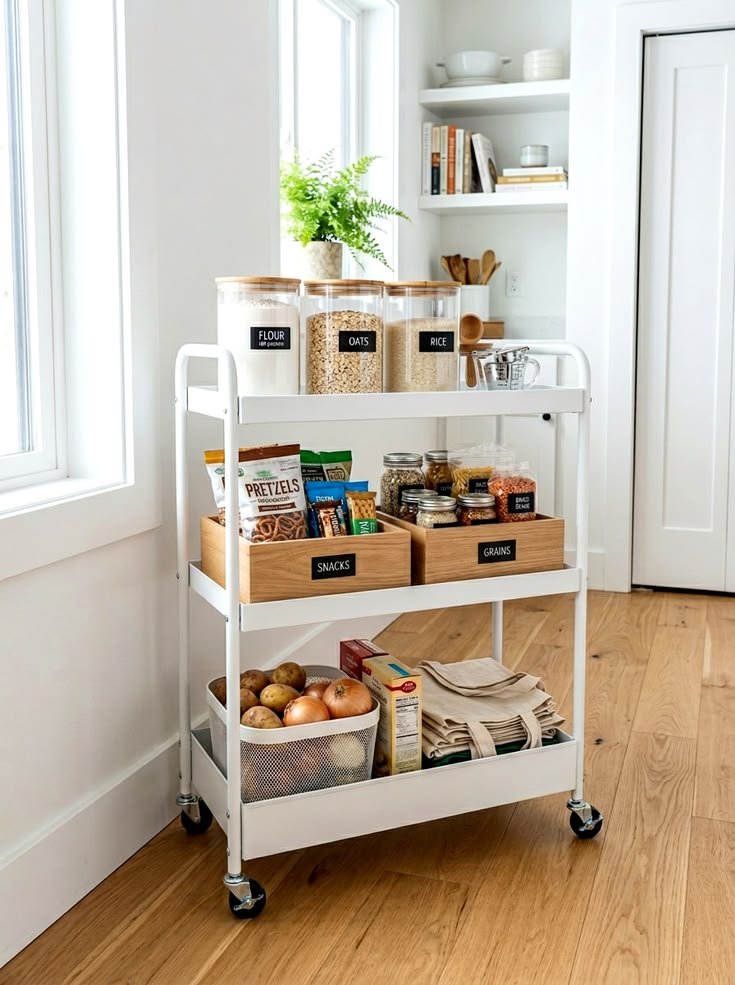
The rolling cart adds a prep surface, which studio kitchens almost universally lack. It adds drawers, shelves, and side hooks for additional storage. And it’s mobile, meaning it can be positioned where you need it while you’re cooking and rolled out of the way afterward. Some carts roll into the living area entirely when not in use, which is a solution worth considering for studios with an open-plan layout. Studio Apartment Setup covers this kind of multi-zone strategy in depth across their storage guides, and the principle comes up repeatedly for good reason: flexibility in small spaces is worth just as much as capacity.
Choosing the right cart matters. Too wide and it becomes an obstacle instead of an asset. Too lightweight and the lower shelf tips under anything heavier than a bag of onions. I consistently recommend looking for a width in the 16 to 20 inch range, locking casters (non-locking wheels on a hard floor are a small nightmare), and at least one drawer for things that don’t belong on an open shelf.
The IKEA Råskog is a solid entry-level option. The Crosley Bramble cart, which has a butcher-block top, looks considerably more intentional in a thoughtfully designed space. Neither is expensive. Both do the job.
And before anyone assumes a cart has to look like a hospital trolley: a wood-top cart in a warm walnut or oak finish brings texture and warmth to a kitchen that might otherwise feel a little cold. Function and aesthetic working together. That’s always the goal.
5. What Doesn’t Belong in the Kitchen at All
Not everything you buy at the grocery store needs to live in the kitchen. This is the part of the conversation that tends to surprise people, but once you hear the logic, it’s hard to unsee.
Backup stock belongs somewhere else. The second bag of pasta, the four extra cans of tomatoes you bought because they were on sale, the giant bag of oats from Costco that will last three months. None of that needs to compete for cabinet space with what you’re actually cooking with this week. A small, dedicated shelf in a closet, the top shelf of a wardrobe, a compartment in a rolling storage unit in the main room, all of those work perfectly well as backup pantry locations. You pull one item into the kitchen as needed and replenish from backup when it runs out.
This is essentially the active kitchen versus reserve storage principle, and it’s one of the most practical shifts in thinking for anyone living in a studio. It’s the same concept that the Studio Apartment Setup breakdown of common storage mistakes applies to the whole apartment, not just the kitchen: every item in your immediate space should be something you interact with regularly. Everything else lives in reserve.
The other thing worth doing at this stage, and I say this with kindness because I’ve had to say it to clients more than once, is an honest audit of what you actually cook. If the tahini has been in your cabinet since last spring and you’ve opened it once, it doesn’t need a prime shelf spot. If you own six different vinegars and use two of them, consider whether the other four need to stay. In a small space, every item has to earn its position.
For a broader look at how this principle applies to studio organizing overall, there’s quite a bit on the Studio Apartment Setup site worth reading on the topic, because the kitchen is rarely the only room where this problem lives.
FAQs
Can a rolling cart actually substitute for a pantry in a studio kitchen?
It can’t fully replicate a large pantry, but for a one or two person household cooking regularly, it covers the essentials. A two-tier cart with a drawer and an open lower shelf can hold dry goods, small appliances you don’t use daily, and overflow items without taking up significant floor space. The key is choosing one narrow enough to move around without being in the way.
I have zero counter space and almost no cabinet room. Where do I even start?
Start with a mounted rail above or beside the counter for spices, utensils, and small jars. That one change alone frees up more cabinet space than most people expect, because spice storage in standard jars takes up a disproportionate amount of shelf real estate. From there, invest in a set of square airtight containers for your dry goods and a small rolling cart for the overflow. Those three things, in that order, solve the majority of the problem without any permanent installation.
Should everything go into airtight containers?
No, and this is a common overcorrection. Canned goods, bottled condiments, and sealed oils don’t need airtight containers because they already are sealed. Focus airtight storage on things that genuinely go stale: flour, sugar, cereals, crackers, pasta, grains, and spices. Buying airtight containers for everything is an unnecessary expense and creates a container storage problem on top of the food storage problem.
What about a tension rod or tiered shelf inside an existing cabinet?
Both are excellent, low-cost additions. A tiered riser in a cabinet shelf doubles your vertical storage for canned goods and lets you see what’s in the back without pulling everything out. A tension rod on the inside of a cabinet door can hold spray bottles, rolls of plastic wrap, small jars, or cutting boards depending on where it’s installed. These are not glamorous solutions, but they work precisely because they fit how a real kitchen is actually used.
How do I keep a studio kitchen from looking cluttered once it’s organized?
Uniformity does more visual work than people expect. Matching containers, a consistent color palette for anything stored on open shelves, and a genuinely clear counter except for things used every single day. The counter is workspace, not storage. Once you treat it that way, even a modest studio kitchen starts to look like a considered design decision rather than a space someone is just getting by in.