

There was a point in my studio apartment where I couldn’t find my keys for 20 minutes — and they were sitting on the kitchen counter the whole time. Buried under a pile of mail, a phone charger, two reusable bags, and a jacket I hadn’t put away since Tuesday.
That was my wake-up call.
Clutter in a studio doesn’t build up dramatically. It creeps. One surface gets messy, then another, and before you know it the whole 400 square feet feels chaotic even though nothing is technically “dirty.” It’s just… everywhere.
I’ve spent a lot of time figuring out what actually works — not the Pinterest-perfect solutions that look great in photos but fall apart in real life, but the practical, everyday habits and setups that genuinely keep a studio feeling calm and clear.
Here are 8 organizing tricks that made a real difference for me.
1. Give Every “Homeless” Item a Permanent Address
The clutter problem in most studios isn’t really about having too much stuff. It’s about having stuff with nowhere to go.
Think about what’s currently sitting on your counters, your floor, your sofa. Chances are, most of it doesn’t have a designated spot. So it just lands wherever you set it down last — and stays there.
The fix sounds simple but requires actual thought: every item needs a home.
Not a vague home (“it goes somewhere in the kitchen”) but a specific one. Your keys go on the hook by the door. Your phone charger lives in the nightstand drawer. Your laptop goes on the floating desk shelf when you’re not using it.
Here’s how I approached it:
Step 1: Walk through your studio and pick up every “homeless” item — things that don’t have a clear spot.
Step 2: Group them by category (tech items, papers, accessories, daily-use things).
Step 3: Assign a specific location for each group and get whatever storage solution makes that location work (a hook, a small basket, a drawer organizer).
Step 4: Put things back in their assigned spot every single time. This is the part that requires discipline, but once it becomes muscle memory, it’s effortless.
The first week is the hardest. After that, it genuinely clicks. Your brain starts automatically returning things to their home instead of just dropping them anywhere.
2. Do a “One-Surface Rule” Reset Every Evening
This one changed my life more than anything else on this list, and it costs absolutely nothing.
The rule: before you go to sleep, every flat surface in your studio gets cleared. Not deep-cleaned — just cleared. Things go back to their homes (see trick #1), dishes go in the sink or dishwasher, clothes go in the hamper or get hung up.
The whole process takes me about 7 to 10 minutes.
The reason it works so well is psychological. When you wake up to a clear studio, your brain starts the day calm. When you wake up to yesterday’s mess, you’re already behind before you’ve had coffee. That low-level stress adds up.
I use a small Bluetooth speaker to play a short playlist while I do my evening reset — it makes it feel less like a chore and more like a ritual.
Surfaces to hit every night:
- Kitchen counter
- Coffee table
- Dining/desk area
- Bathroom counter
- Sofa and floor around it
- Entry area
You don’t have to be perfect. But 80% consistent beats 0% perfect every single time.
3. Use Labeled Bins and Baskets — But Actually Label Them
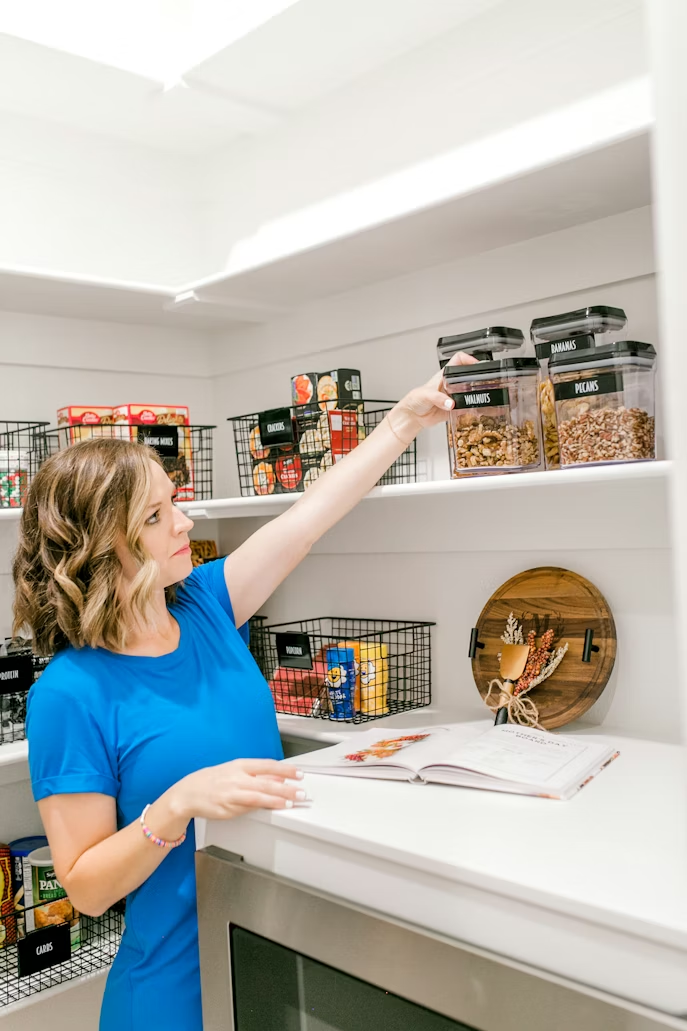
I know “use baskets” sounds like the most obvious organizing advice ever. But here’s where most people go wrong: they buy the baskets, toss stuff in them, and never label anything.
Six weeks later, one basket has random cables, a birthday card, nail clippers, and a packet of soy sauce. The basket made things look organized without actually being organized.
The label is what makes it work. When a basket has a specific label — “Cables & Chargers,” “Current Reading,” “Skincare,” “Snacks” — it has a purpose. Things that don’t belong in it don’t go in it.
For labels, I use a cheap label maker (the Brother P-Touch is about $20 on Amazon and genuinely worth it). You can also use printed paper labels slipped into small frames — some baskets from IKEA even have little label holders built in.
Here’s a quick breakdown of how I use baskets throughout my studio:
| Location | Basket Label | What Goes In It |
|---|---|---|
| Entryway shelf | “Daily Carry” | Keys, wallet, sunglasses, transit card |
| Kitchen counter | “Snacks” | Granola bars, nuts, small packaged items |
| Living area shelf | “Remotes & Tech” | TV remote, spare charger, earbuds |
| Bedside | “Current Reading” | Book, journal, reading glasses |
| Bathroom counter | “Skincare” | Daily-use products only |
| Under desk | “Cables” | All cords, adapters, power strips |
The moment you label it, the basket becomes intentional. And intentional storage is clutter-free storage.
If you’re looking for more ways to build smart, hidden storage into your studio, these studio apartment space hacks for storage you can’t see are worth bookmarking.
4. Tackle the Paper Problem Once and For All
Paper clutter is sneaky and relentless. Mail, receipts, takeout menus, sticky notes, bills, random flyers — it multiplies overnight and looks terrible even in a well-organized space.
I used to have a “paper pile” on my kitchen counter that I told myself I’d sort “this weekend.” It never happened. The pile just grew.
Here’s the system that finally worked for me:
Three-folder approach:
- Action: Stuff that needs something done (a bill to pay, a form to fill out, something to respond to)
- Hold: Things I need to keep temporarily (a lease copy, a warranty card, an upcoming event ticket)
- File: Long-term documents that need to be kept (tax docs, insurance papers, ID copies)
Everything that comes in the door gets sorted immediately into one of these three folders — or straight into the recycling bin. Nothing gets set down on a counter “to deal with later.”
For the “File” folder, I eventually transitioned to mostly digital. I use a free app called Adobe Scan (iOS and Android) to photograph and store important documents on Google Drive. My physical filing folder is now about a third of the size it used to be.
Receipts go straight into the recycling unless they’re for something I might return. Takeout menus? I haven’t kept a paper one in years — everything is on apps like Zomato or just a Google search.
The paper pile hasn’t come back. That kitchen counter is clean every day now.
5. Install Hooks — More Than You Think You Need
I’m going to make a bold claim: you cannot have too many hooks in a studio apartment.
Hooks are the fastest, cheapest, most effective organizing tool available. They keep things off surfaces and off the floor. They make things easy to grab and easy to put back. And in a studio where floor space is everything, hooks are one of the best ways to use your walls without taking up an inch of floor.
Where I put hooks and what they hold:
- Behind the front door: Two large hooks for coats, one smaller one for my everyday bag. This alone eliminated a chair that used to serve as a “coat pile holder.”
- Inside kitchen cabinet doors: S-hooks for measuring spoons, small strainers, oven mitts. Everything is right where I need it without taking up drawer space.
- Bathroom door back: A multi-hook strip for towels, a robe, and my gym bag.
- Bedroom wall beside the wardrobe: Hooks for tomorrow’s outfit, belts, and accessories. Sounds small, gets used constantly.
- Desk area: One hook for my headphones so they’re never in a tangled pile on the desk.
Command hooks (the 3M adhesive ones) are great for renters — no holes, no damage, they hold more than you’d expect if you use the right size. For heavier items, I used small screw-in hooks where I was allowed to drill.
For a full breakdown of how good entryway organization can anchor your whole studio, these studio apartment space hacks for entryway storage are genuinely helpful.
6. Audit Your Stuff Every 90 Days — Not Once a Year
Most people do a big “declutter” once a year — usually around spring cleaning or moving — and then let things pile up again for the next 12 months.
The problem with annual declutters in a studio is that stuff accumulates fast in a small space. 12 months of accumulation in 400 square feet is a lot to deal with at once. It’s overwhelming, so you put it off, and then it gets worse.
What works better: a 90-day mini audit. Set a reminder every three months. Block out one hour. Go through these specific areas:
- Wardrobe — anything you haven’t worn this season, donate or sell
- Kitchen — expired pantry items, gadgets you haven’t used in 90 days
- Bathroom — expired products, duplicates, stuff you meant to try and never did
- Desk/work area — paperwork, old notebooks, dead pens
- Under-bed storage — anything that ended up there “temporarily” and is now just living there
The 90-day cadence means each audit is small. You’re only dealing with three months of accumulation instead of a year. It takes an hour instead of a whole weekend. And because you do it regularly, clutter never reaches the “I can’t deal with this” stage.
I put mine in my Google Calendar as a recurring event so I don’t have to remember it. It just shows up, I do it, done.
7. Digitize What You’re Keeping “Just in Case”
There’s a whole category of clutter that’s pure anxiety storage. Books you might read again. Magazines with recipes you’ll probably never make. Manuals for appliances. Cables for devices you no longer own. Things you’re keeping not because you use them, but because getting rid of them feels risky.
This is where digitizing changes everything.
For books: I use the Libby app (connects to your local library) for ebooks and audiobooks. I’ve sold or donated about 60% of my physical book collection. I kept only the ones I genuinely love having as physical objects.
For magazines and articles: Pocket or Apple Notes for saving online content. If I want a recipe from a magazine, I photograph it and save it to a folder in Google Photos before recycling the magazine.
For manuals and warranty documents: Adobe Scan → Google Drive folder called “Manuals.” I haven’t opened a physical manual in two years.
For cables: If you haven’t used a cable in six months and can’t identify what device it’s for, it goes. The rule is one spare for every type (one spare USB-C, one spare HDMI). Everything else is clutter wearing a “useful” costume.
Digitizing doesn’t just reduce physical clutter — it reduces the mental clutter of thinking “but what if I need that?” Because now you can actually find things when you need them.
8. Create a “Clutter Catch” Zone — Then Empty It Daily
Here’s a trick that sounds like it contradicts everything above, but actually reinforces it: designate one intentional spot for the stuff that doesn’t have a home yet.
Not a surface. A specific container. A small basket or tray — mine is a 10-inch round tray on a side table — where random things can land temporarily. Stuff that comes home with you. Things you’re not sure where to put yet. Items in transition.
The key rule: empty it every single evening.
Whatever’s in the tray at the end of the day has to be dealt with. Put away, donated, thrown out, or assigned a proper home. Nothing stays in the tray overnight.
This works because it gives clutter a single point of entry instead of spreading across every surface. Instead of your keys ending up on the counter, your sunglasses on the sofa, and your grocery receipt on the desk — it all lands in the tray.
Then you deal with it once.
It’s the difference between clutter being everywhere (overwhelming) and clutter being in one place (manageable).
Here’s a visual of how the clutter flow works with this system:
| Without the Catch Tray | With the Catch Tray |
|---|---|
| Stuff lands on every surface randomly | Stuff lands in one designated spot |
| You clean up multiple areas every night | You empty one container every night |
| Things get lost across the apartment | Things stay in one visible place |
| Clutter feels overwhelming and everywhere | Clutter feels contained and manageable |
| Surfaces always look messy | Surfaces stay clear except for one spot |
Small shift, massive difference in how the space feels day to day.
If you want to pair this system with better organizing habits overall, my 7 studio organizing habits that changed everything goes deeper into the daily routines that keep a small space from spiraling.
The Mistakes That Kept Setting Me Back
Before I figured all this out, I kept making the same errors. Sharing them here because they’re easy traps to fall into:
Buying storage before decluttering. I spent money on cute bins and drawer organizers before getting rid of anything. All I did was organize my clutter. The stuff inside the bins was still stuff I didn’t need.
Organizing for aesthetics instead of function. My studio looked nice for about a week after each big reorganize session. Then real life happened and the pretty system fell apart because it wasn’t actually practical. Function first, looks second.
Trying to do it all at once. “I’m going to organize my entire apartment this Saturday” almost never works. One drawer, one shelf, one zone at a time is sustainable. All at once leads to burnout and abandoning the project halfway.
Not maintaining it. The evening reset is what keeps everything working. Skip it for three days and the clutter creeps back like nothing changed. Maintenance is not optional — it’s the whole system.
Wrapping Up
A clutter-free studio isn’t about having less stuff (though that helps). It’s really about having systems — simple, repeatable habits and setups that make it easier to put things away than to leave them out.
You don’t need to overhaul everything in one weekend. Pick one trick from this list and do it properly for two weeks. Then add another. That’s how it actually sticks.
The goal isn’t a perfect, magazine-worthy studio. It’s a space that feels calm when you walk in — and doesn’t require an hour of cleaning every time someone comes over.