
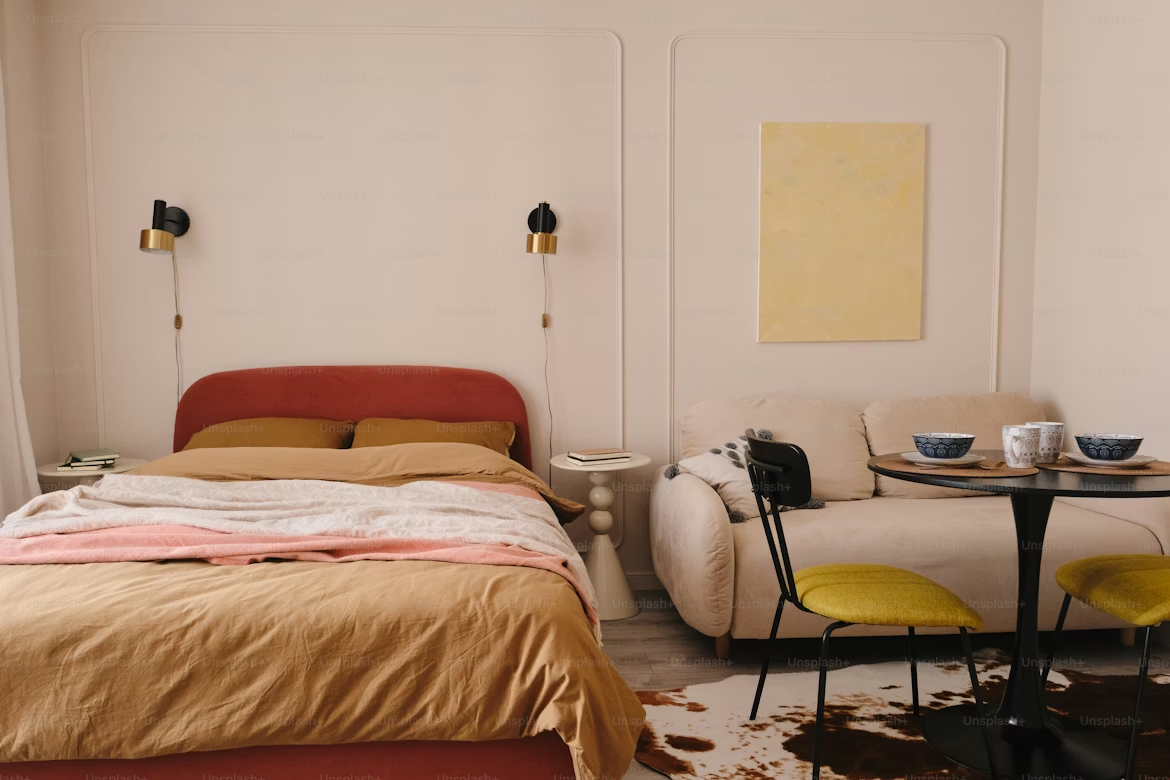
For the first eight months of living in my studio, I kept telling myself the apartment just “wasn’t there yet.” The bones were fine. The layout worked. But every time I walked in after a long day, something felt off — like I was walking into a waiting room rather than a home.
I tried rearranging furniture. I deep-cleaned everything. I bought a scented candle and convinced myself that was the fix.
It wasn’t the candle.
What actually transformed my studio wasn’t a full renovation or a new furniture set. It was six specific decor pieces — things I either stumbled upon, got recommended, or bought out of mild desperation — that somehow, one by one, made the whole space click into place.
I’m not exaggerating when I say these changed the feel of my apartment completely. So let me walk you through each one, what I noticed after adding it, and the mistakes I made along the way so you don’t have to repeat them.
1. A Large Area Rug (The One That Actually Fit)
I had a rug before. A small, sad little rug that sat under my coffee table like it was embarrassed to be there. I thought it was doing something. It wasn’t.
The problem with small rugs in studio apartments is that they chop the floor up visually, which makes the already-limited space feel even more fragmented. I learned this after finally caving and buying a large 8×10 rug — something I’d been avoiding because of the price.
The difference was immediate and genuinely shocking. The whole living area suddenly felt defined. Like it had a purpose and a boundary. The furniture stopped looking like it was floating randomly around the room.
What I learned:
- Go bigger than you think you need. In a studio, a rug that’s too small almost always looks worse than no rug at all.
- Warm, neutral tones (cream, rust, muted terracotta) make a space feel inviting without overwhelming it.
- A low-pile rug keeps things looking clean and is way easier to maintain in a small space where foot traffic is concentrated.
I found mine on Rugs USA during a sale — ended up paying around $120 for a decent-quality 8×10. Wayfair and even IKEA’s ADUM range are solid options if you’re on a budget.
| Rug Size | Best For | Visual Effect |
|---|---|---|
| 4×6 | Under a small coffee table only | Can make space feel smaller |
| 5×8 | Medium seating areas | Works if placed correctly |
| 8×10 | Full living/sleeping zone | Grounds the space, feels intentional |
| 9×12 | Large studios | Creates clear room zones |
Don’t make my mistake of going small to “save money” — you’ll just end up buying a bigger one later anyway.
2. A Full-Length Mirror (That Did Double Duty)

Every person who’s ever written about small space design mentions mirrors, and I rolled my eyes at it for a long time. It felt like advice that belonged on a list someone wrote without actually living in a tiny apartment.
Then I added one and immediately understood what everyone was talking about.
A full-length mirror leaning against the wall in the corner of my studio did two things I didn’t expect. First, it genuinely made the room feel wider — not dramatically, but enough to notice. Second, and this was the surprise, it bounced light around the room in a way that made the whole space feel brighter without me changing a single bulb.
The one I got was a simple arched mirror from Amazon — around $65. It leaned against the wall so no drilling was needed, which was important for me as a renter.
Tips I wish someone had told me:
- Position it across from a window if possible. That’s where the light-bouncing effect is most noticeable.
- Avoid placing it directly facing your bed if that makes you uncomfortable — a lot of people find that disorienting.
- An arched or rounded mirror tends to look more intentional and less “gym locker room” than a plain rectangular one.
If you want your studio to look larger without moving a single piece of furniture, a well-placed full-length mirror is genuinely the fastest way to get there. For more ideas on making a small space feel bigger visually, 9 studio apartment space hacks for a larger appearance covers this really well.
3. A Warm-Toned Floor Lamp (Bye, Overhead Lighting)
My studio came with one ceiling light. A cold, bright, flat overhead fixture that lit the entire room like a dentist’s office. I lived with it for way too long because I thought lighting was a “later” problem.
It was not a later problem. It was an immediate problem affecting my mood every single evening.
The floor lamp I finally bought — a simple arc lamp with a linen shade from Target’s threshold line, around $80 — transformed my evenings completely. Not exaggerating. I started actually wanting to spend time in my apartment instead of defaulting to staying at my desk with headphones on.
The key is the warmth of the bulb. I use a 2700K LED bulb, which gives off that soft amber glow rather than the cold blue-white of daylight bulbs. That specific color temperature is what separates “cozy corner” from “office break room.”
My floor lamp setup:
- Arc lamp positioned behind and slightly to the side of my main seating area
- 2700K warm LED bulb (I use the GE Soft White LED — cheap and reliable)
- Overhead light now stays off after 6 PM entirely
- Small table lamp on the nightstand for bedtime reading
The difference between one ambient light source and layered lighting is night and day — literally.
4. Floating Shelves With an Actual Styling Plan
I put up floating shelves early on. Two white IKEA LACK shelves, installed slightly crooked (I own a drill but apparently not the patience to use a level), filled with random stuff — a few books, some chargers, a broken succulent, and a candle I’d burned down to nothing.
They looked cluttered and a bit tragic.
The second time around, I took the shelves down, patched the walls, rehung them properly with a level, and actually thought about what I was putting on them. That was the real change — not the shelves themselves, but the intention behind what went on them.
The rule I follow now is called the “odd number rule” — group things in threes. A tall item, a medium item, and something low or flat. Books stacked horizontally as a base, a small plant on top, a ceramic object or small framed photo next to it. That’s it. That one formula makes shelves look styled rather than just… stored.
What works on studio shelves:
- Books (grouped by color or size, not just shoved in randomly)
- One or two small plants — pothos or a small snake plant are forgiving
- A small framed photo or piece of art
- One decorative object — a vase, a small sculpture, something with texture
What doesn’t work:
- Charging cables (they always look messy)
- Random papers or mail
- More than 5–6 items per shelf (it immediately reads as clutter)
If you’re figuring out how to style vertical space in a studio without it looking chaotic, 5 wall shelving space hacks for a quick studio apartment has some really practical guidance on this.
5. A Room Divider / Curtain That Created a “Bedroom”
This one was a game changer for my mental health more than anything aesthetic.
Living and sleeping in the same open room sounds fine in theory. In practice, your brain starts struggling to separate “winding down for sleep” from “the place where I work and eat and exist.” Sleep quality suffers. Stress follows you to bed. It’s a real thing.
I tried a bookshelf divider first — too heavy, took up too much floor space, looked awkward. Then I installed a ceiling-mounted curtain rod and hung a set of linen curtains that I could draw closed at night.
Cost: About $35 for the rod system and $45 for the curtains. Total $80.
Result: I sleep better. My studio feels like it has two rooms. Guests come over and don’t feel like they’re sitting directly next to my bed. It made a $700/month studio feel like a proper home.
Quick guide to the curtain divider:
- Use a tension-mounted or ceiling-mounted curtain track for renters (no permanent damage)
- Go floor-to-ceiling with the curtains — it makes the ceiling look higher
- Linen or cotton curtains in a neutral tone look the most natural in a small space
- Keep the curtain slightly off-center if you want your sleeping zone to be smaller and your living area to feel more spacious
This is one of those ideas that sounds simple but has a genuinely outsized impact on how liveable a studio feels day to day.
6. Real Plants (Not Fake Ones)
I know, I know. Everyone says plants. But hear me out, because I was firmly in the “fake plants are fine” camp for years, and I switched for a specific reason that had nothing to do with aesthetics.
Fake plants look great in photos. In person, especially up close in a small space where everything is within arm’s reach, they look fake. People notice. You notice. And there’s something subtly depressing about having a thing that imitates life but isn’t actually alive.
Real plants, even just two or three, bring something to a studio that nothing else does. They change slightly day to day. They respond to light. They give you something small to care for, which sounds trivial but actually builds a habit of paying attention to your space.
The ones I swear by for studio apartments:
| Plant | Why It Works | Light Needed | Difficulty |
|---|---|---|---|
| Pothos | Trails beautifully, nearly impossible to kill | Low to medium | Very easy |
| Snake plant | Upright, sculptural, air-purifying | Low | Very easy |
| ZZ plant | Glossy leaves, drought-tolerant | Low | Easy |
| Peace lily | Flowers occasionally, does well in shade | Low | Easy |
| Rubber plant | Bold, statement-making | Medium | Easy-moderate |
I started with a pothos from a local nursery for about $8. It’s now trailing across my entire bookshelf and it’s the first thing people comment on when they come over.
The key mistake to avoid: don’t buy more plants than you’ll actually water. Two thriving plants look infinitely better than eight dying ones.
For a styled, cozy studio look on a budget, pairing real plants with the right decor elements makes a huge difference. If you’re also looking at keeping costs down across the board, 7 budget apartment hacks under $50 that absolutely work is worth bookmarking.
What All Six of These Have in Common
Looking back at every item on this list, they all share something: none of them were the most expensive option available, and none of them required any permanent changes to the apartment. Everything was renter-friendly, budget-conscious, and reversible.
But more than that, each one solved a specific problem — the rug defined zones, the mirror opened up space, the lamp fixed the mood, the shelves added personality without clutter, the curtain created privacy, and the plants added life.
That’s the real lesson. Decor that actually works in a studio isn’t about filling space. It’s about solving problems with things that also happen to look good.
Here’s a quick cost snapshot of everything combined:
| Decor Piece | Approx. Cost | Impact Level |
|---|---|---|
| Large area rug (8×10) | $90–$150 | Very High |
| Full-length mirror | $50–$90 | High |
| Floor lamp + warm bulb | $75–$100 | Very High |
| Floating shelves + styling | $30–$60 | Medium-High |
| Curtain room divider | $70–$100 | High |
| 2–3 real plants | $15–$30 | Medium-High |
| Total | $330–$530 | Transforms the space |
Under $550 for a studio that actually feels like home. That’s a pretty good deal.