
There was a point — about three months into living in my studio — where I genuinely couldn’t find my phone charger for two days. Two days. In a 400 square foot apartment. That’s when I knew something had to change.
The problem wasn’t that I had too much stuff (okay, maybe a little). The real problem was that nothing had a proper place. Everything just kind of… landed somewhere. The kitchen counter held mail. The desk held snacks. The floor held clean laundry that never quite made it to the closet.
Sound familiar?
Once I actually started getting intentional about organizing — not just cleaning, but organizing — the whole apartment transformed. Not physically, obviously. Same four walls. But it felt like I’d gained an extra room somehow.
These are the six hacks that made the biggest difference, and honestly, I’m a little annoyed I didn’t figure them out sooner.
1. Assigning Every Single Item a “Home”
This sounds almost too simple to be useful, but stick with me.
Most clutter in a studio doesn’t happen because you’re messy. It happens because things don’t have a designated spot. So when you’re done with your scissors, your keys, your headphones — they just get put down somewhere, and that somewhere is different every time.
The fix is almost obsessively intentional: every item in your apartment needs one specific home it always goes back to.
Here’s how I actually did it:
Start with the things you use every day — keys, wallet, phone, chargers, remote controls. These are the items that migrate the most. Pick one spot for each and stick to it like it’s a rule you made for yourself (because it is).
For me:
- Keys — small hook right by the front door
- Phone charger — always on the nightstand, not the couch, not the kitchen counter
- Remote — on the left arm of the sofa, always
- Sunglasses — small tray on the entryway shelf
It took about a week of consciously putting things back before it became automatic. After that? I haven’t lost my keys in months. That alone was worth it.
The next step is extending this to everything else — pantry items, toiletries, cleaning supplies, paperwork. A label maker (I use a Brother P-Touch, nothing fancy) helped a lot because it made the “homes” feel official.
2. The Command Center Concept — One Spot for All the Admin Chaos
In a studio, paperwork and everyday admin stuff can spiral fast. Bills, mail, sticky notes, receipts — it all ends up in a pile somewhere and then you avoid looking at it.
A “command center” is basically one dedicated wall area or surface that contains all of that. It sounds corporate but the concept is genuinely life-changing for small space living.
Mine lives on a small section of wall near my entryway. It has:
- A small wall-mounted organizer (got mine from IKEA for under $15) with three slots — incoming mail, to-do, and to-file
- A small whiteboard for weekly reminders and grocery lists
- A few hooks for bags I use regularly
The whole thing takes up maybe 18 inches of wall space. But it means that all the “floating admin chaos” has one home. When mail comes in, it goes straight to the incoming slot — not on the kitchen counter, not on the table.
This also pairs really well with a habit I picked up: a 5-minute Sunday night reset where I clear out the command center, deal with anything urgent, and set up the week. Takes barely any time, and Monday mornings feel so much calmer.
If you want more ideas on how to keep the whole apartment in that kind of organized flow, My 7 Studio Organizing Habits That Changed Everything is genuinely worth a read — some habits there that I still use daily.
3. Vertical Drawer Dividers (The Underrated Game-Changer)
I used to shove everything into drawers and then forget it existed. Out of sight, out of mind — except also out of reach and out of use.
The problem with unsorted drawers in a studio is that you end up buying duplicates of things you already own because you can’t find them. I once had four pairs of scissors because I kept thinking I didn’t have any.
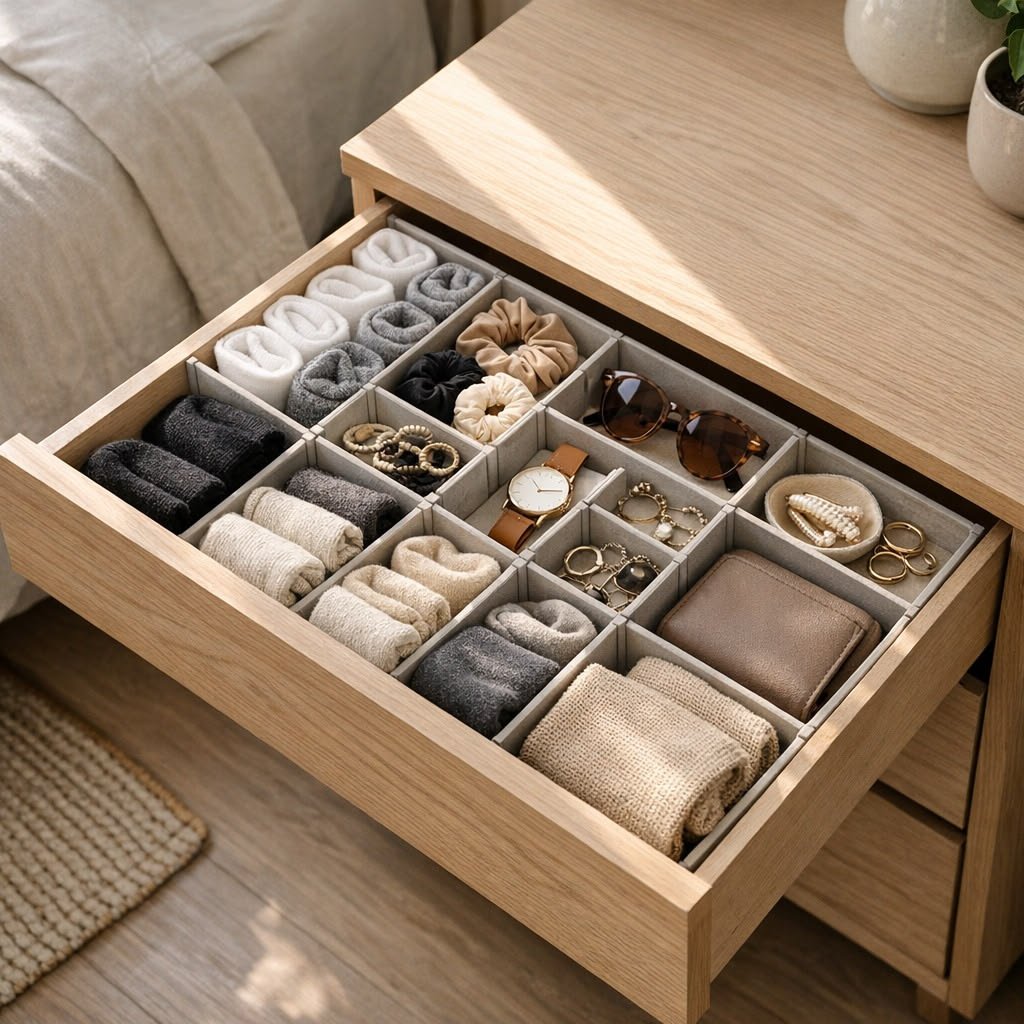
Drawer dividers — specifically the vertical kind that let you stack things upright — completely changed how I use drawer space.
Where this matters most:
Kitchen drawers: Instead of a chaotic pile of spatulas and tongs, everything stands upright and is immediately visible. I use simple bamboo dividers from Amazon — nothing expensive.
Clothing drawers: The KonMari folding method (yes, the Marie Kondo thing) actually works incredibly well once you have dividers to keep things separated. Fold clothes into small rectangles and stand them vertically — you can see every item without digging.
Desk drawers: Sectioned off with small organizer trays (the kind you can find at any dollar store) for pens, chargers, sticky notes, and other small items.
| Drawer Type | Without Dividers | With Dividers |
|---|---|---|
| Kitchen | Dig through pile to find anything | Everything visible, grab in seconds |
| Clothing | Unfold everything searching for a shirt | See all items at a glance |
| Desk | “I know it’s in here somewhere” | Everything in its section |
| Bathroom | Products falling over each other | Neat rows, easy access |
The time I save not hunting through drawers adds up more than you’d think.
4. Using the Back of Every Door You Own
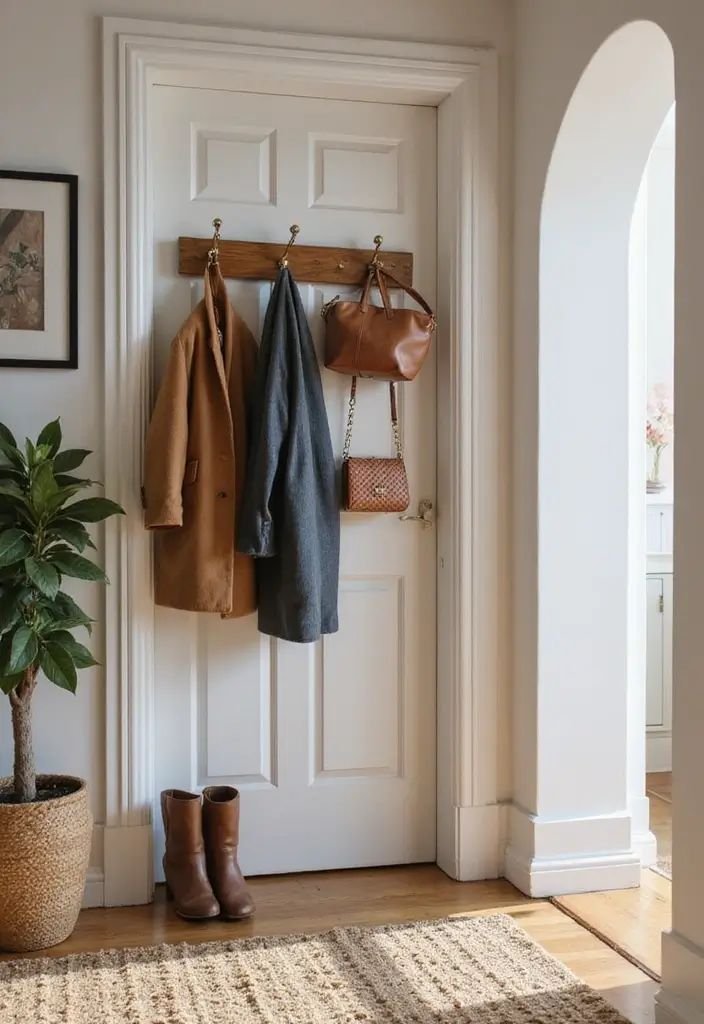
Doors are free real estate and almost everyone ignores them completely.
I have five doors in my studio — entry door, bathroom door, closet door, and two cabinet doors in the kitchen. All five now do actual organizing work. Before I started using them, that was five completely wasted vertical surfaces.
Here’s what I put behind each:
Entry door: An over-door shoe organizer (the clear-pocket type) — but not for shoes. I use it for scarves, gloves, sunscreen, bug spray, dog treats, and other “going out” items. Everything I need when leaving the house is right there as I walk out.
Bathroom door: Another over-door organizer, this time for toiletries and beauty products. Freed up an enormous amount of counter space.
Closet door: A small mirror mounted at eye level — this alone made a huge difference since I no longer need a freestanding mirror taking up floor space.
Kitchen cabinet doors: Adhesive hooks and small wire racks for measuring spoons, pot lids, and cleaning supplies. Inside cabinet doors are especially underused.
The whole setup cost maybe $40 total and recovered what feels like an entire square footage equivalent of storage.
This kind of approach — using hidden and overlooked surfaces — is something the 10 Studio Apartment Space Hacks for Storage You Can’t See covers really well if you want to go deeper on the concept.
5. The “One In, One Out” Rule — Applied Consistently
This is less of a physical hack and more of a mindset shift, but it’s had more impact on my studio’s organization than almost anything else.
The rule is simple: every time something new comes into the apartment, something old leaves. New coffee mug? An old one goes. New pair of shoes? An old pair gets donated. New book? An old one leaves the shelf.
In a regular-sized home, accumulation creeps up slowly and you have room to absorb it. In a studio, accumulation is visible almost immediately. Things pile up fast when there’s nowhere for them to go.
When I started actually applying this rule, a few things happened:
First, I started buying things more carefully. When you know you have to get rid of something to bring something in, impulse purchases feel a lot less appealing.
Second, the apartment stopped feeling fuller over time. Most studios gradually get more cramped each year. Mine has actually stayed about the same level of organized since I started this habit.
Third — and this surprised me — I started appreciating what I already had more. Because I was being thoughtful about what stayed, every item in my apartment is something I actually want there.
A few practical ways to make it stick:
- Keep a small “donate box” in your closet at all times. When something’s done, it goes straight in. When the box fills up, it goes to the donation center.
- For digital clutter (yes, this counts): when you download a new app, delete one you don’t use.
- For paperwork: new document comes in, old one gets filed or shredded on the same day.
6. Categorizing by Zone, Not by Type
This one flipped how I thought about organizing entirely.
The traditional way people organize is by category — all books together, all kitchen stuff in the kitchen, all clothes in the closet. That makes logical sense, right? But in a studio, it can actually create more friction than it solves.
Organizing by zone means grouping things by where and how you use them, not just what they are.
Here’s what that looks like in practice:
My “morning zone” near the bathroom has everything I need to get ready — skincare, hair stuff, a mirror, my watch and jewelry. All in one spot, even though technically some of those things might “belong” in the bedroom.
My “work zone” at my desk has not just work supplies but also the chargers, headphones, and even a small snack drawer — because realistically, those things live at my desk during work hours.
My “wind-down zone” next to my bed has my book, a sleep mask, a phone charger, melatonin, and a small notebook for jotting thoughts before sleeping.
None of these zones care about rigid categories. They care about what you actually do in that spot.
The result is that you almost never have to walk across the apartment to get something you need for a task. Everything you need for a specific activity is already in that activity’s zone. It sounds like a small thing but it quietly reduces chaos by a huge amount.
Pairing this with intentional furniture placement made the biggest impact — if you haven’t thought carefully about where each zone physically sits in the room, 9 Proven Studio Layout Ideas for Better Flow has really solid guidance on arranging zones smartly.
The Honest Part: What Doesn’t Work
Before wrapping this up, it’s worth mentioning the things that sound like great organizing hacks but kind of fail in real studio life:
Over-organizing with too many bins and containers. There’s a version of organizing where you buy 40 matching containers and label everything meticulously — and then spend more time maintaining the system than actually living. Keep it simple enough that you’ll actually stick to it.
Organizing without decluttering first. You cannot organize your way out of having too much stuff. Before any of the above hacks will really work, you need to spend a few hours just being ruthless about what actually needs to be in the apartment. Donate, toss, or store what isn’t earning its place.
Perfect systems that don’t survive real life. Any organizing system that requires everything to be done perfectly every time will fail. Build in some flexibility. A drawer that’s “good enough” most of the time beats a system that falls apart the moment you have a busy week.
A Simple Organizing Priority Guide
| Hack | Effort Level | Impact | Cost |
|---|---|---|---|
| Assign every item a home | Low | Very High | Free |
| Build a command center | Medium | High | $15–30 |
| Drawer dividers | Low | High | $10–25 |
| Back-of-door storage | Low | Very High | $20–40 |
| One in, one out rule | Low (habit) | Very High | Free |
| Zone-based organizing | Medium | Very High | Free |
Final Thoughts
The honest truth is that none of these are complicated. There’s no fancy furniture required, no expensive renovation, no weekend-long project. Most of what made the biggest difference in my apartment cost under $30 or nothing at all.
What did take effort was consistency — actually putting things back in their homes, actually following the one-in-one-out rule, actually maintaining the command center instead of letting it become another pile.
But once those habits clicked, the apartment started feeling like a place I actually wanted to be in. Not just a space I slept in between places.
Start with one thing from this list today. Honestly, just one. Pick the drawer dividers or assign homes to five items you always lose. The momentum from even one small win tends to carry you forward naturally.