There’s a pattern I keep seeing, and after enough years doing this, it stops being surprising and starts being almost predictable. I walk into a studio apartment, the person opens the closet for me — usually with a slightly apologetic expression — and somewhere in that closet, behind a tangle of jackets and shoe boxes, there are three unopened packs of matching velvet hangers. Maybe a set of wicker baskets that didn’t quite fit the shelves. A drawer divider system still in the package.
They went out and bought organization. And the closet still doesn’t work.
Here’s the thing people don’t want to hear: more organizers are not the solution to an impossible studio closet. More organizers are the solution to a closet that’s already logical but needs tightening. In a space where the closet is doing the work of three different rooms, buying products before rethinking the system is like rearranging furniture in a room with no floor plan. You’re just moving the problem around in a slightly tidier way.
The actual fix is surprisingly unglamorous. But it holds.
1. The Wrong Belief That Started All of This
Standard apartment closets were designed with the assumption that they’d hold clothes. Maybe some extra bedding. A few pairs of shoes along the floor. That’s it. The architecture of a typical studio closet, one rod, one shelf above it, open floor space below, was never meant to accommodate the reality of solo urban life in a 350-square-foot apartment.
And yet that’s exactly what we ask it to do.
Vacuum cleaner, luggage, off-season winter coats, gym equipment, cleaning supplies, a box of tax documents from 2021, the sleeping bag from a camping trip you went on twice. All of it ends up in the closet because the closet is the only enclosed space in the apartment. And when everything shares one space with no category logic, the brain reads it as disorder, regardless of how many matching bins you stack in there.
The wrong belief is: “My closet is messy because I haven’t organized it correctly yet.”
The true belief: “My closet is failing because I’ve asked it to function without a system, and no amount of bins will create a system where none exists.”
This matters because it changes where you start. You don’t start with a shopping trip to The Container Store. You start with a full audit of what is actually in the closet, what category it belongs to, and whether it should live in the closet at all.
Pull everything out. Every single item. Sort by category on the bed or the floor: clothing, footwear, bedding and linens, cleaning and utility, luggage, and miscellaneous. Once you see the volume of each category separately, the closet design almost tells you what it needs. That step takes an hour. Skipping it costs you six months of frustration and about $200 in storage products that don’t fix anything.
2. What Actually Makes a Closet Work in a Studio
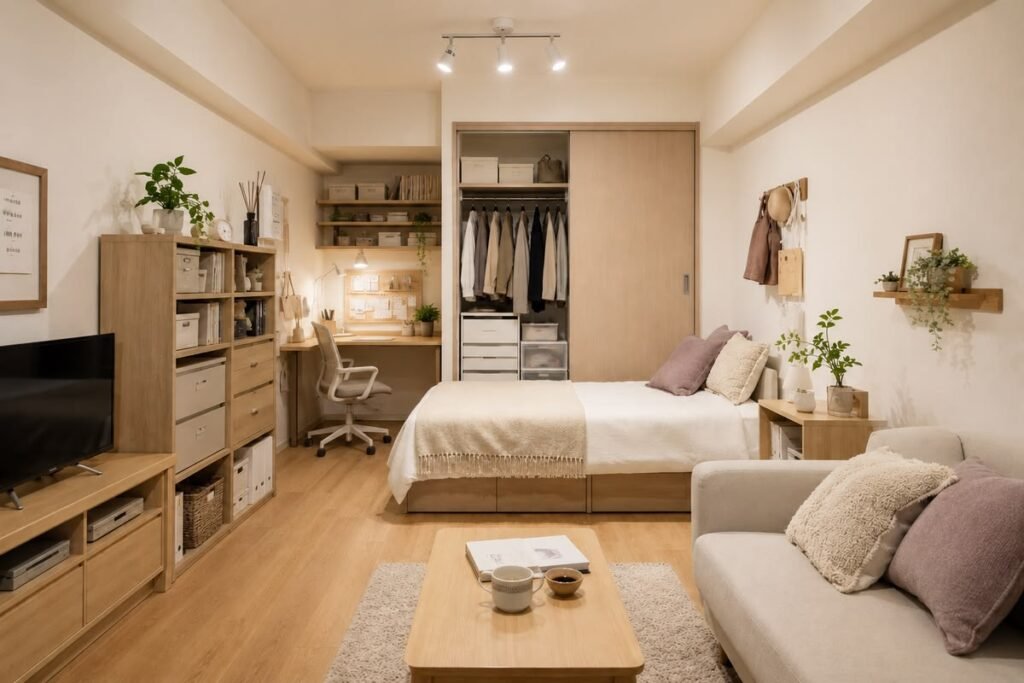
The biggest structural change you can make, and the one with the most immediate return, is the double-rod setup.
Every standard closet comes with one hanging rod, positioned at roughly 68 inches off the floor. Below that rod, from about mid-thigh height down to the floor, is completely empty vertical space. Dead air. You’re leaving, depending on the width of your closet, somewhere between eight and fifteen cubic feet completely unused.
A second rod at approximately 40 inches from the floor changes that. The upper rod handles your longer pieces: dress shirts, blazers, the good coat, anything you want wrinkle-free and hanging full length. The lower rod takes shorter pieces: folded trousers on clips, gym tops, casual shirts, knitwear that needs to stay stretched.
Now here’s where most people mess it up. They add the second rod, fill both rods to capacity, and conclude the system doesn’t help. But the double-rod isn’t designed to store more things. It’s designed to store the right things better, so that the right-things-only principle can actually hold. If you’re putting sixty items on two rods when your daily rotation is twenty, the rods aren’t the problem.
The top shelf above the upper rod? That’s Zone 3 territory. What belongs there: seasonal items, vacuum-sealed bags of off-season clothing, rarely touched extras. Not the gym bag you use three times a week. Not the work tote you carry every day. The top shelf should require a minor effort to reach because what’s up there should require only minor access.
For ideas on where seasonal and overflow items go when they leave the closet, Studio Apartment Setup has a thorough guide on under-bed storage setups that covers exactly this kind of closet-to-bed migration.
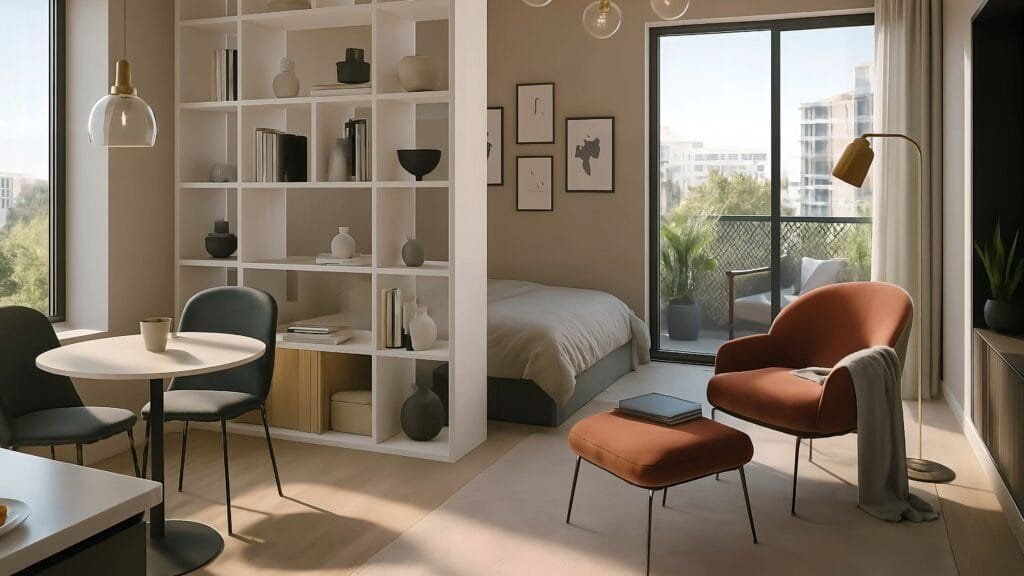
3. The Zone Model That Stays Logical Under Pressure
I use a three-zone model with every studio client I work with, and it works not because it’s complicated but because it mirrors how people actually behave rather than how they intend to behave.
Zone 1 is your daily-reach zone. Eye level to waist height, easy to grab, zero friction. What lives here: the six to ten pieces you wear most frequently, your everyday shoes, the bag that leaves the apartment with you five days a week. Everything in Zone 1 should be reachable in under three seconds without moving anything else.
Zone 2 is your weekly-reach zone. Slightly above eye level and below knee level. Requires a small reach or a slight bend, but still effortless. Here: the blazer for meetings, workout clothes you use a few times a week, your second pair of everyday shoes, backup hangers.
Zone 3 is everything else. The top shelf, the back corners, the floor of the closet for items that live in properly organized containers. This zone has the lowest access frequency, and what’s here should stay here for weeks at a time without being disturbed.
| Zone | Location in Closet | Frequency | What Belongs Here |
|---|---|---|---|
| Zone 1 | Eye level to waist | Daily | Core wardrobe rotation, everyday bag, current-season shoes |
| Zone 2 | Above eye level and below knee | Weekly | Blazers, workout gear, second-option shoes, backup accessories |
| Zone 3 | Top shelf and floor containers | Seasonal or rare | Off-season clothing, extra linens, luggage, seldom-used items |
The breakdown I see constantly: Zone 3 items occupying Zone 1 spots. A winter coat taking up prime hanging real estate in July because it never got moved. Daily-use items piled on the floor because the best positions are blocked by things that only get touched twice a year. Once you map zones deliberately and commit to keeping them clear, the closet becomes genuinely usable instead of theoretically organized.
And this is the part worth noting, because people skip it: zone discipline is an ongoing habit, not a one-time fix. Every few months, do a five-minute zone audit. Things drift. Especially in a small space, especially if you’re living alone and the only accountability is yourself.
For context on how this kind of thinking applies to the vertical space throughout the rest of the apartment, not just the closet, Studio Apartment Setup covers vertical storage strategies in a way that connects well with the closet zone model.
4. When the Closet Genuinely Isn’t Enough Space
Sometimes the math doesn’t work. A 280-square-foot studio with a coat closet masquerading as a wardrobe closet, and a household’s worth of belongings that need a home. No amount of zoning solves a pure capacity deficit.
This is where the rest of the apartment takes on part of the closet’s job, and that’s fine. That’s actually good design, not a compromise.
A wardrobe or armoire positioned against a wall adds substantial hanging space without any installation. The key is the depth: anything in the 18-to-22-inch range reads as furniture rather than overflow, and a proper armoire with quality hardware looks intentional in a studio living space. It holds an entire season’s wardrobe, it closes completely, and the visual effect in the room is furniture rather than clutter.
Open clothing racks work too, though they ask more of you aesthetically. An open rack in a studio living space needs to look curated, not just stored. If what’s on it is edited, visually consistent, and maintained, it can actually add character. It becomes a display. But if it becomes a catch-all for whatever didn’t fit in the closet, it reads as chaos, and the room pays for it.
I worked on a project once in a 340-square-foot Toronto unit where the closet was almost comically small, barely deeper than a coat. We redistributed storage across three points in the apartment: a wardrobe near the entry, hanging shelves over the sofa for folded items and books, and a long low dresser that doubled as a TV stand and media console. Nothing was hidden exactly, but everything was deliberate. The space actually felt larger because the storage was distributed intelligently rather than crammed into one failing closet.
If you’re navigating this kind of situation and want to see how broader furniture choices play into storage strategy, Studio Apartment Setup has covered this across several pieces that are worth scanning before you make any major purchases.
5. The Detail Most People Get Wrong at the End
After all of this, there’s one mistake that undoes the system faster than anything else. People leave the closet door open.
In a studio, an open closet is a visual disruption to the entire room. Your eye catches the hanging shirts, the stacked bins, the slightly askew shoe at the bottom corner. The room stops reading as composed. It reads as a work-in-progress, even if the closet itself is perfectly organized.
Close the doors. If it’s a curtained closet, keep the curtain drawn unless you’re actively inside it. This sounds minor. It is not minor.
The floor of the closet is the other thing. People treat it as a secondary dumping zone, the place where the gym bag gets kicked, where the boots pile up sideways, where something that might be a belt lives. The closet floor is actually the foundation of Zone 1. Two or three pairs of current-rotation shoes, lined up properly. If you have more shoes than that in rotation, a slim two-tier shoe rack takes up about eight inches of depth and keeps everything visible. The floor is storage infrastructure, not a landing pad.
Once the floor is clear and the door is closed, even a modest closet system looks like it’s doing its job. That psychological shift matters more than people expect. A closet that looks finished makes the whole apartment feel more resolved.
FAQs
Why does my studio closet always end up messy no matter what I do?
Usually because the organizational system doesn’t match how you actually live, only how you plan to live. If you’re someone who hangs everything at the end of a tired evening, a system built around careful folding will fail within a week. Design around your real habits, not your ideal ones. Put the things you reach for daily at the easiest-access level, make the system require as little decision-making as possible, and it’ll hold.
What’s the most useful single upgrade for a small studio closet?
A second hanging rod, no question. It requires no permanent installation, costs under $30 for a tension or hook-mounted version, and doubles your usable hanging space immediately. It’s the kind of change that takes twenty minutes and you spend the next month wondering why you didn’t do it sooner.
Should I use matching bins and containers in my closet?
Matching containers do make a closet look more cohesive, and in a small space where the closet is visible, that matters aesthetically. But don’t let the visual uniformity drive you to buy a whole system before you know what you’re storing. Understand your categories first, then choose containers by size and function, then decide whether matching matters for your space. Buying twelve matching bins and then realizing you needed two large ones and four small ones is a very common and avoidable mistake.
My studio closet has no built-in shelving at all, just the rod. Where do I start?
Add one shelf above the rod first, if your landlord allows it. A simple wooden shelf bracket situation, or even a solid tension rod with a shelf board, changes the math considerably. If you absolutely can’t install anything, a freestanding shelf unit placed inside the closet (assuming the closet is deep enough) accomplishes the same thing. You want at least one surface above the rod for folded items, bags, and Zone 3 containers before you work on anything else.
Is there a point where you’d recommend not bothering with the closet and just using external wardrobe furniture?
Yes, honestly. If the closet is genuinely undersized for the amount of clothing you reasonably own and wear, the better investment is a proper wardrobe or armoire rather than increasingly creative attempts to fit twelve pounds of stuff into a five-pound bag. A quality piece of furniture bought once beats six rounds of storage products that don’t solve the underlying capacity problem. Pick the wardrobe for depth first, then aesthetics, and think of the closet as overflow and utility storage from that point forward.