Every week in my inbox, somebody sends me a version of the same message. Different apartment, different city, same frustration: “I’ve tried everything and I still don’t have enough storage.”
And almost every time, I ask for photos. Almost every time, the photos show me exactly what I expected: four or five feet of perfectly bare wall running from the top of the furniture straight up to the ceiling. Untouched. Ignored. Available.
That’s not a storage problem. That’s a vertical space problem, and they’re not the same thing.
Most people in studio apartments think about storage as something that lives at floor level or just above it. They fill drawers, stack things on counters, and maybe install a shelf or two at eye height. But the wall real estate sitting above where your eye naturally lands gets left completely alone. Nobody considers it storage. It gets treated like structural backdrop. Sometimes like a gallery wall they haven’t gotten around to finishing.
Thirty years of designing spaces across Toronto has taught me this: if you’re running out of room in a studio, the solution is almost never more storage containers. It’s to look up. Everything you need is already there.
1. Know What You’re Actually Working With
Start here before you touch a shelf bracket or open a catalog.
Standard studio apartments have ceiling heights somewhere between 8 and 10 feet. Furniture, wardrobes, and countertops typically max out around 5 to 6 feet. That leaves you 2 to 4 feet of completely unused wall running around your entire apartment. Add that up across all four walls and you’re sitting on a genuinely significant volume of space. Comparable, in some layouts, to an entire additional storage room.
The way I explain it to clients is simple: imagine laying all that wall space flat on the floor. Suddenly what seemed like dead air looks like an extra zone of the apartment.
But there’s a reason most people stop installing shelves at arm-reach height. It’s comfortable. It’s where things are convenient to grab. Fair. The thing is, storage isn’t only about convenience of access, it’s about creating layers. Daily-use items go at eye level and below. Seasonal clothes, backup supplies, extra linens, and the board games nobody has touched in six months, those belong up high. Accessible when needed. Not competing with the items you reach for every single morning.
Before you plan anything, make two lists. What you access daily. What you access once a month or less. That separation tells you how to assign your wall zones.
2. Match Your System to Your Wall
This is where expensive mistakes happen, and they happen regularly.
Not every wall works with every mounting system. Drywall with wood studs is the most forgiving. Concrete walls, which you’ll find constantly in older Toronto buildings and many new poured-concrete condo towers, need masonry anchors and the right drill bit entirely. Plaster walls, common in pre-war units, are trickier still and often call for toggle bolts rather than standard anchors.
I had a client who installed floating shelves using basic plastic drywall anchors on a concrete wall. Everything looked gorgeous for about three months. Then the shelves started slowly pulling away from the surface. Nothing collapsed, mercifully, but she had to redo the entire installation, this time with proper sleeve anchors. The shelves were fine. The hardware was wrong from day one.
| Wall Type | Correct Mounting Method | What to Avoid |
|---|---|---|
| Drywall with wood studs | Stud-anchored screws | Drywall anchors for anything heavy |
| Concrete or masonry | Masonry anchors, sleeve anchors | Standard screws, plastic plugs |
| Plaster (pre-war buildings) | Toggle bolts, locate studs first | Drilling directly without testing |
| Hollow partition walls | Hollow-wall toggle anchors | Standard screws, heavy shelving systems |
Renters get a slightly different equation. Permanent drilling may not be an option, but vertical storage is still completely achievable. Large Command adhesive strips handle modest loads well. Freestanding ladder shelves require zero wall contact at all. Over-door rail systems work in kitchens and bathrooms without any modification. For a more thorough breakdown of what works specifically in renter situations, the 7 Studio Storage Solutions Every Tiny Apartment Needs guide on Studio Apartment Setup covers the renter-friendly vertical options in genuinely practical terms.
3. Build in Columns, Not Rows
The single most common mistake I see: two or three shelves installed at the same height across a wall, presented as vertical storage.
That’s not vertical storage. That’s horizontal storage raised slightly off the ground.
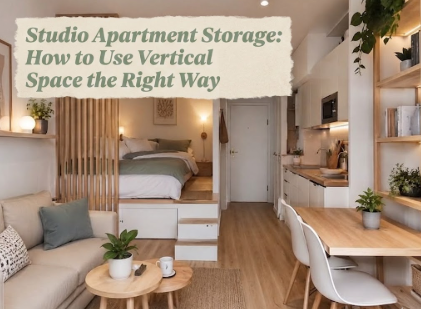
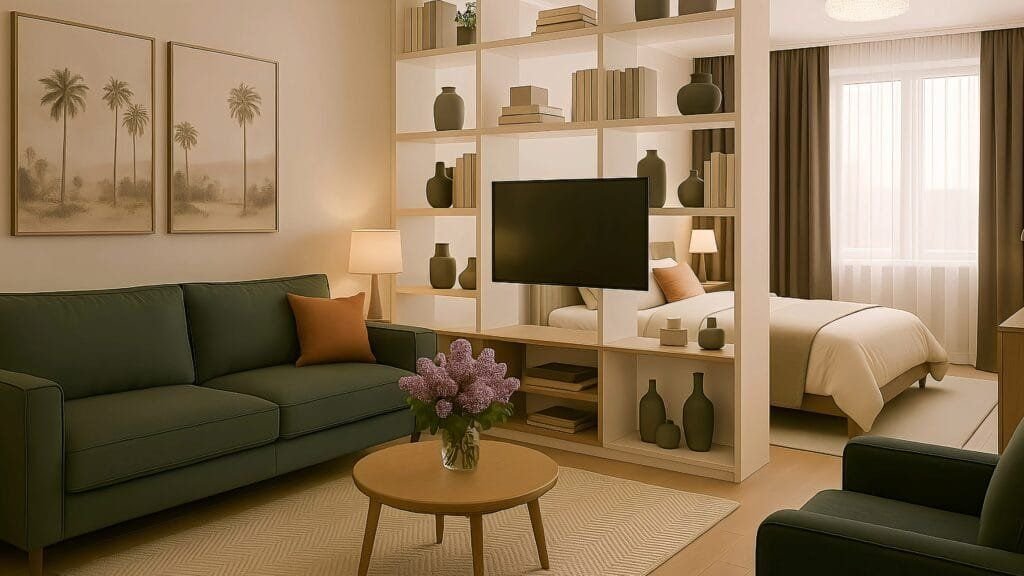
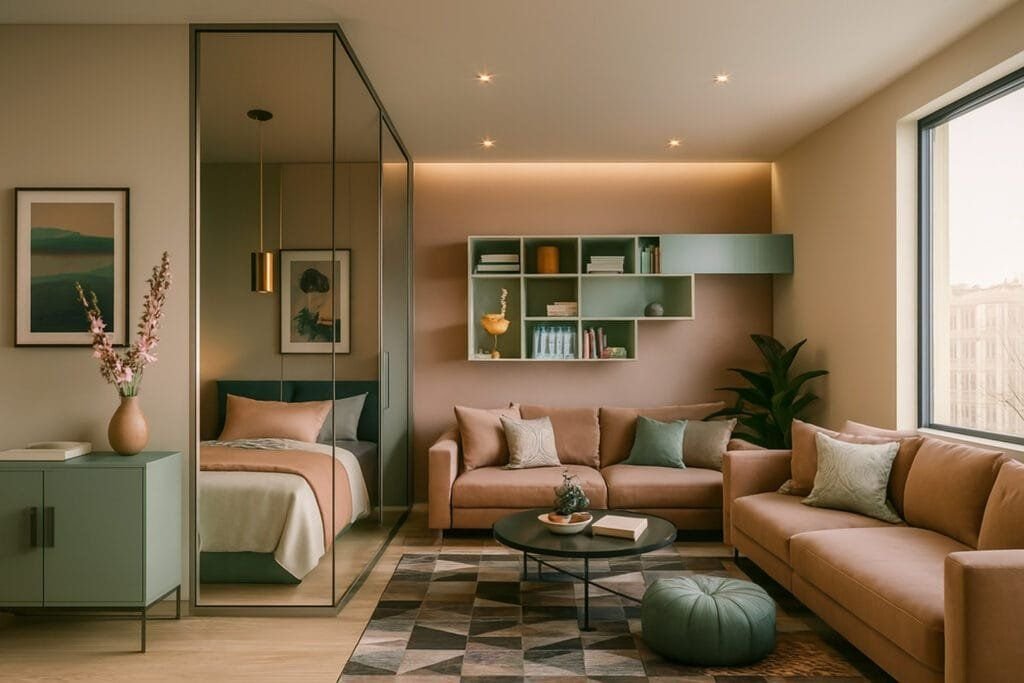
True vertical use of wall space means running shelves in a column from floor to ceiling, not along a single horizontal band. A floor-to-ceiling column draws the eye upward, which makes the room feel taller. It holds significantly more volume than the same linear footage installed at one level. And it reads, visually, as a built-in design feature rather than an afterthought.
In a kitchen corner, a floor-to-ceiling open shelving column can hold double what a single row of upper cabinets holds. In a living area, a vertical floating shelf column creates the feeling of a library built into the wall. In a sleeping zone, a column beside the wardrobe handles overflow clothing, extra bedding, and personal items without competing with floor space you genuinely cannot give up.
Shelf spacing matters. Install them every 10 to 14 inches vertically for standard item clearance. Books, folded clothes, small appliances, and decor all fit within a 10-inch gap. Anything taller gets its own dedicated shelf or goes somewhere else.
Pegboards deserve a specific mention here. A 24×48-inch pegboard above a kitchen counter can hold your most-used pots, utensils, spice jars, and cutting boards, which clears cabinet space for the things that don’t belong on display. The whole board counts as activated vertical surface. And it’s adjustable, which matters in a studio where your storage needs shift over time.
Corner shelves are another chronically underused option. Triangular floating corner shelves fit directly into a 90-degree wall junction and turn dead corner space into real storage without eating any floor area.
4. Make It Look Intentional, Not Like Overflow
Now I’m putting my designer hat back on squarely, because this part matters enormously and most storage guides skip it entirely.
Vertical storage done poorly looks like accumulated clutter that migrated upward when everything else got full. That’s not what we’re building. The higher a shelf, the more visible it is from multiple angles across the room, and the more it has to function as a design decision rather than pure utility.
The fix is visual consistency. Repeat containers. If you’re using baskets, use the same basket in the same color throughout the installation. If you’re using bins, keep the same brand and profile. For books on high shelves, organize by color grouping or height order. The brain registers pattern as intentional. Randomness reads as clutter even when the physical volume of stuff is identical.
Items stored above eye level should be contained rather than open wherever possible. A row of identical white lidded boxes near ceiling height looks considered and deliberate. The same amount of miscellaneous objects without containers looks like a before photo. Same items, completely different effect.
One thing I find myself saying constantly in consultations: if your newly installed vertical shelving makes the space feel busier rather than more functional, the problem is almost always too many different container styles or too many visual categories competing on the same wall. Standardize the containers before assuming you simply have too much stuff. It’s almost always the containers, not the volume.
The 6 Studio Storage Mistakes That Waste Valuable Space breakdown on Studio Apartment Setup addresses this pattern directly, and covers a few related habits that quietly work against good storage systems regardless of how well the physical setup is designed.
5. The Specific Spots Everyone Forgets
Four vertical zones in almost every studio apartment that go unused nearly universally.
Above the refrigerator. There’s typically 12 to 18 inches between the top of the fridge and whatever cabinet or ceiling sits above it. A single basket or two handles cereal, coffee, pantry overflow, and anything that keeps landing on the counter for lack of a better address.
Above the bathroom door. Small studio bathrooms have almost nothing happening on the wall above the doorframe. A narrow floating shelf there handles backup toiletries, cleaning products, and folded hand towels without touching the under-sink cabinet, which is usually already working overtime.
The walls flanking a narrow kitchen entry. If the short walls on either side of your kitchen doorway are bare, they’re a pantry column waiting to be installed. A vertical run of floating shelves 8 inches deep doesn’t pull a single inch of floor from the kitchen itself.
Above the headboard. In studios where the bed sits against a wall, the foot or so of wall between the headboard top and the ceiling gets completely ignored. A shelf there handles books, a lamp, and bedside items that would otherwise compete for floor area beside the bed where a nightstand would eat into clearance you can’t afford.
If you’ve been working through your studio’s storage systematically and want to pair this with smart layout decisions, 9 Studio Layout Tips for Small and Narrow Apartments covers the spatial side of the same challenge.
One last thing.
Installing vertical storage is the easy part. Maintaining it is what most people don’t prepare for.
The most beautifully designed floor-to-ceiling shelving system becomes decoration if the upper shelves stay empty because climbing two rungs on a step stool feels like too much effort. Label your bins. Know what zone holds what. Keep your step stool somewhere genuinely reachable rather than buried in a closet behind everything else.
The studio apartments that work, the ones that feel stylish and organized and somehow spacious despite being 380 square feet, are not built on square footage. They’re built on intention. Every wall has a job. Every shelf has an assignment. And nothing is stored somewhere just because it had nowhere better to go.
That’s the real difference. Not the size. The thinking behind it.
FAQs
How high should floating shelves go in a studio apartment? As high as the wall allows. Ideally to ceiling height or within a few inches of it. The goal is to activate the full vertical height of the room, not stop at comfortable arm-reach. Items on the highest shelves should be seasonal or infrequently used, so easy daily access is not a requirement. A small folding step stool handles everything else.
My walls are concrete. Can I still install proper shelving? Yes, but you need masonry anchors specifically, not standard plastic drywall plugs. You’ll also need a hammer drill with a masonry bit. Sleeve anchors and wedge anchors give you the holding power that concrete requires. The installation takes more effort than drywall, but properly anchored shelves in concrete often hold more weight than equivalent setups in framed walls. Do not skip the right hardware.
Can renters use vertical space without drilling? Absolutely, with some limitations on load capacity. Freestanding ladder shelves work with no wall contact at all. Tension rod systems fit inside closets and under sinks without any modification. Over-door rail and hook systems in kitchens and bathrooms are genuinely capable of holding meaningful storage. For lighter living area loads, IKEA’s SKADIS pegboard with adhesive mounts is a solid option. The trade-off is that adhesive and freestanding systems won’t handle the same weight as properly anchored shelving.
Does vertical storage make a studio feel bigger or more cramped? Done with visual consistency, it makes the space feel taller, which reads as larger. The eye moves upward and the ceiling appears farther away. Done poorly, mismatched containers, random items, visual noise stacked high, it does the opposite. The volume of stuff is rarely the variable. The visual order is.
I’ve installed shelves before and they’re always cluttered again within weeks. What’s going wrong? Almost always a zoning problem rather than a volume problem. Shelves without assigned purposes become landing zones for everything that has nowhere else to be. Before loading anything onto a shelf, assign it a single category and stick to that category exclusively. For the behavioral habits that support a lasting storage system, 6 Studio Organizing Hacks I Wish I Tried Sooner addresses the patterns that cause organized setups to fall apart quickly, which is just as important as the physical installation itself.