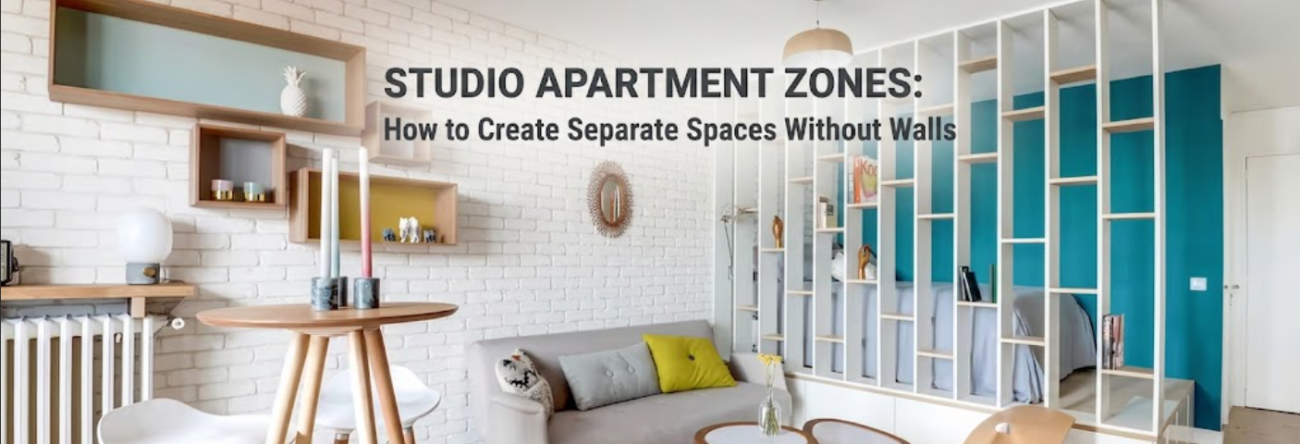
Open floor plans don’t automatically create livable spaces. That’s the part nobody tells you upfront.
I’ve walked into hundreds of studios over the course of my career, and the ones that feel uncomfortable — the ones where the person living there says “I can’t relax here” or “it always feels like a mess” — almost never have a storage problem or a furniture problem. They have a zoning problem. Everything is visible from everywhere. There’s no place where the bed stops being the bedroom and the sofa starts being the living room. It’s just one continuous, ambiguous room.
And here’s what that does to you psychologically: your brain never gets to switch modes. You’re trying to focus on work and the unmade bed is in your direct sightline. You’re trying to sleep and the laptop is two feet away on the same surface where you eat breakfast. The space doesn’t support any of those activities particularly well because it was never asked to.
Creating zones doesn’t require walls. It doesn’t require a contractor or a landlord’s blessing. What it requires is understanding what’s actually creating the problem in the first place — and most people have the wrong theory about that.
1. The Myth That’s Making Your Studio Feel Smaller
The advice most people get is to “keep things open.” Push the furniture against the walls. Leave the centre of the room empty. Don’t block sight lines.
This is wrong. Not entirely wrong, but wrong in the specific way it’s usually applied.
Furniture floating around the edges of a studio apartment makes the room feel like a waiting room. Everything is peripheral, nothing is anchored, and the open floor space in the middle reads as dead space rather than breathing room. I’ve seen clients do this religiously and wonder why their apartment feels so institutional.
The actual problem with unzoned studios isn’t the furniture placement specifically — it’s the absence of any visual signal that tells you where one activity zone ends and another begins. When your eye can move from the bed to the sofa to the desk in one uninterrupted sweep, the whole space collapses into a single category: “inside my apartment.” Nothing reads as distinct. Nothing feels purposeful.
Good zoning creates that distinction without requiring physical barriers. And once you have it, the apartment doesn’t feel smaller. It actually reads more like multiple rooms because each area has its own identity.
Before rethinking your layout entirely, it’s worth reviewing whether any of the 6 Studio Layout Mistakes Making Your Apartment Feel Smaller are compounding the problem — several of them are specifically about furniture placement relative to the centre of the room.
2. The Three Tools That Do All the Work
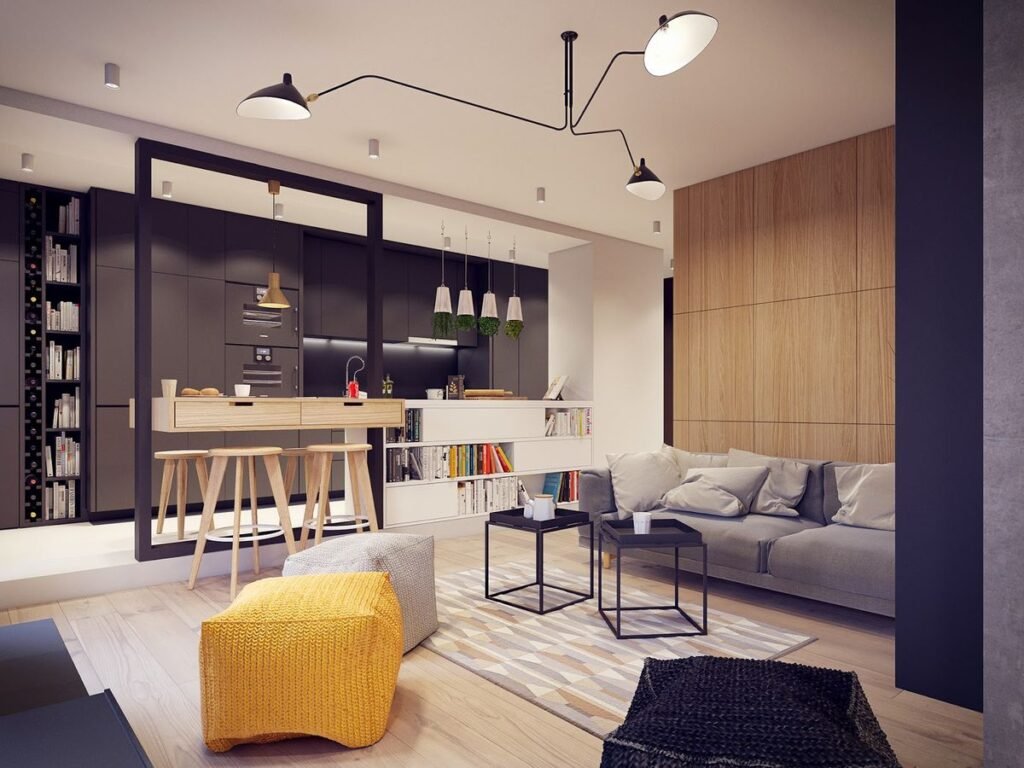
Most zoning solutions in a studio apartment come down to three things: rugs, furniture positioning, and light. That’s it. Everything else is supplementary.
Rugs are the most underdramatized zoning tool in small space design, and I say that after twenty years of looking at living rooms. A properly sized area rug anchors the living zone and communicates its edges to anyone standing in the room. Without a rug, a sofa and coffee table arrangement reads as furniture that happened to land somewhere. With the right rug underneath, it reads as a sitting room.
The size mistake is epidemic. People buy small rugs because they’re worried about the space feeling cramped. A 5×7 rug under a sofa looks tentative and weird, and it makes the furniture look like it belongs to a different apartment. In a studio under 500 square feet, an 8×10 is usually the right call for a living zone. The rug can extend partially under the sofa legs — that’s intentional, not a mistake.
Furniture positioning does more than people realize when it’s done with intention. The back of a sofa is a divider. Turning it perpendicular to a wall rather than against it, or angling it so the sofa back faces the sleeping area, creates a physical and visual break between zones. This is one of the oldest tricks in small apartment design and it still works every single time.
Light zones after dark in a way that daylight doesn’t. A floor lamp positioned at the perimeter of the living area essentially removes the rest of the room from visual attention once the overhead light is off. That sleeping corner at the far wall recedes, the work desk disappears into shadow, and the lit area feels like its own contained space. Overhead lighting is the enemy of this effect — it illuminates everything equally and creates no sense of enclosure anywhere.
3. The Four Zones Every Studio Apartment Needs
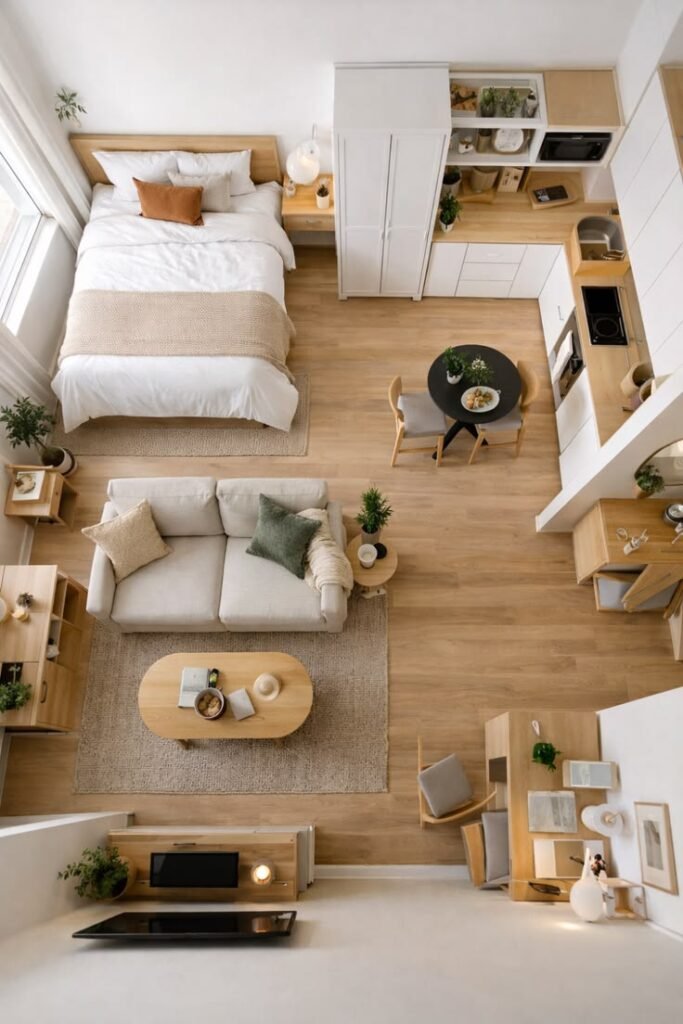
Three zones get talked about. The fourth one almost never does, but it might be the one that changes how the whole apartment feels most dramatically.
The sleeping zone is usually the anchor. The bed is the largest single piece of furniture and it should earn that position by having a clearly defined perimeter around it. A headboard does some of this work automatically. A ceiling-mounted curtain track that wraps around three sides of the bed does it more completely — when the curtains are drawn, even partially, the bed becomes a room within a room. For renters, these tracks install with ceiling mounts and come down cleanly.
The living zone anchors to the sofa and its rug. The cluster of sofa, coffee table, and secondary seating should feel pulled together rather than spread out. Furniture arranged with about 16 to 18 inches of space between the coffee table and sofa creates a usable, proportional grouping. Push them farther apart and the zone dissolves.
The work zone is the one most studio renters improvise and then regret. Working from the sofa consistently wrecks posture, wrecks focus, and wrecks the ability to mentally “leave” work at the end of the day because there’s no physical location to leave. Even a small dedicated desk in a corner — with a wall-mounted shelf above it, a task lamp angled over it, and ideally something (a low bookcase, a plant arrangement, a curtain) separating it visually from the living zone — functions better than a couch with a laptop.
And then the entry zone. In a house, you pass through a foyer and psychologically transition into the home. In a studio, you open the door and you’re immediately inside everything. Creating even a minimal entry moment — a console table or narrow shelf, a mirror, a hook for keys and bags — signals arrival and creates a tiny psychological buffer between the outside world and the living space. It’s a small thing that makes a surprising difference in how the apartment feels to come home to.
| Zone | Anchoring Element | Best Separator | Common Error |
|---|---|---|---|
| Sleeping | Bed + headboard | Curtain track, canopy, bookcase | Bed pushed against corner with no visual frame |
| Living | Sofa + area rug | Rug perimeter, sofa back facing away | Small rug that doesn’t anchor furniture group |
| Working | Desk + task lamp | Low shelf unit, curtain, plant row | Laptop on sofa with no dedicated surface |
| Entry | Console or shelf + mirror | Position near door, clear from living zone | Door opening directly into main living area |
4. Where People Go Wrong: The Scale Trap
Scale errors are the most common reason good zoning intentions collapse in execution. And honestly, I catch myself having to re-explain this to clients who are convinced that “small space” means “small furniture.”
It doesn’t.
In a studio apartment, you don’t need fewer items — you need each item to be properly proportioned and doing real work. A full-sized sofa in the right position on a properly sized rug creates a credible living zone. Six pieces of “studio-sized” furniture scattered at the same scale create a room that looks like it hasn’t been finished yet.
The reverse problem is also real. A sectional that’s three metres wide in a 40-square-metre apartment doesn’t leave functional floor space anywhere. Even if it converts to a guest bed, even if it has storage inside the ottoman, the sheer mass of it makes every zone collapse into its footprint. Multi-functional is good. Multi-functional at wrong scale is expensive.
The 9 Studio Layout Tips for Small and Narrow Apartments piece on Studio Apartment Setup goes deep on exactly this problem in longer, narrower floor plans where scale errors get compounded by the shape of the room itself.
5. Colour, Texture, and the Zones You Can’t Touch
This is where zoning stops being about furniture arrangement and starts becoming actual design.
Colour and texture can mark zone transitions without any physical object involved at all. A sleeping zone with warmer, more muted tones — a linen headboard, soft bedding in a quieter palette, a warm-toned lamp — communicates something different from a work corner with slightly brighter, cooler lighting and a clean desk surface. Those tonal shifts read as different environments even when they share the same wall.
A gallery wall that exists only in the living zone tells the eye that something specific happens in that part of the room. A distinct wallpaper or peel-and-stick treatment applied only to the wall behind the bed creates a bedroom “wall” without touching the ceiling or the floor. Plants clustered at the entry corner become a soft visual threshold.
Curtains deserve a specific mention. Sheer panel curtains on a ceiling track — especially when the track runs in a slight L-shape around a sleeping area — add texture, diffuse light, and create enclosure with almost no visual weight. They’re removable for renters, they’re relatively affordable, and they do more for the feeling of a studio than almost any other single element. The 7 Studio Decor Tricks That Make Rooms Feel Bigger breakdown covers how mirror placement works in conjunction with these kinds of soft dividers — it’s worth reading together rather than separately.
One thing I want to be clear about: you don’t need to zone every corner of the apartment. The goal is intentional separation, not visual density. Leave some negative space between your living cluster and your sleeping area. That gap — a few feet of unoccupied floor — is part of the design. It gives the eye somewhere to rest and makes each zone feel more distinct simply by the breathing room around it.
A Practical Note Before You Move Anything
A client called me once — I was actually about to leave for a shoot — and said her studio felt like it was “crushing” her even though she’d spent a full weekend rearranging. When I looked at photos she sent, the problem was immediately clear: she had zoned the space, but then decorated every zone with the same objects. Same candle style. Same throw blanket type. Same basket texture. Everything was the same, so the zones she’d created with furniture placement were being visually cancelled out by the identical decorating throughout.
The zones need to look a little different from each other. Not completely different, not clashing, but different enough that the eye registers a change. That’s the full picture.
Start with your bed. Decide where it belongs and what visual frame it needs. Then work outward, zone by zone. The 7 Studio Layout Secrets for a More Open Apartment on Studio Apartment Setup is one of the more practical starting frameworks if you’re working through this from scratch — it gives you a sequencing approach rather than a checklist of items to buy.
The zones almost always reveal themselves once you’ve committed to one anchor point. Commit to that first, then let everything else follow.
Frequently Asked Questions
Can you create real zones in a studio under 400 square feet, or is the space just too small?
You can, and the size actually matters less than most people expect. In a 350-square-foot apartment, a well-placed rug, a sofa positioned with its back toward the sleeping area, and a designated desk corner with its own lamp create enough psychological separation to make the space function like distinct rooms. The zoning doesn’t need to be physically dramatic to be effective. Even a subtle shift in lighting and textile texture between zones registers clearly.
What’s the best renter-friendly way to divide a sleeping area from a living room?
A ceiling-mounted curtain track is the most effective option for renters. It installs with a few ceiling anchors, pulls the curtain around the bed when you want privacy or visual separation, and removes cleanly when you move out. A tall open bookcase placed perpendicular to the wall also works — it creates a visual divider while adding storage, and it requires no installation at all.
Do I need to buy new furniture to create zones, or can I work with what I have?
In most cases, you can start with what you have. Repositioning a sofa so its back faces the bed is free. Adding a rug under existing furniture is usually the highest-impact purchase you can make. Moving a floor lamp to the perimeter of the living zone costs nothing. Buy new furniture only after you’ve tested the zone positioning with your existing pieces and confirmed what the room actually needs.
How do I stop my work zone from making the whole apartment feel “on” all the time?
Physical separation helps, but the most effective thing is a consistent end-of-day ritual that involves closing the laptop, clearing the desk surface, and turning off the task lamp. When the work corner is visually dark and closed, it recedes from the room. A curtain on a tension rod across the desk alcove, even a simple one, also works well — closing it tells your brain that the work zone is off.
Is it possible to have a dining zone in a studio apartment, or is that just too many zones?
It depends on the floor plan, but a dining zone doesn’t need to be a full-sized table. A narrow console table along a wall with two stools can function as a dining area that doubles as a work surface or extra counter space. Fold-down wall-mounted tables are another option — they’re flat and out of the way until you need them, then they become a proper two-person dining surface in about thirty seconds. The zone works as long as there’s a dedicated spot where eating happens and it’s not also where you sleep or work.