The bike is leaning against the wall next to the bed. You know the spot. Every person who’s moved a road bike or a hybrid into a studio apartment ends up with it somewhere it doesn’t belong, wedged between the dresser and the radiator, rolled into a corner behind the couch, propped against the bookshelf at a slightly maddening angle. And the longer it stays there, the more invisible it becomes, which from a design standpoint is the most honest kind of problem. You’ve stopped seeing it, which means the clutter has already won.
I’ve worked on enough small spaces to know the bike isn’t what’s causing the problem. The bike is actually fine in a studio. It’s where it ended up that’s the issue.
1. Why the Floor Is Where Good Storage Plans Die
Floor space in a studio isn’t just valuable. It’s finite in a way that wall space isn’t, and every object you place on it takes a piece of what the room has to offer in terms of movement, light distribution, and the general sense that there’s room to breathe.
A bicycle resting on the floor, even leaned cleanly against a wall, takes up somewhere between 6 and 8 square feet of floor area depending on the wheelbase and lean angle. That’s roughly the same footprint as a loveseat. And unlike a loveseat, it’s not doing anything while it’s there, not giving you somewhere to sit, not serving as a surface, just occupying the room.
The shift that actually changes things: stop trying to find a floor spot for it and start thinking about which wall it can live on. Wall space is largely unused in most studios, and in a space where every square foot matters, the vertical plane is where the real opportunity lives. Studio Apartment Setup has a solid breakdown of how to use vertical space without making rooms feel cramped, and a bike on a wall mount is exactly the kind of solution that piece is talking about.
2. Wall Mount Options: What’s Actually Available
Not every hook sold at a hardware store is worth putting in your wall. I’ve seen the $12 options. They work until they don’t, and when a bicycle wheel torques against a thin-gauge arm, the whole assembly pulls away from drywall in a single, costly moment.
Here’s what’s actually worth considering:
Horizontal wheel hooks are the most common. The front wheel hangs over a padded arm, the bike sits perpendicular to the wall. These typically run $20 to $40 and work well in spaces with at least 60 to 65 centimetres of clearance on either side. The issue in studios is that “perpendicular to the wall” means the bike extends outward considerably, and in a tight entrance or narrow sleeping area, that projection is constantly in your path.
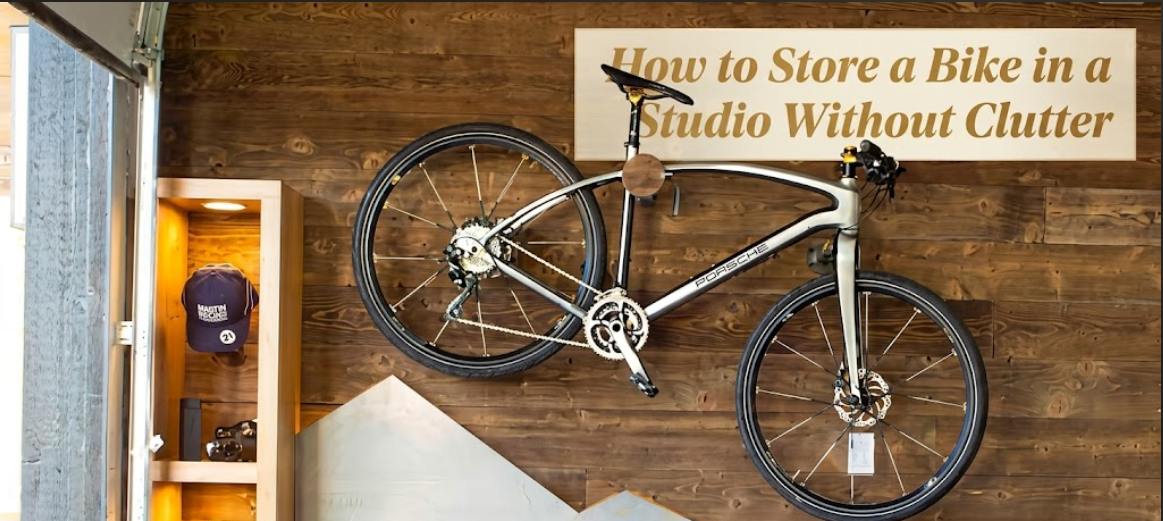
Display-style frame mounts hold the bike at the downtube, keeping the frame parallel and flush to the wall. These look significantly better. The bike reads almost like wall art, and they keep everything much tighter to the wall surface. The better versions, from brands like Delta Cycle, Feedback Sports, or Hornit, start around $50 and go up from there. For a studio where aesthetics are part of the point, which they always are, this is the category to shop.
Vertical floor-to-wall racks are useful when you’re working around corners. The rear wheel rests on a padded floor cradle, the front wheel hooks into an upper wall support, and the whole bike stands upright against the wall. These technically still touch the floor, but the actual floor footprint is just the cradle pad, maybe 8 by 8 inches. Better than the full bike lying around, not quite as clean as a pure wall mount.
| Mount Type | Typical Cost | Wall Projection | Best For |
|---|---|---|---|
| Horizontal wheel hook | $20–$40 | 50–65 cm from wall | Hallways, entryways with room |
| Frame/downtube display mount | $50–$100 | 20–30 cm from wall | Living areas, feature walls |
| Vertical floor-to-wall rack | $35–$75 | 10–15 cm from wall | Corners, tight alcoves |
| Ceiling pulley system | $40–$100 | None (overhead) | Studios with no usable wall |
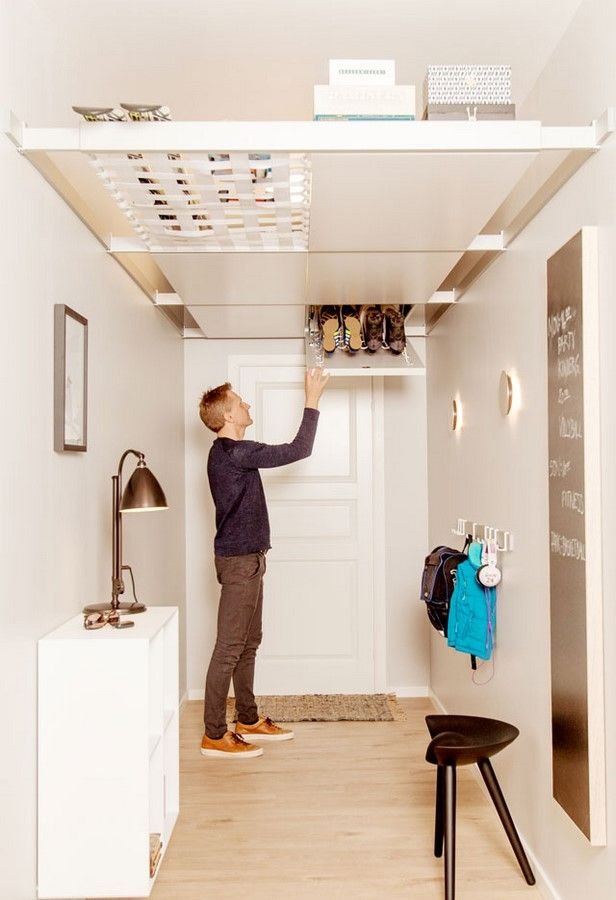
3. Ceiling Storage: The Option People Overlook
Some studios genuinely don’t have a good wall for any of this. Maybe every wall is windows, or there’s a built-in unit you can’t remove, or the landlord painted something in 2019 that they consider protected artistic territory. These situations exist.
Ceiling pulley systems solve for all of them. The setup involves two hooks screwed into ceiling joists, a pulley-and-rope system rated for the appropriate load, and clips that attach to the bike’s frame. You lift, clip, pull, and the bike goes up. Lower it when you ride, raise it when you’re done. The bike lives overhead and the floor below it stays completely clear.
A few things to get right before you buy:
The hooks go into a joist, not just drywall. Use a stud finder before you drill anything. Drywall anchors alone will not hold a 10-kilogram bike over time. Pulleys for bike storage are typically rated for 40 to 50 kilograms, which is generous for most bikes, but know your bike’s actual weight before you commit.
And you need ceiling height. If your studio has 8-foot ceilings, a bike raised to ceiling hooks sits at roughly 6 feet of clearance underneath, depending on the bike’s frame size. For most people, workable. For anyone over 6’1″ or with an oversized-frame bike, measure before you decide.
4. Making It Look Like It Belongs There
The functional part is the easier part. Getting the bike off the floor is a solved problem, there are products for every wall configuration and every ceiling type. The harder part, and the part most practical storage guides skip entirely, is making sure the solution looks like you actually intended it.
A bike on a wall hook, installed correctly but without any design context around it, looks like a bike on a wall hook. Fine, but not finished. That same bike on a thoughtfully considered wall, against a contrast color, accompanied by a small floating shelf at handlebar height holding your helmet and a plant or two, reads differently. It reads like a feature.
This is the principle I come back to constantly when working with small space clients: storage should look like decor, not like storage trying to solve itself. When you treat the bike wall as part of the apartment’s design rather than a logistical inconvenience to manage, it stops reading as clutter and starts functioning as a design element.
If you’re considering which wall to give this kind of treatment, Studio Apartment Setup’s guide on accent walls is worth reading alongside this one, because a bike positioned against a contrast-painted wall, framed by a simple floating shelf arrangement, is genuinely doing double design duty in a small space.
Think about sightlines too. Mounting the bike on the wall directly behind your main seating area means looking at the underside of a rear tire every time you sit down. From where you most often sit, what does that wall look like? That question should be settled before you pick up the drill.
5. When a Folding Bike Solves the Problem Entirely
I’ll be upfront: I resisted recommending folding bikes for a long time. They felt like a compromise for people who couldn’t make a full-size bike work, and I wasn’t inclined to suggest compromise before exploring what real options existed.
But after watching how studio residents actually use their spaces over weeks and months rather than in a staged setup, I’ve genuinely changed my view. A Brompton, a Tern Link, or a Dahon folds to roughly the size of a large carry-on suitcase. It slides into a closet, rolls under a desk, or stands behind a door. No mounting hardware, no drilling, no design decisions about which wall to give up. The bike just becomes another closeable problem.
The trade-offs are real. Folding bikes at comparable quality levels cost more than fixed-frame bikes. They’re heavier per unit of frame material. And the geometry feels slightly different, though most regular riders adjust within a few weeks.
But if your studio has no viable mounting wall, or you rent in a building with strict no-drill policies, a quality folding bike closes the issue in a way no amount of clever mounting resolves. And if you’re already weighing whether the closet is the right home for any of this, the closet setup breakdown at Studio Apartment Setup is worth reading before you decide, because the closet might be doing more important work than you think.
Where It Usually Goes Wrong
Three patterns that come up consistently, and all of them are fixable before you spend a cent:
People install on the wrong wall. The right wall is the one with a stud at the height and location you need, not the nearest available wall, not the one that makes intuitive sense based on where the door is. The one with structural support in the right spot. Buy a stud finder before you buy the mount.
People mount too low. The hook or cradle ends up at a height where the rear wheel barely clears the floor, the pedals sit at ankle height, and every piece of nearby furniture starts collecting bike-shaped scratches. Aim to have the lowest point of the bike at least 15 to 20 centimetres off the floor.
And people don’t think about what’s adjacent to the mount location. A bike hook installed 30 centimetres from a door frame means the handlebar swings into that frame every time you remove the bike. Seems obvious from a photo, completely escapes your attention when you’re standing in the apartment with a drill and a goal.
Before committing to a location, stand in that spot and extend your arm at the bike’s projected length. Actually rotate it the way you’d remove and replace it. If your hand hits something, the bike will hit that same thing every single day.
This is the same kind of spatial thinking that the Studio Apartment Setup guide on apartment zones addresses for the broader layout, and it applies just as directly to where the bike goes. Where you put it should be part of the same decision-making process as everything else in the room.
Frequently Asked Questions
Can I store a road bike in a studio without drilling into the walls? Yes. Freestanding floor stands like the Feedback Sports Sprint or the Delta Cycle Gravity Stand hold the bike upright using contact pressure, no hardware required. They’re not as minimal as a wall mount from a visual standpoint, but for no-drill situations they’re stable and fully reversible. A good freestanding stand holds the bike at about an 18-inch diameter floor footprint. Not nothing, but manageable.
What’s the cleanest-looking wall mount for a studio where the bike will be visible from the main living area? A display-style downtube cradle, sometimes called a horizontal frame mount. The bike hangs flush and parallel to the wall surface rather than projecting outward on a wheel arm. The Delta Cycle Leonardo and the Hornit Clug are two widely available options. The Leonardo in particular sits nearly flat against the wall when the bike is off it, which matters for how the wall reads the other 23 hours of the day.
Are ceiling pulleys a reasonable option in a rental apartment? They require anchor bolts into ceiling joists, which typically means getting landlord approval in a rental. The structural load of a bicycle is within what residential ceiling framing handles routinely. But whether you’re allowed to make ceiling penetrations is a lease question, not a structural one. Ask specifically, and get the answer in writing if you can, because “no drilling” clauses in leases don’t always specify ceiling versus wall.
My bike is an e-bike at around 22 kg. Does that change anything significantly? Yes, it does. Standard wall hooks are typically rated to 15 or 18 kg, which road and hybrid bikes fall well under. An e-bike at 22 kg requires a mount specifically rated for higher load, usually a two-point frame support system that holds the bike at both the downtube and the seat stay. Look for mounts marketed specifically for e-bikes, or consider a floor-to-ceiling tension pole rack, which distributes the load to both the floor and ceiling rather than to a single wall anchor point.
How do I stop the bike from swinging around on a single wall hook? Add a secondary contact point at the rear. The simplest approach is a foam-padded J-hook at rear-tire height, keeping the back wheel lightly rested against it. This stabilizes the bike without requiring a second structural mounting point. Several kits include a stabilizing hook for exactly this purpose. If your current setup swings freely every time someone walks by, that rear contact point is the specific fix you’re looking for.
The bike doesn’t need a different apartment. It needs a different approach to where it lives in the one you have. Get it off the floor, treat the wall with some design intention, and what felt like a square-footage problem turns out to be a thinking problem. Both are solvable. One of them you can fix this weekend.