Bad lighting is the most underestimated problem in small spaces. I’ve redesigned studios that had the right furniture, a coherent color palette, decent storage, and they still felt lifeless, clinical, or worse, like a motel room where someone left the overhead fluorescent running. Every time I traced it back to the same thing: one source of light, mounted to the ceiling, pointed at everything equally.
A single overhead light does exactly one thing. It illuminates. What it doesn’t do is create atmosphere, define zones, add warmth, or make the room feel like somewhere a person actually lives. In a studio, where your kitchen and your bed and your desk are all sharing the same floor plan, the lighting has to work much harder than it would in a house where rooms do that separation automatically.
This is the guide I wish existed the first time a client called me from their new studio at nine in the evening to say it felt “wrong” and couldn’t explain why.
1. Start by Auditing What You Have
Before buying a single lamp, I want you to stand in your studio after dark and look honestly at where the light is coming from and what it’s doing to the room.
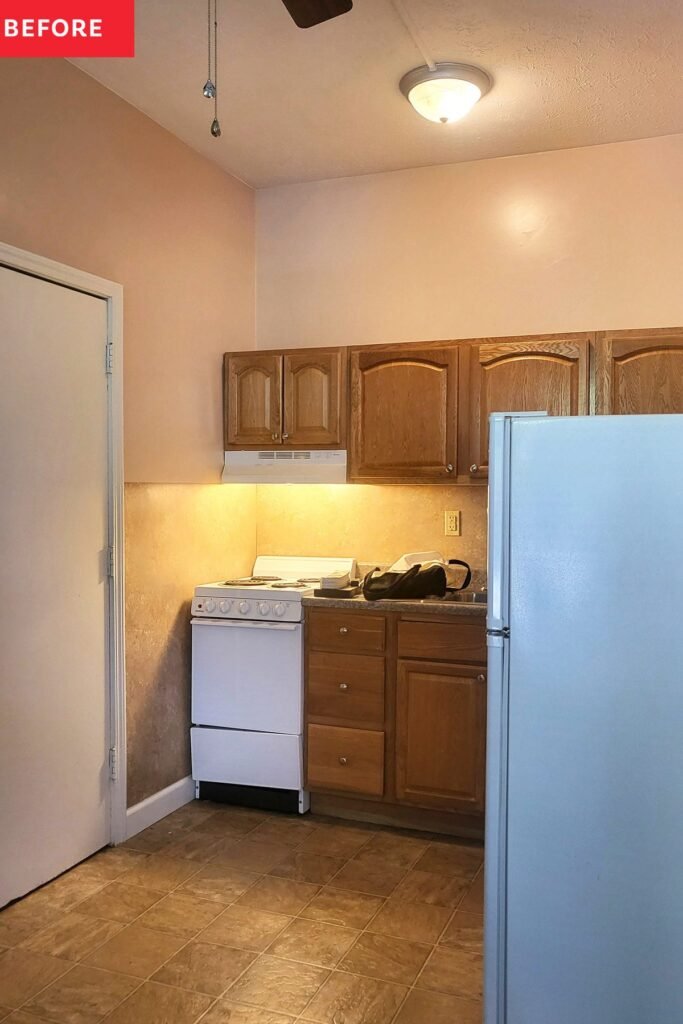
Most studios come with one or two ceiling fixtures. In newer buildings there’s sometimes recessed lighting, which is better than a bare socket but still creates the same core problem: flat, directionless light that illuminates the floor and the countertop and the top of your head with roughly equal enthusiasm. Nothing is emphasized. Nothing is softened. The room is simply lit, which is not the same thing as the room feeling lit.
Note what’s plugged in. Note where the shadows are, or more accurately, where they aren’t. Notice whether the bed area feels the same temperature of light as the kitchen. It almost certainly does. Think about whether that bothers you. It should, because those two zones have completely different emotional needs.
Now turn everything off. Sit for a minute. When you turn things back on one by one, you’ll start to understand what each source is contributing and where the gaps are. I realize this sounds like slightly precious advice, but it works.
2. Understand the Three Layers Before You Add Anything
The standard design framework for lighting is: ambient, task, and accent. These categories are genuinely useful and worth knowing before you spend anything.
Ambient light is the general illumination layer. The thing that lets you see the room. Task light is targeted and functional: your desk lamp, your reading lamp, the light above the kitchen prep area. Accent light is the decorative layer, the light that falls on a specific object, surface, or wall section to draw attention to it.
Studios need a fourth consideration that single-room living introduces almost immediately: zone definition through light. When you can see your entire apartment from one corner of it, your eye needs help understanding where “sleeping” ends and “working” begins and “cooking” happens. In a house, walls do this. In a studio, light has to approximate that function, and it can, but only if the lighting is intentionally layered to create different conditions in different parts of the room.
This is something I come back to often in the context of creating separate zones in a studio without physical dividers. A warm lamp near the sofa creates a living zone. A cooler, brighter light over the desk creates a work zone. The demarcation doesn’t need to be dramatic. But it needs to exist.
3. Rethink the Ambient Layer First
You probably can’t remove the overhead fixture in a rental. What you can do is stop letting it run the room.
The most effective first step is putting it on a dimmer. In most rentals you can replace the existing light switch with a dimmer switch yourself, as long as you reinstall the original when you leave. A dimmable overhead at forty percent intensity is a completely different experience than the same fixture at full blast. You’re not eliminating it, you’re making it a background element rather than the sole source.
The next step is adding ambient alternatives that live at eye level rather than ceiling level. Arc lamps and tripod-style floor lamps that throw light upward toward the ceiling diffuse it rather than directing it at the floor, which is what you want. A well-placed floor lamp in a dark corner does two things simultaneously: it illuminates the corner (which visually expands the room) and it creates a wash of warm ambient light that has nothing to do with the overhead.
Table lamps on bedside tables, on a console near the entrance, or on a bookshelf contribute to the ambient layer while also defining zones. A lamp on each bedside table tells the room that this area is the sleeping zone. The placement is doing spatial work even when the lamp isn’t the only thing on.
One thing I see constantly, and it’s worth naming directly: all the lamps at the same height, all the same wattage, all the same color temperature. The result is that you’ve just moved the flat overhead problem down to table level. Vary the heights. One arc floor lamp, two table lamps at different elevations, possibly a plug-in sconce somewhere unexpected. The variation creates visual rhythm, which is how a room stops feeling like a set and starts feeling like a home.
4. Task Lighting: Placed Where Work Actually Happens
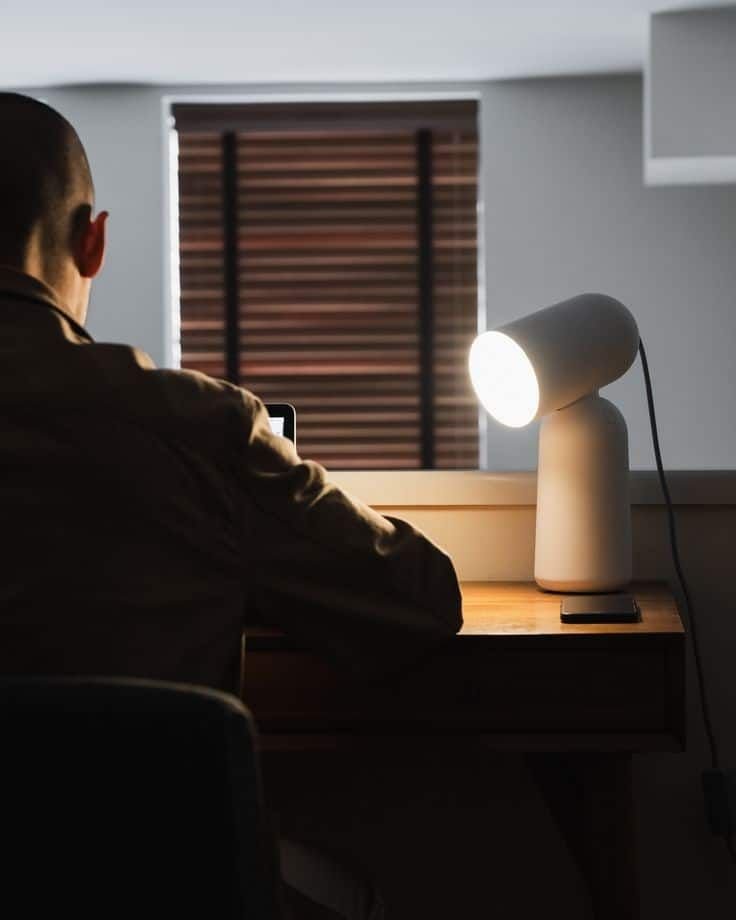
The most commonly neglected task light in a studio is the desk lamp. People buy one that matches the room’s aesthetic and point it at the wall behind the monitor. Then they develop a squint working under a 2700K Edison bulb designed for a reading nook, not a screen.
Desk work needs a color temperature between 3000K and 4000K. The lower end of that range, around 3000K, is still warm enough not to feel cold but bright enough for focused concentration. A 5000K “daylight” bulb at a studio desk is clinically effective and thoroughly cheerless.
The reason a lot of studios read like a hotel room is precisely this: every zone lit to the same functional intensity, which reads as institutional even when the furniture is good. Task lighting, placed only where tasks actually happen, is one of the corrections.
For the kitchen, under-cabinet lighting changes the whole feel of the space. Plug-in LED strips require no hardwiring and cost almost nothing. They illuminate the countertop for prep work while adding a layer of light that is clearly distinct from the overhead, and even when both are on simultaneously, the under-cabinet strip creates a visual zone with its own source. The kitchen immediately feels more considered.
5. Accent Lighting: The Layer That Does the Aesthetic Work
This is the layer most people skip when setting up a studio, and I understand why. When you’re furnishing a small space on a budget, a small light pointed at a shelf feels like a luxury category item. It isn’t.
Accent lighting is the layer that makes a room look designed rather than assembled. A directional spotlight aimed at a gallery wall. LED strips tucked behind a floating shelf so the glow spills upward against the wall. A small lamp placed low, behind a sofa, throwing light up the wall rather than across the floor. These moves create shadows. And shadows give a room dimension. Flat light has no shadows. Layered light does.
At Studio Apartment Setup, the question I hear most around accent lighting is whether it reads as excessive in a small space. It doesn’t. A single LED strip behind a bookcase adds warmth and depth without making the room feel theatrical. The one rule: keep the color temperature consistent with the ambient layer. If your floor lamp is at 2700K, your accent strip should be at 2700K. Mixing warm and cool sources at equal intensity looks like a mistake, not a choice.
Lighting Layer Checklist for a Studio
AMBIENT LAYER
[ ] Overhead on dimmer (or smart dimmable bulb if the switch can't change)
[ ] At least one floor lamp or arc lamp, not directly below the overhead
[ ] Table lamp(s) in the living and/or sleeping zone

TASK LAYER
[ ] Desk lamp at 3000K-4000K (not the same bulb as the ambient layer)
[ ] Under-cabinet light in kitchen (plug-in LED strip is fine)
[ ] Bedside reading lamp on each occupied side of the bed

ACCENT LAYER
[ ] At least one directional source aimed at art, a shelf, or a focal wall
[ ] LED strip behind a bookcase, TV unit, or floating shelf
[ ] One lamp placed to throw light upward rather than outward

ZONE DEFINITION CHECK
[ ] Sleeping area has its own distinct light source(s)
[ ] Work zone has different color temperature than relaxation zone
[ ] Overhead is NOT the primary light in any zone at evening hours
This checklist isn’t meant to be completed at once. Most people add layers over months as they find the right pieces, which is perfectly fine. The goal is to know what you’re building toward rather than accumulating lamps without a framework.
6. The Color Temperature Consistency Issue
This is the detail that separates a layered lighting scheme that works from one that just has a lot of lamps.
Most people end up with a random mix of bulb temperatures across their studio because they bought whatever was at the hardware store on three separate trips. The warm Edison bulb in the floor lamp. The cool-white bulb someone put in the kitchen fixture. The bluish LED strip that came with a smart home kit. And the room, despite having multiple light sources, feels incoherent.
Pick a temperature range for the ambient and accent layers and apply it consistently. I work with 2700K to 2900K for living and sleeping zones. It’s warm, it’s flattering, and it makes a space feel like somewhere you actually want to spend an evening. The task zone can go slightly cooler, up to 3500K, without disrupting the overall warmth because task lighting is directional and its brighter quality reads as purposeful.
Paint color and bulb temperature interact in ways that are worth testing before committing. A warm ivory wall at 2700K looks golden and inviting. The same wall under 5000K looks slightly yellow and aged. The Studio Apartment Setup guide on color palettes in small spaces touches on this, particularly how dark paint behaves differently depending on the quality of light falling on it. That relationship runs in both directions and it’s worth reading before you finalize either decision.
FAQs
My lease says I can’t install anything. Can I still layer lighting properly?
Almost entirely, yes. Plug-in wall sconces, plug-in pendant lights with ceiling hooks and cable covers, floor lamps, table lamps, and adhesive LED strips are all non-invasive. The one thing you’ll miss is a dimmer switch, and smart bulbs that dim through an app solve that without touching the wiring.
How many light sources are too many for a studio?
Distribution matters more than count. Five well-placed sources serving different layers and zones feel cohesive. Three lamps all pointed at the same corner feel like a mistake. There’s no hard number, but if every source is serving a purpose and no two are redundant, you’re in good shape.
What wattage should I use in a floor lamp for a studio?
For ambient purposes, a 9 to 12 watt LED bulb is enough for most studios. In terms of lumen output, 800 to 1100 lumens is the target range. If the shade is opaque and diffusing the light, lean toward the higher end of that range. If it’s open-topped and bouncing light off the ceiling, the lower end works fine.
I have recessed lighting on a single switch. Is there anything I can actually do with that?
Treat the recessed lights as the ambient baseline, ideally on a dimmer, and add floor and table lamps that give the room direction and variation. Don’t fight the recessed lights. Supplement them. The goal is that the recessed fixtures stop being the only source rather than the primary one.
Does the lighting approach change based on the studio’s design style?
The color temperature and fixture choice should reflect the room’s direction. A Japandi studio reads better with warm, minimal fixtures and subtle accent lighting, nothing too visible or decorative. A studio going in a maximalist direction can absorb more statement fixtures without looking cluttered. If you’re still working out which aesthetic suits your space, this breakdown of Japandi versus warm minimalism is a good place to start.
The best version of a studio’s lighting isn’t the version with the most fixtures. It’s the version where every source has a reason to be there, and together they make the room feel like three different places depending on what time it is and what you’re doing in it.